As an air quality enthusiast, I know of many air quality monitors, and I’ve even reviewed many of them on this website. However, almost none have quite the reputation of the AirVisual Pro (previously the AirVisual Node), a monitor created by the same company that runs the AirVisual app, IQAir. IQAir is one of the largest names regarding air quality; therefore, the AirVisual Pro has quite a reputation that proceeds it.
Despite coming out initially almost a decade ago (as the AirVisual Node, the AirVisual Pro was released in 2018), I never got the chance to review one of these monitors as they are quite pricey, and shipping to my country has always added a significant cost on top of the already high price. Luckily, I’ve recently managed to obtain three such monitors, which has allowed me to finally put together this review, which I am so pleased to be able to publish on BreatheSafeAir.
But what makes me so excited to review the AirVisual Pro air quality monitor? Well, there are a few reasons. Firstly, AirVisual is also one of the best AQI apps out there (and it’s the one I use every day), and this monitor should integrate seamlessly into the app, which is already part of my everyday life. Secondly, the AirVisual Pro uses a particulate matter sensor co-developed by IQAir, meaning this monitor doesn’t just use off-the-shelf components as many other air quality monitors do. Finally, there are also some other unique features that the AirVisual Pro has, such as server access without the need for the internet, which makes it a rather interesting air quality monitor to review.
All of these features combine to make the AirVisual Pro a rather intriguing device and one that I am excited to be able to share finally. Since this monitor has been out in some form or another for almost ten years, how does it compare to the newer monitors on the market? Is it still able to command its rather high price tag, and, more importantly, is it worth it? In this review, I will answer all these questions and more.
Before I begin, I do want to clarify a few points. There are a few versions of the AirVisual Pro, and the more recent v1.1683 (and proceeding models) are vastly more accurate than their earlier counterparts. The good news is that the v1.1683 monitor was released many years ago, and all models you can purchase now should be updated. However, if you purchase a second-hand monitor, you might want to be careful to purchase the later model.
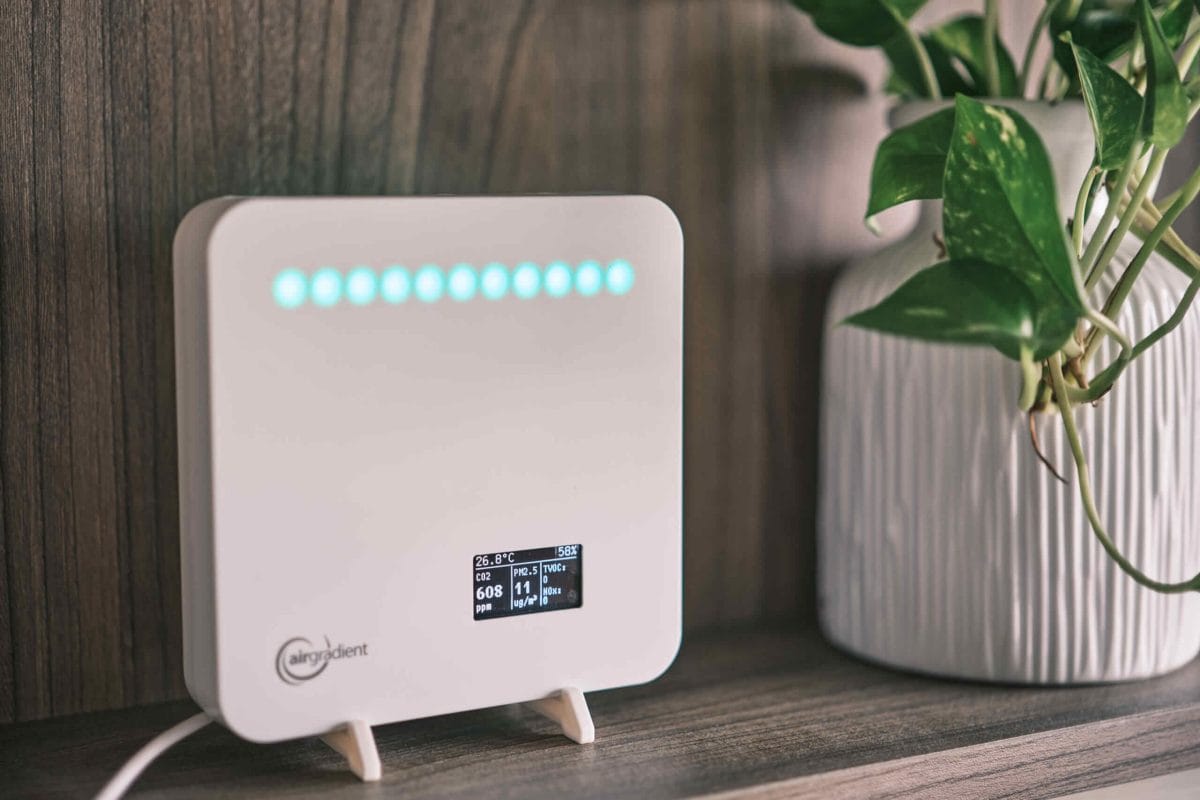
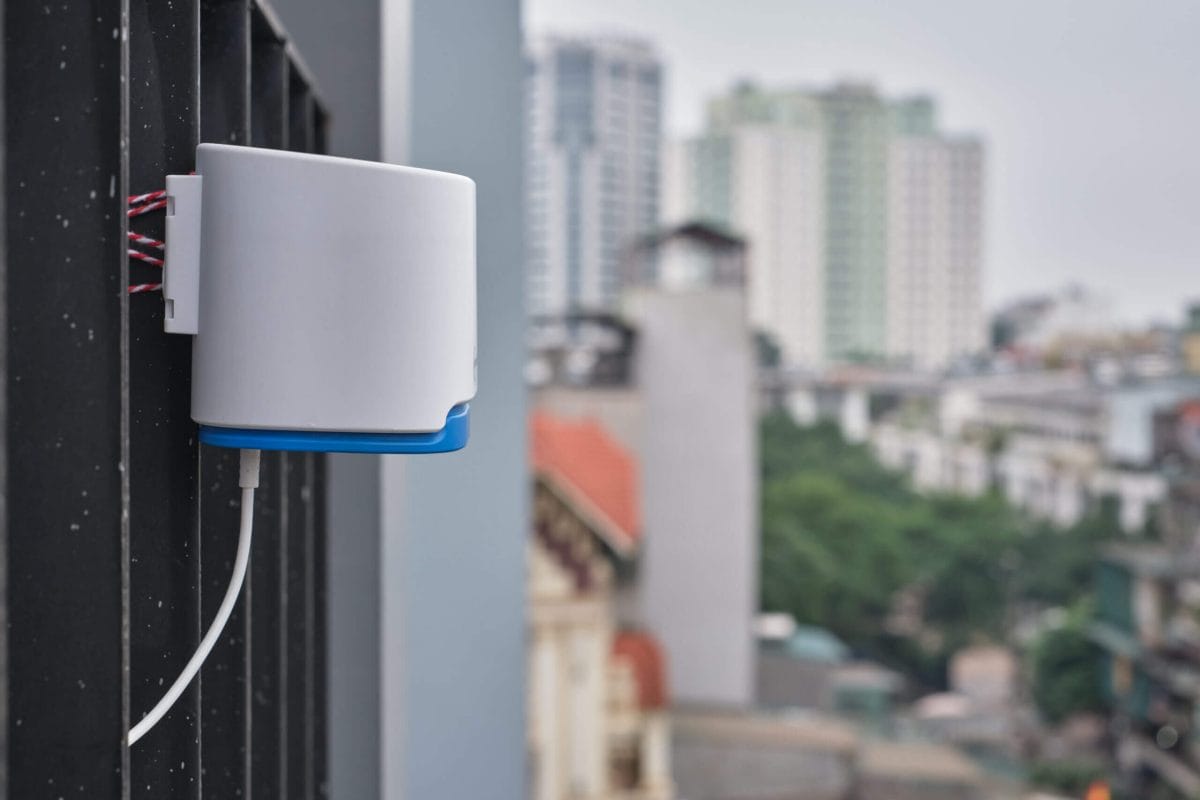
Also, while this monitor can be used outdoors (and many reviewers seem to take it outdoors), I don’t believe it’s a good monitor for this purpose. It has no protection from the elements and is too big to be effective as a portable monitor. Furthermore, IQAir has an outdoor monitor, clearly indicating that this is supposed to be an indoor air quality monitor. For that reason, I will be reviewing it from that perspective. If you want an outdoor air quality monitor, check out the AirGradient Open Air. With all of this out of the way, let’s dive in!
Subscribe to BreatheSafeAir
We spend 90% of our time indoors. Make sure the air you breathe indoors is healthy.
This post contains affiliate links. For more information, please refer to my affiliate disclaimer. I was NOT sent a product for review; I purchased this monitor myself. All opinions expressed in this post are my honest thoughts. I only recommend products that I believe in.
Information on this blog is for informational purposes only. Readers are encouraged to confirm the information herein with other sources. Furthermore, this information is not intended to replace medical advice from professionals. This website assumes no responsibility for the accuracy of the information, which is subject to change without notice. Devices mentioned on this website are not medical devices and do not guarantee protection.
Accuracy & Sensors
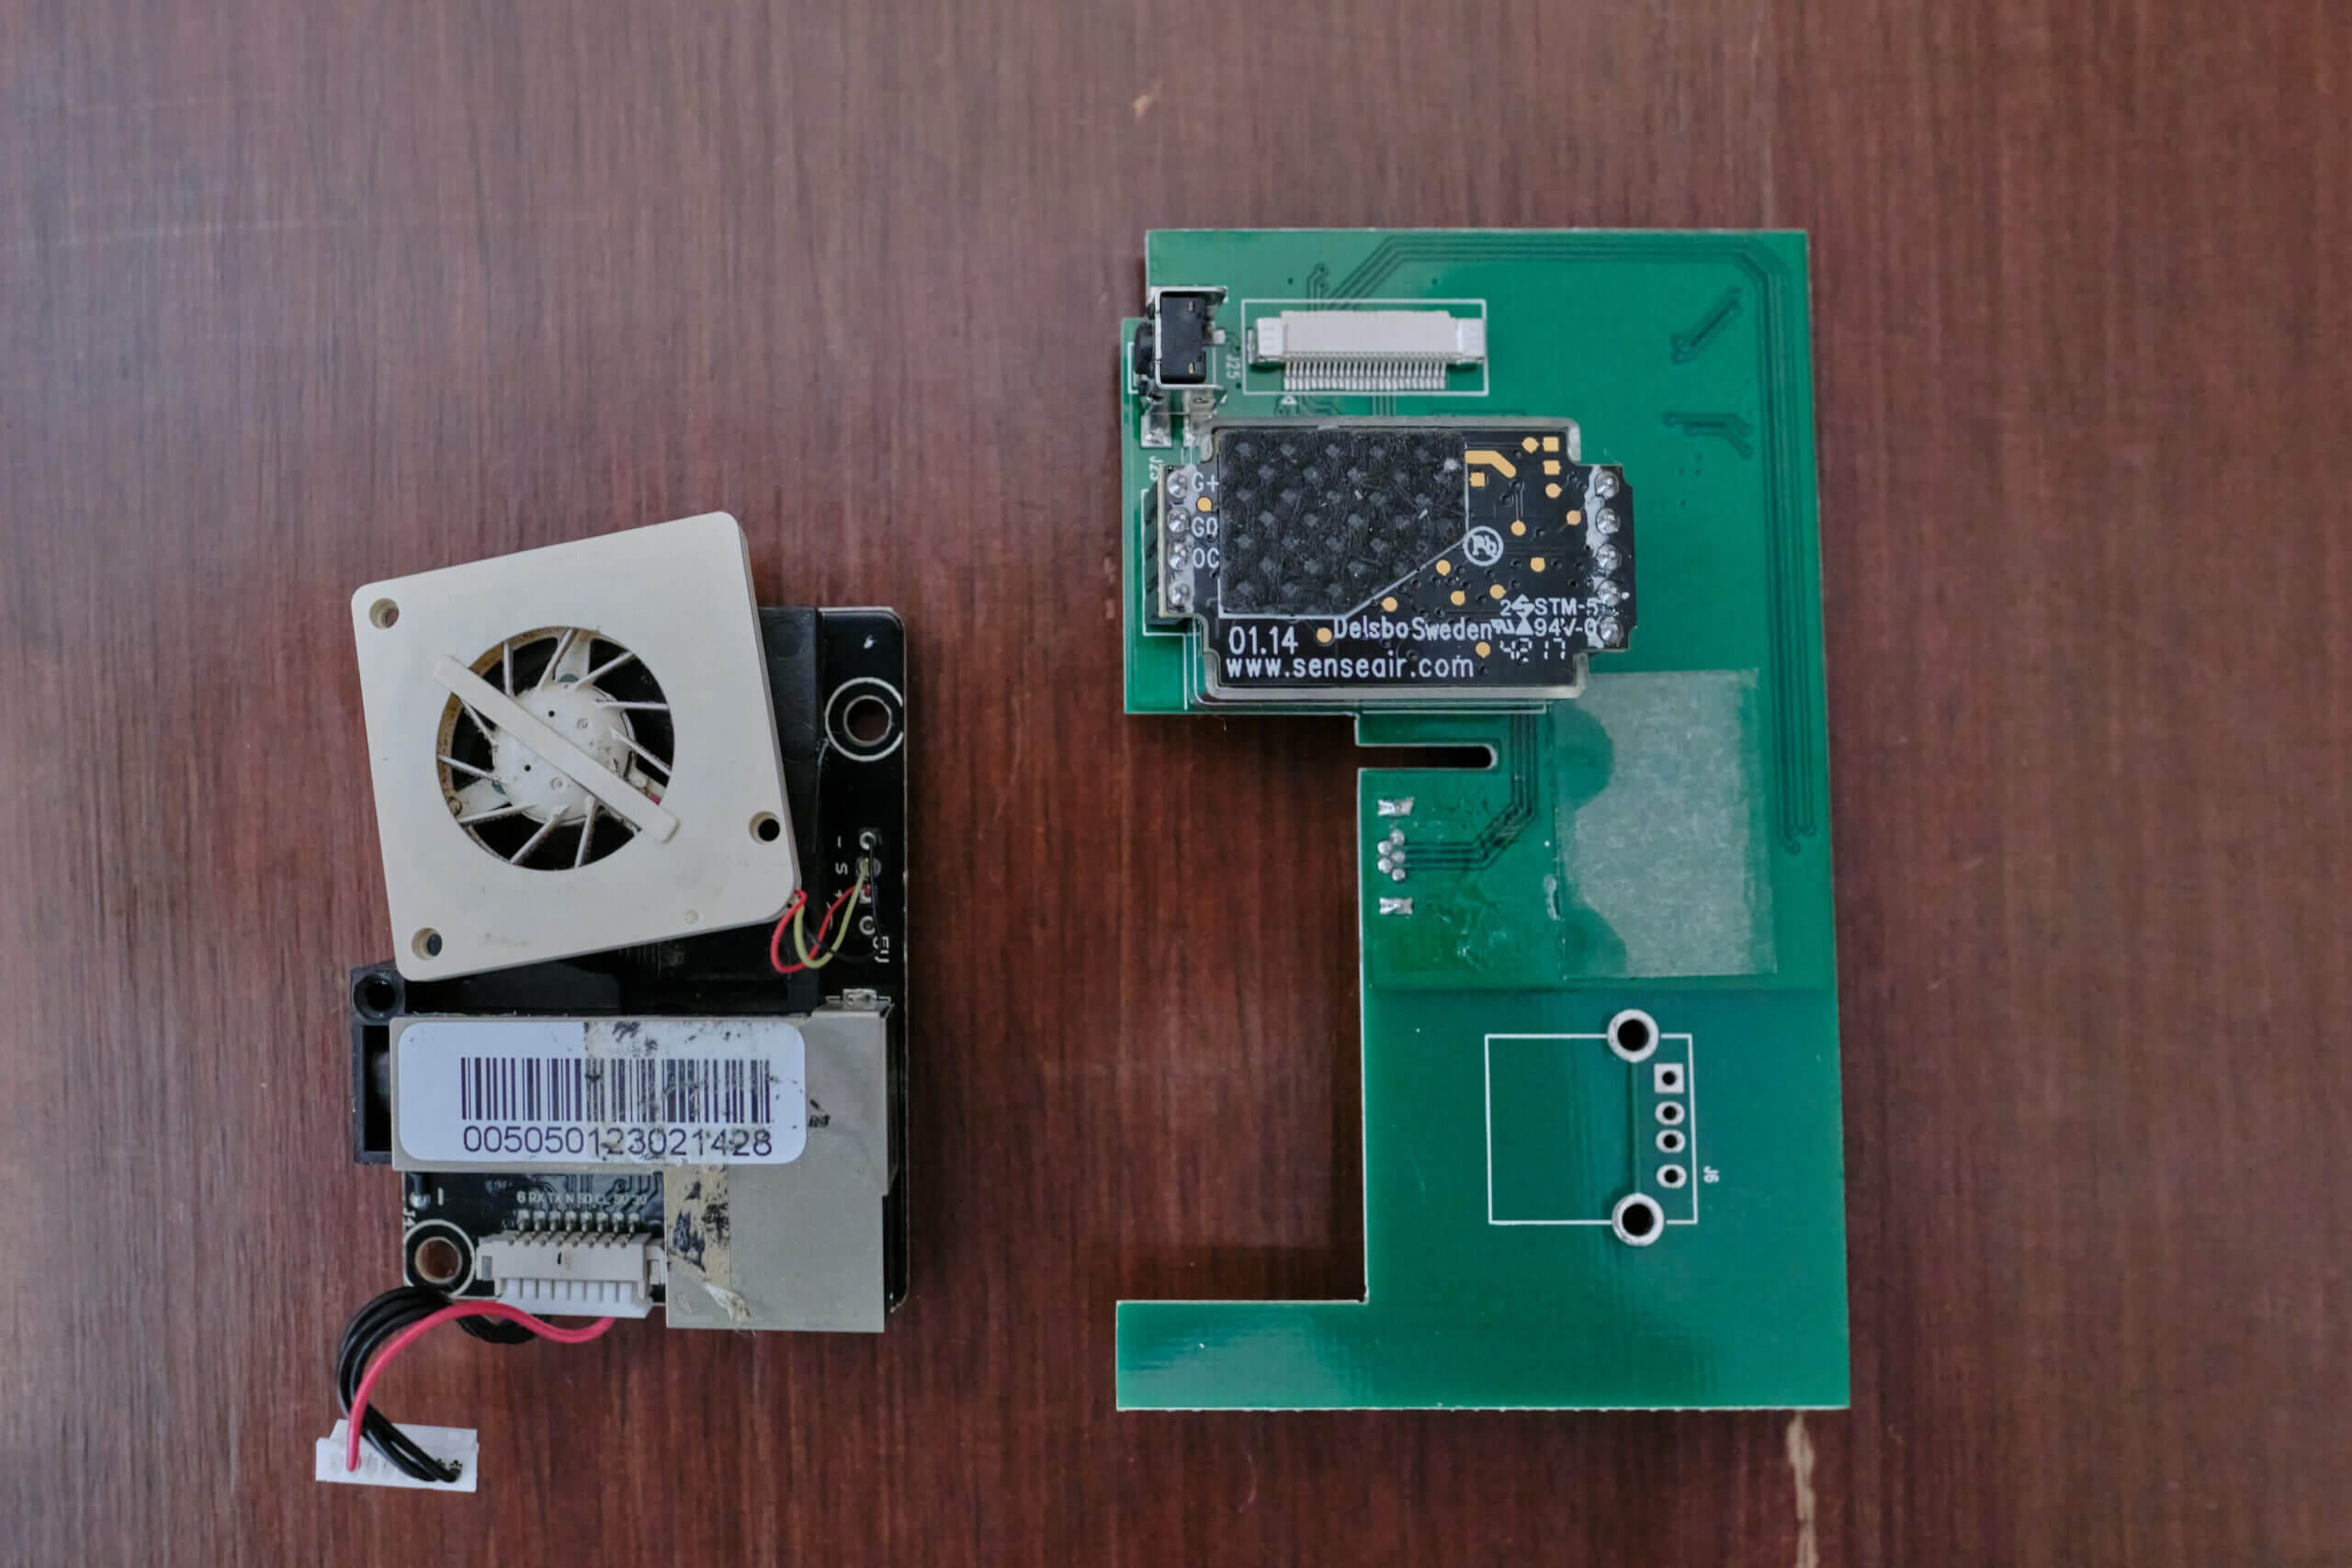
Left: PM sensor from the AirVisual Pro (AVPM25b). Right: CO2 sensor from the AirVisual Pro.
The most important aspect of any air quality monitor is the accuracy. This, of course, is based on the sensors used within the device. In the case of the AirVisual Pro, there are four sensors – one for particulate matter (PM2.5), carbon dioxide, temperature, and relative humidity. As I mentioned in the introduction, the PM sensor is particularly interesting as it’s co-developed by IQAir. This is very unusual for an air quality monitor as most use off-the-shelf components, reflecting IQAir’s ability to invest significantly more in its research and development.
Since IQAir doesn’t mention the components on its website, I opened one of my monitors to get a better look. Inside, I found the SenseAir S8 carbon dioxide sensor (on the right in the image above) and the PM sensor (on the left). While I hoped to find more information on the PM sensor (the AVPM25b), I couldn’t find any branding or markings that gave me further information about it. Luckily, this sensor has been tested by many other reputable third-party organisations, and we can refer to those results when discussing the accuracy here.
Let’s start with the accuracy of the PM sensor used in the AirVisual Pro. This sensor has been tested by South Coast AQMD (Air Quality Management District) as part of its AQ-SPEC (Air Quality Sensor Performance Evaluation Center) program. This program tests low-cost monitors against reference instruments that cost tens of thousands of dollars and evaluates their performance. South Coast AQMD’s AQ-SPEC program is very well-regarded, and these results are trustworthy as they are from an independent third party. You can find a summary of the AirVisual’s results here.
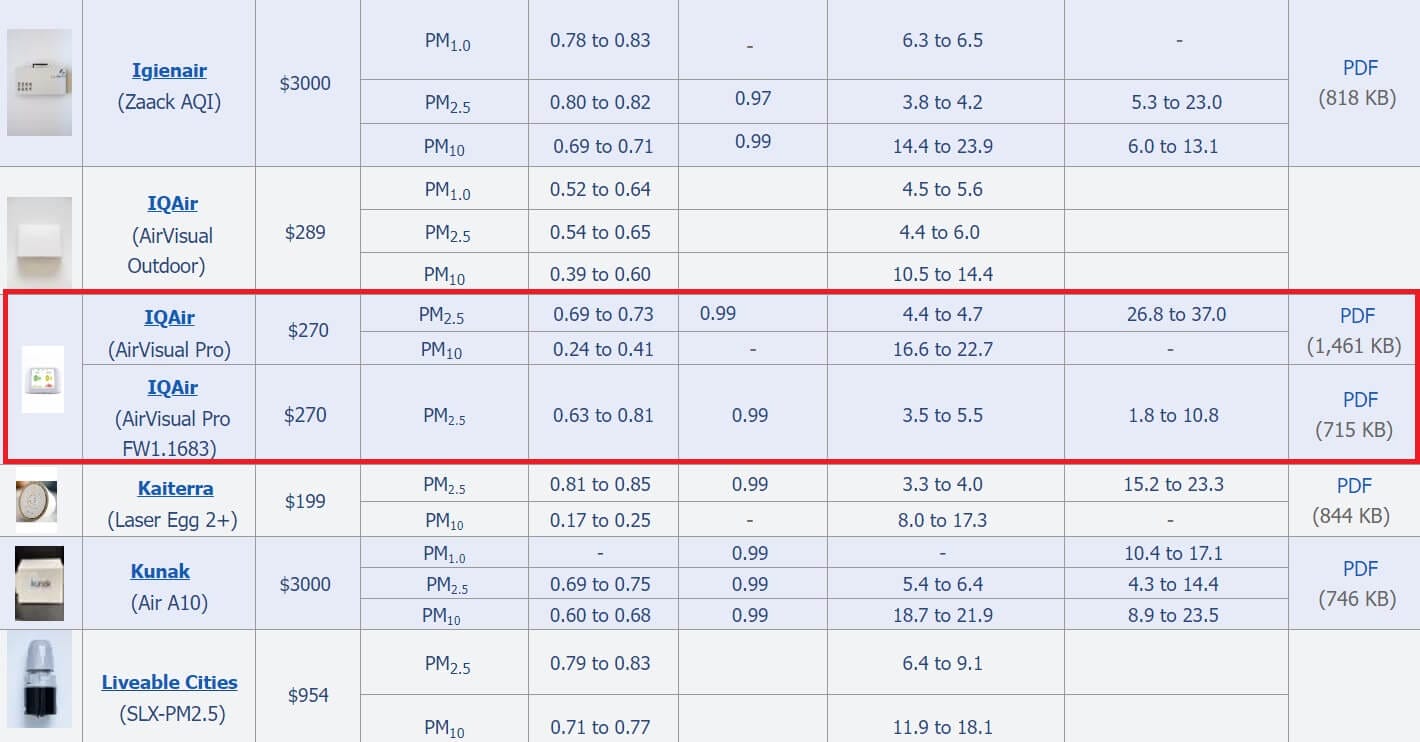
Image from South Coast AQMD.
As you can see from the image above, the AirVisual Pro V1.1683 had a field R2 value of 0.63 – 0.81 for PM2.5 concentrations and an R2 value of 0.99 for lab testing. An R2 value shows the correlation to the reference data, with 1 being a perfect correlation and 0 representing a total lack of correlation. In the case of the AirVisual Pro, there was a very strong (0.99) correlation in lab conditions, showing it’s very accurate when conditions are controlled. However, the correlation dropped to 0.63 – 0.81 in field tests, showing a strong correlation but much lower than in lab conditions. This is likely because other environmental factors, such as humidity and temperature, can greatly affect the accuracy of low-cost particle sensors.
While this accuracy isn’t bad, it is lower than some vastly cheaper air quality monitors, such as the Qingping Air Monitor and Qingping Air Monitor Lite – at least regarding field evaluations. I would place more emphasis on these evaluations, however, as they represent a far more comprehensive range of conditions you are likely to experience unless you have a perfectly climate-controlled home.
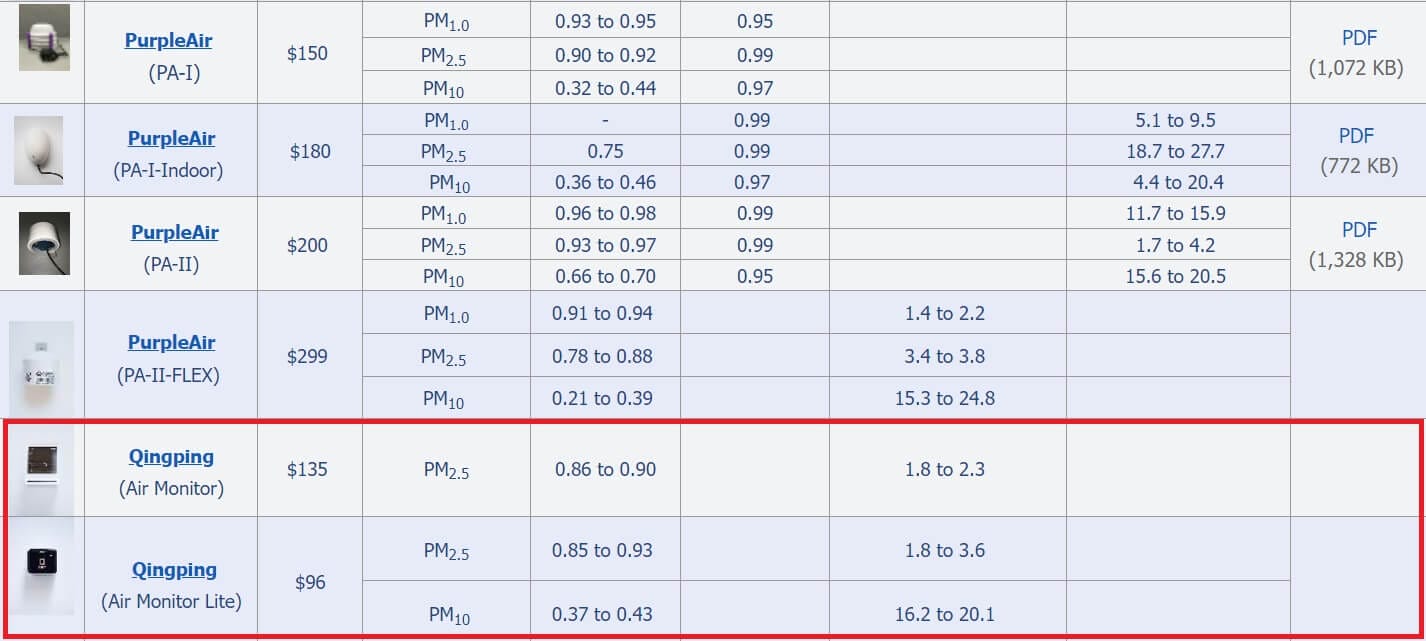
This is somewhat disappointing to me as, while it’s not inaccurate, I would have expected more from a sensor that IQAir developed themselves. This is compounded by the fact that these monitors cost around $300 compared to the $100 Qingping Air Monitor Lite. Of course, that device isn’t perfect, but I believe the IQAir Monitor should perform better for its price.
I would be remiss to point out that the AirVisual Pro (and the other monitors on this table) will likely perform towards the upper ranges of their R2 values when used indoors, as air quality conditions tend to remain more consistent. The AQMD graph below shows that the device has good precision at lower to moderate relative humidity levels. Since conditions inside are generally more controlled to be comfortable for the inhabitants, performance should be towards the upper range of the provided values. This is another reason the AirVisual Pro shouldn’t be used as an outdoor monitor.

Some other studies have focused on testing low-cost indoor air quality monitors. One of these studies found the IQAir AirVisual to be ‘acceptable’ for identifying indoor sources of PM2.5. The same study found that many other low-cost monitors performed poorly at this task, and the AirVisual monitor was one of the better-performing monitors for identifying poor indoor air quality. Another study corroborates these findings, noting that the monitor does struggle with large concentrations of ultrafine particles (which AQMD also noted).
So, what can we conclude about the AirVisual Pro’s PM2.5 accuracy? Well, it is an accurate device that tends to underreport PM2.5 concentrations, but by a lesser degree than some other tested monitors. That said, there are also more accurate monitors at a lower price. The device shouldn’t be used outside, as accuracy will drop significantly as other environmental factors come into play.
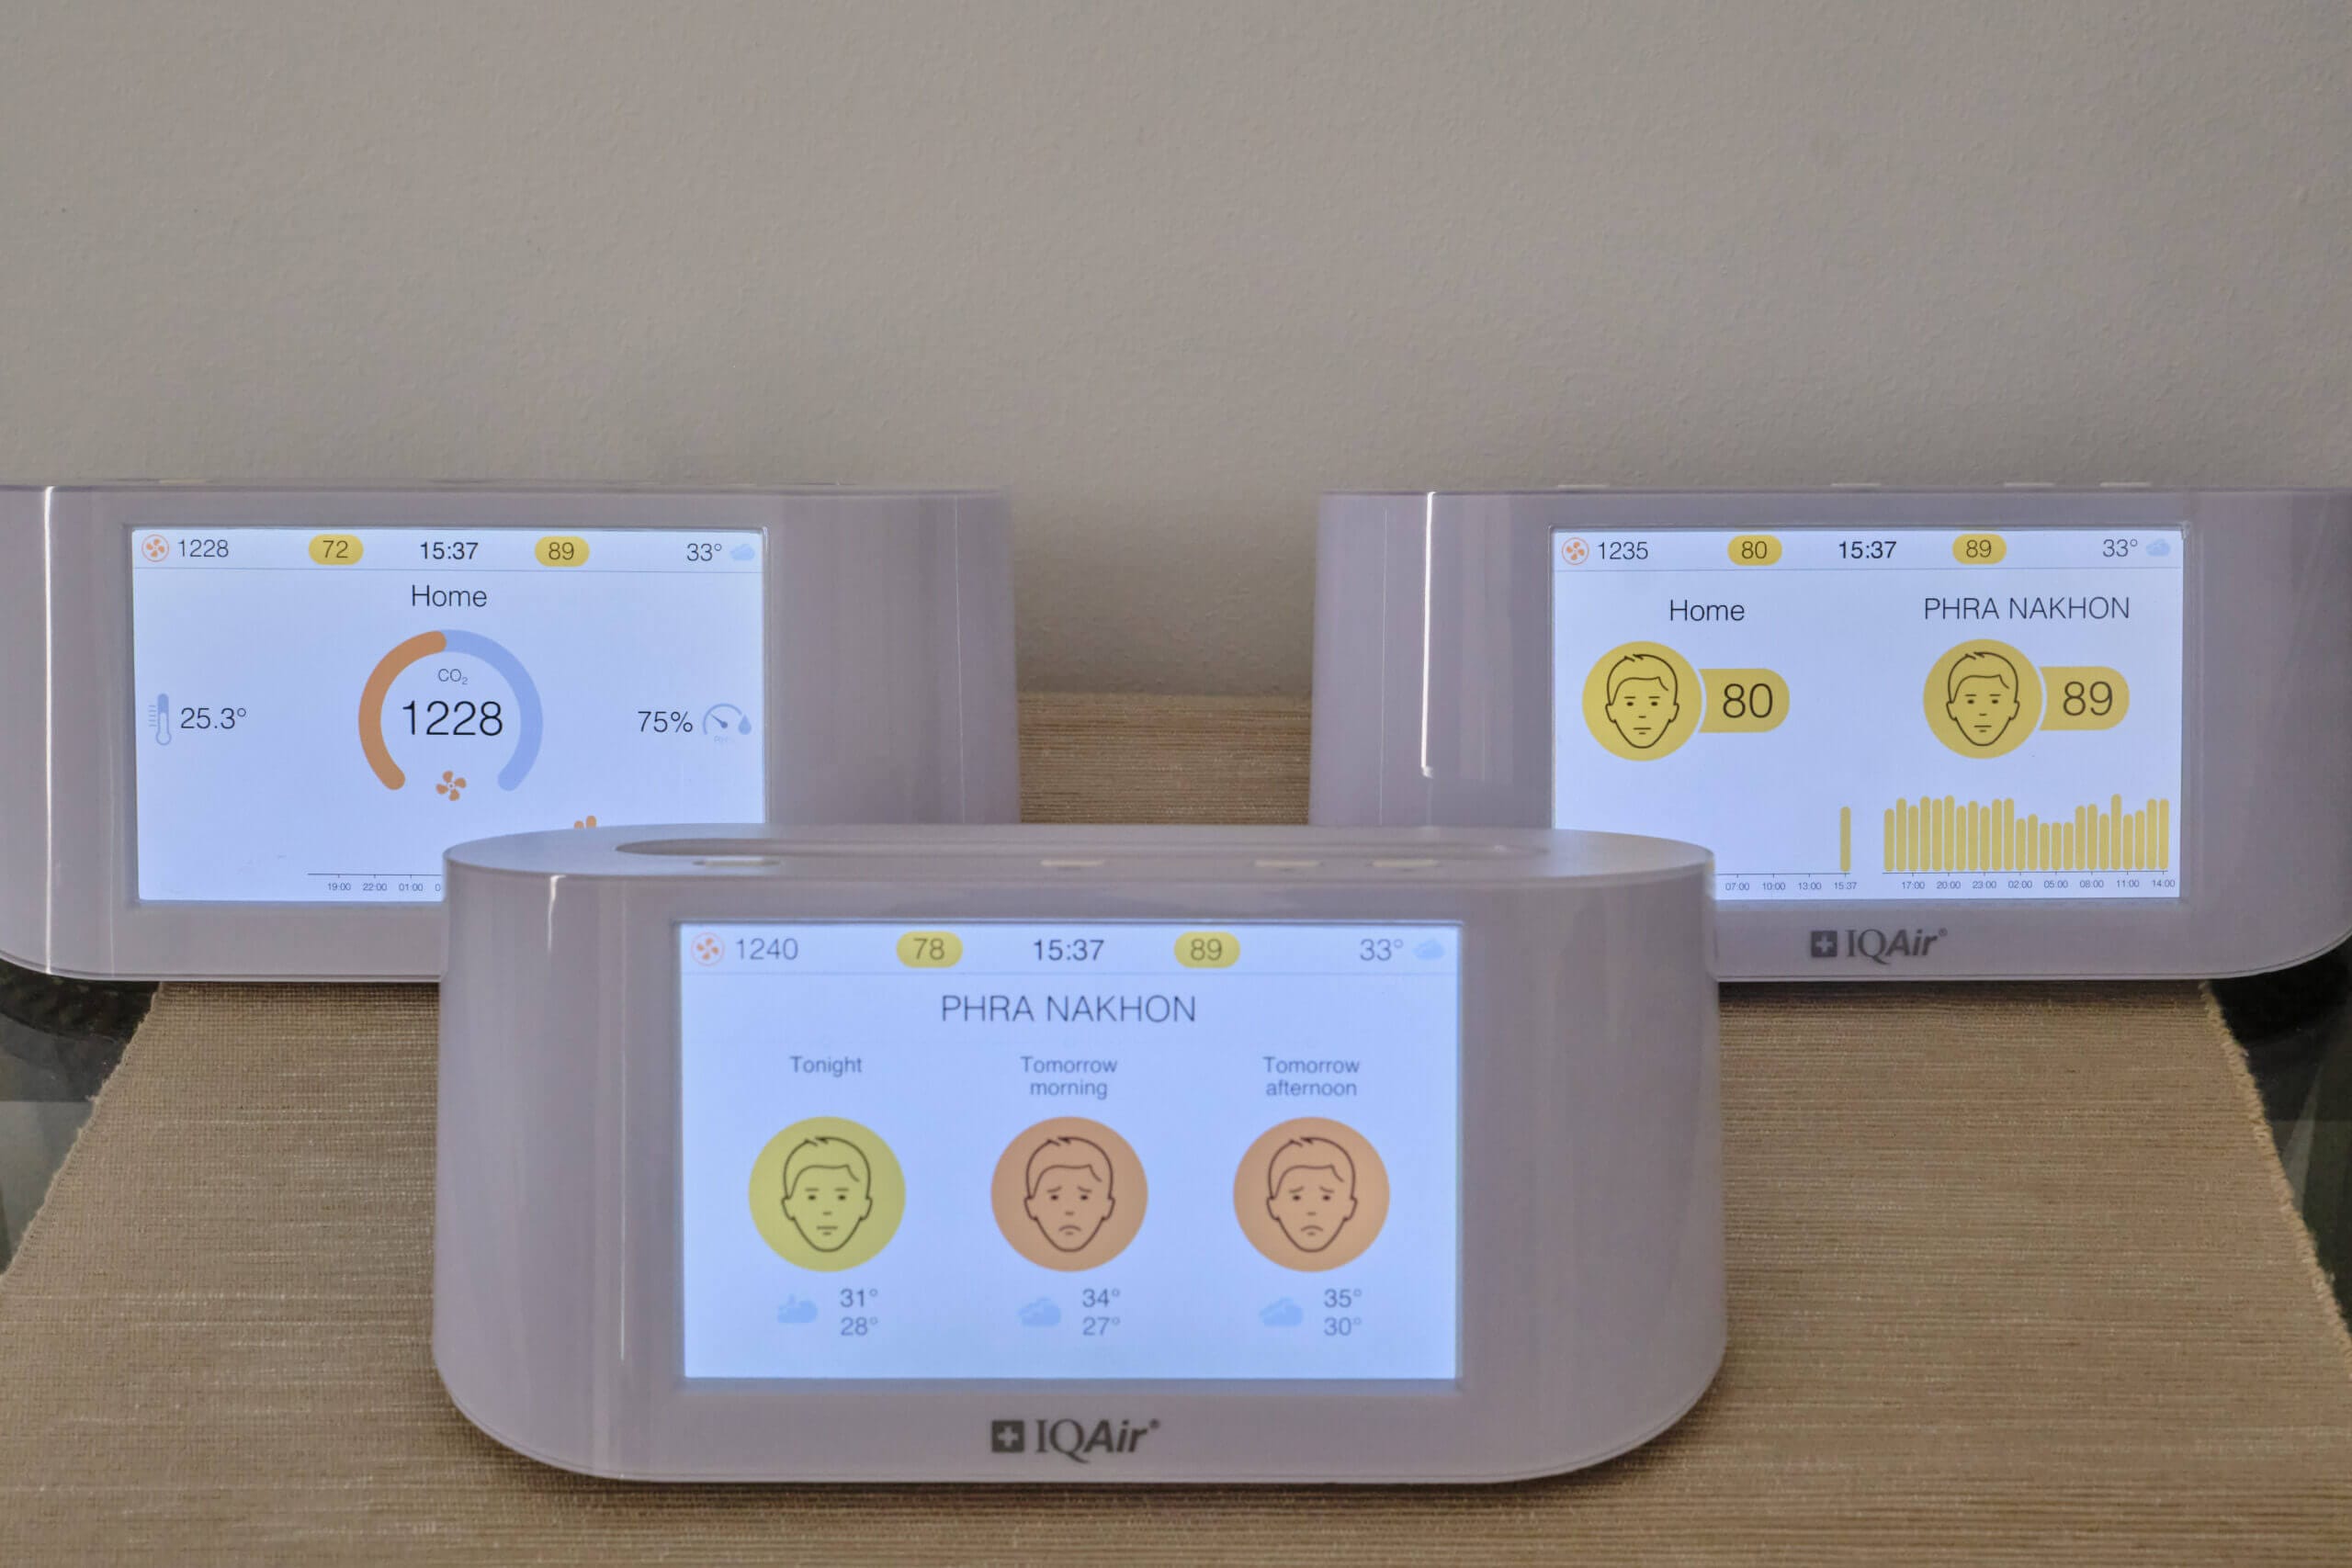
Three AirVisual monitors. The monitors read 72, 78, and 80 indoor AQI from left to right. They also show 1228, 1240, and 1235ppm of CO2.
Regarding carbon dioxide readings, I did some of my testing, and I was very impressed with the accuracy. These monitors use the SenseAir S8 – a sensor I’ve come to trust after using it in the AirGradient ONE and Qingping Air Monitor. While the sensor isn’t quite as high-end as the SenseAir Sunrise in devices such as the Aranet4 Home, it’s a high-quality sensor that provides accurate readings – as long as the autocalibration ‘feature’ is managed.
Firstly, I want to discuss intra-device accuracy. Frankly, I was extremely impressed with how closely my three AirVisual monitors performed regarding CO2 readings. As you can see in the image above, the three monitors show CO2 concentrations within 12 ppm of each other (ranging from 1228 to 1240; concentrations can be seen in the top-left corner of each monitor’s screen). While this image is just one snapshot, I can confirm that this accuracy was consistent over my time using the devices.
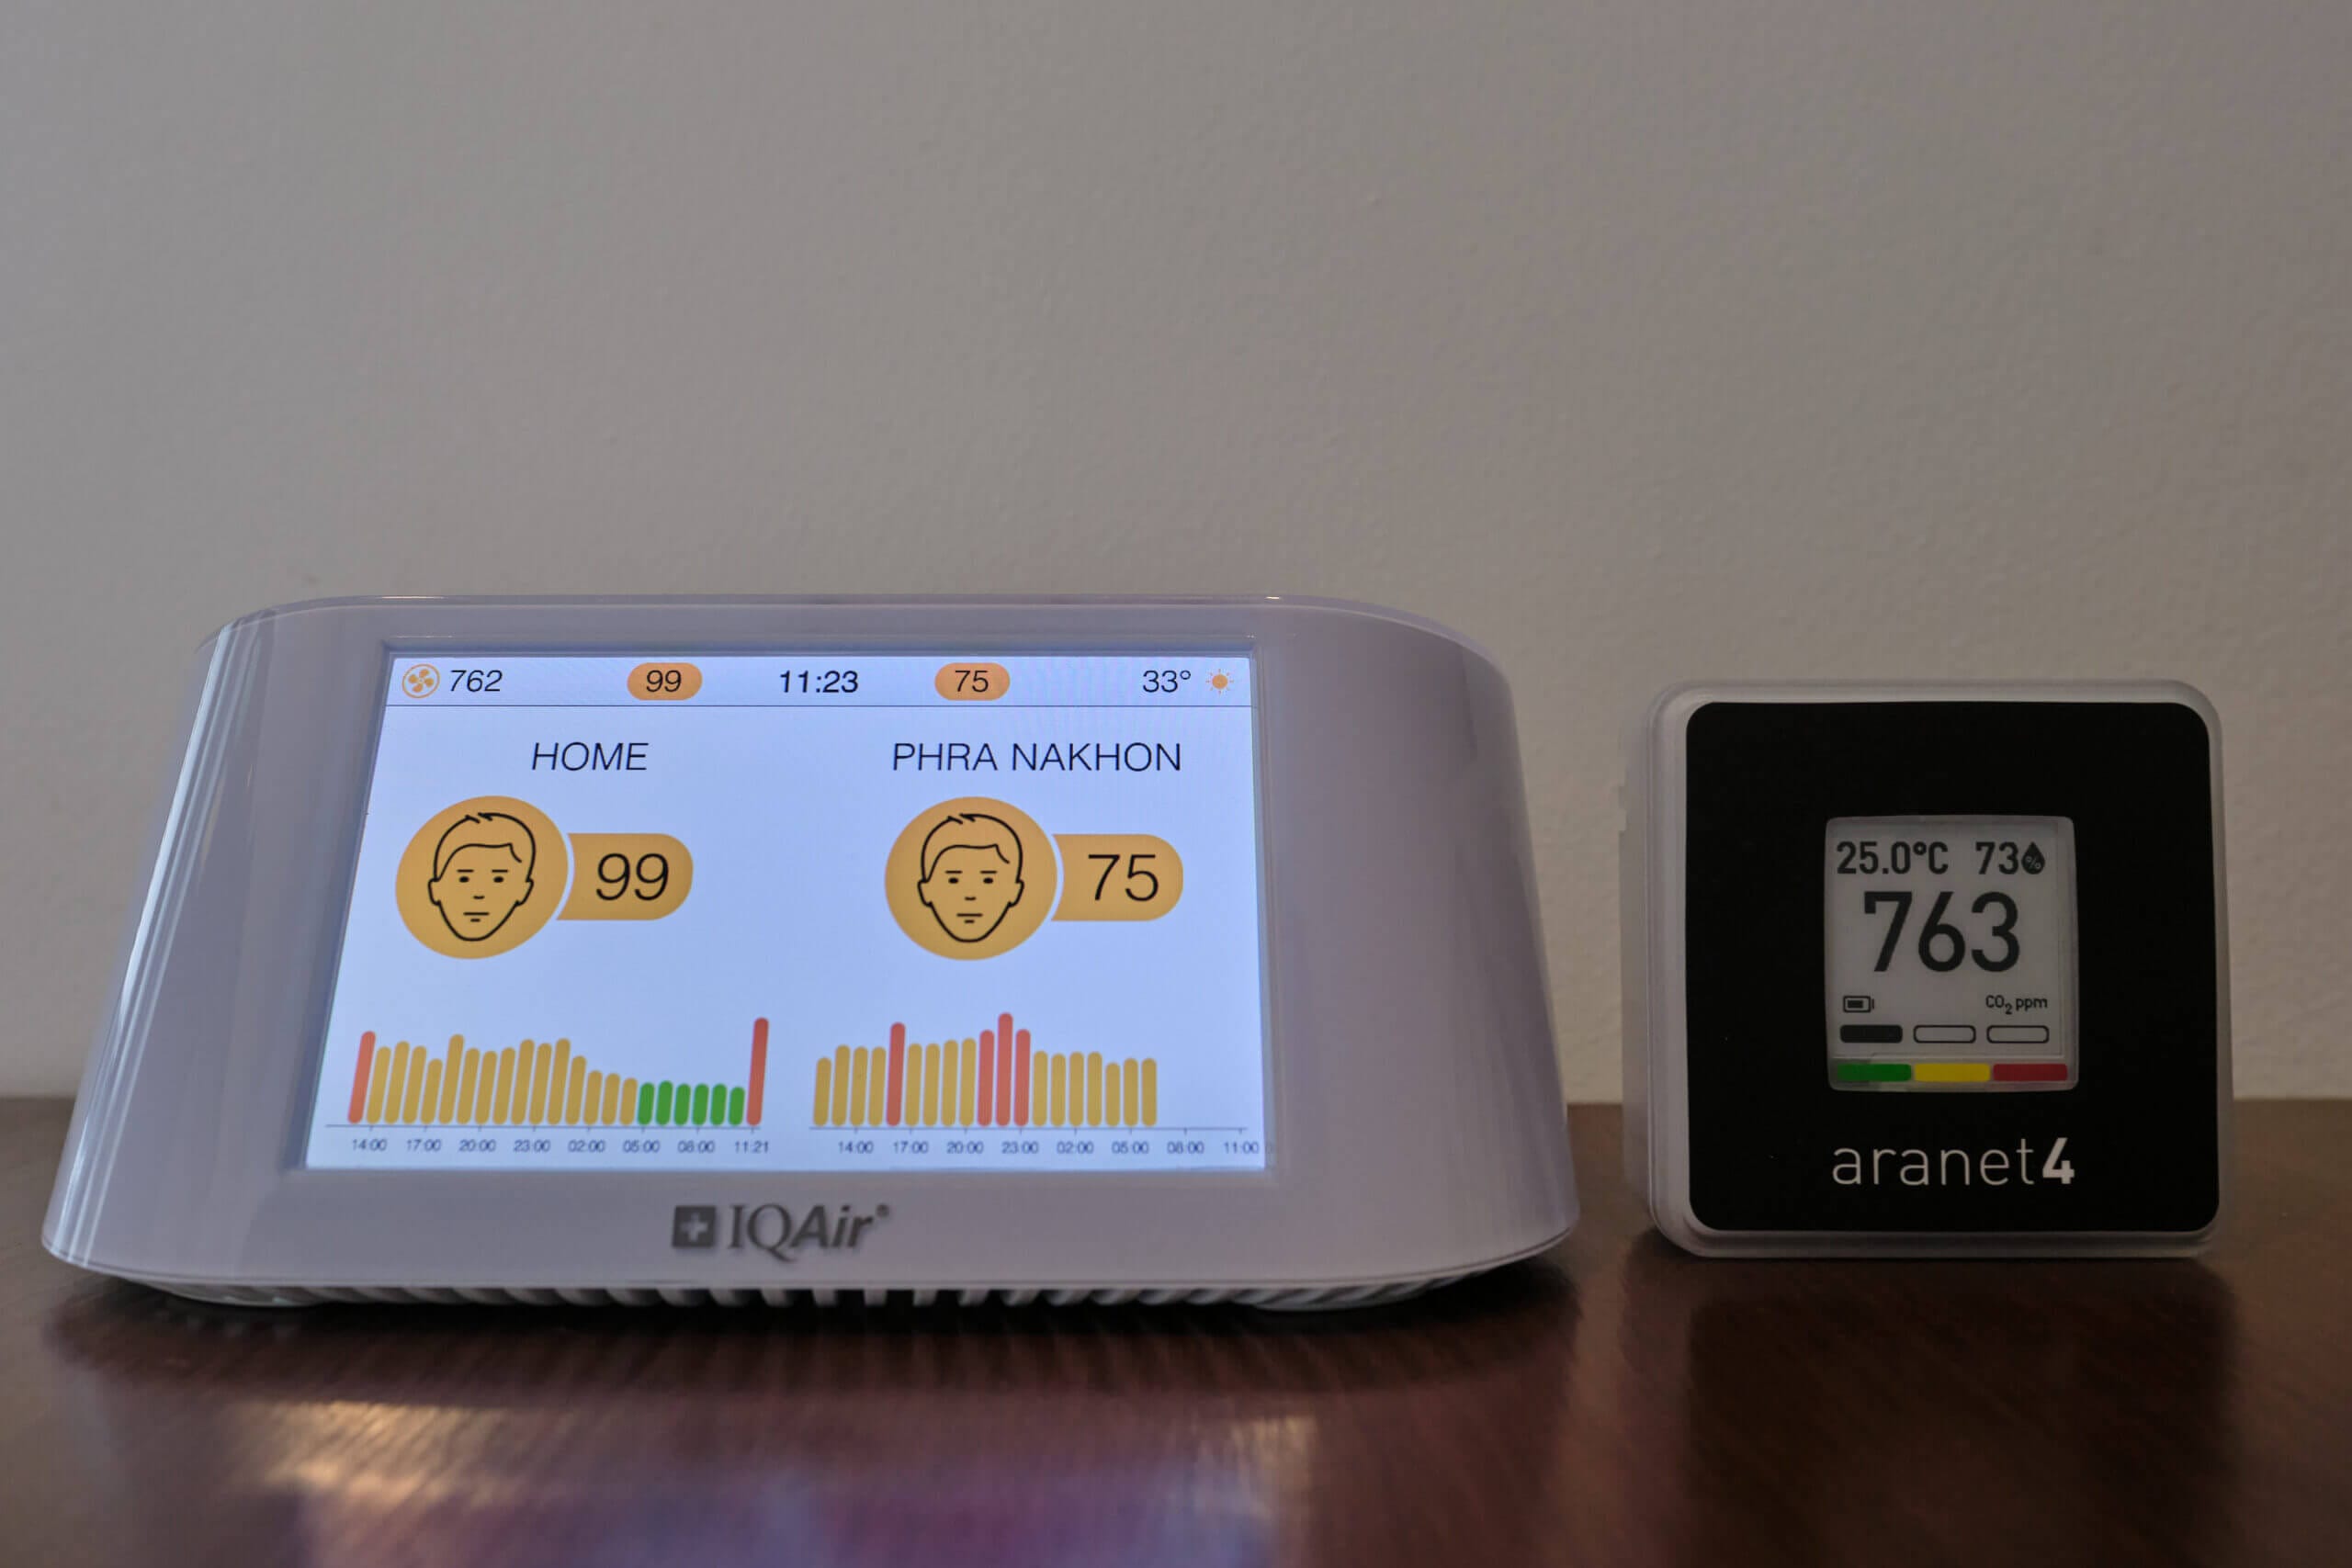
AirVisual vs Aranet4 Home. Airvisual shows 762ppm, Aranet4 Home shows 763ppm.
I continued to be impressed when comparing the AirVisual Pro to the Aranet4 Home CO2 monitor. This device uses Senseair’s highest-end Sunrise CO2 sensor and is known and proven accurate. I calibrated both monitors in this example, and both monitors consistently provided very similar readings between 500 and 2000 ppm (I didn’t get a chance to test higher concentrations as the apartment I am in can’t seem to pass 2000 ppm). This result is fantastic, and this is the closest tracking monitor to the Aranet4 that I’ve tried to date.
The S8 is a common sensor found in many devices. Yet, for some reason, it seems to perform very well in the AirVisual Pro. While I have no proof of this, I believe it must be due to the algorithms that IQAir has implemented with its software. Whatever it’s done, it’s certainly worked, and I trust the CO2 values that my AirVisuals show.
Now, there is one important factor to note here. The S8 is a sensor that has auto-calibration built into it. This means that every week, the sensor will set a new baseline CO2 concentration. While this ‘feature’ is used to combat sensor drift (sensors lose their calibrations over time), it can lead to inaccurate readings if the device isn’t exposed to ambient air occasionally. While this shouldn’t cause any issues if the device is near a window that is opened frequently or in a room often left empty, it can cause an issue if it’s in a location that never sees ambient or near-ambient CO2 concentrations.
Luckily, if you do notice that the CO2 readings are unusual, you can manually recalibrate the device through the AirVisual app. To do this, take the device outside (luckily, it has an internal battery), place it somewhere away from yourself, and trigger the calibration procedure from the app. Once the calibration has been completed, you should have accurate CO2 readings again.
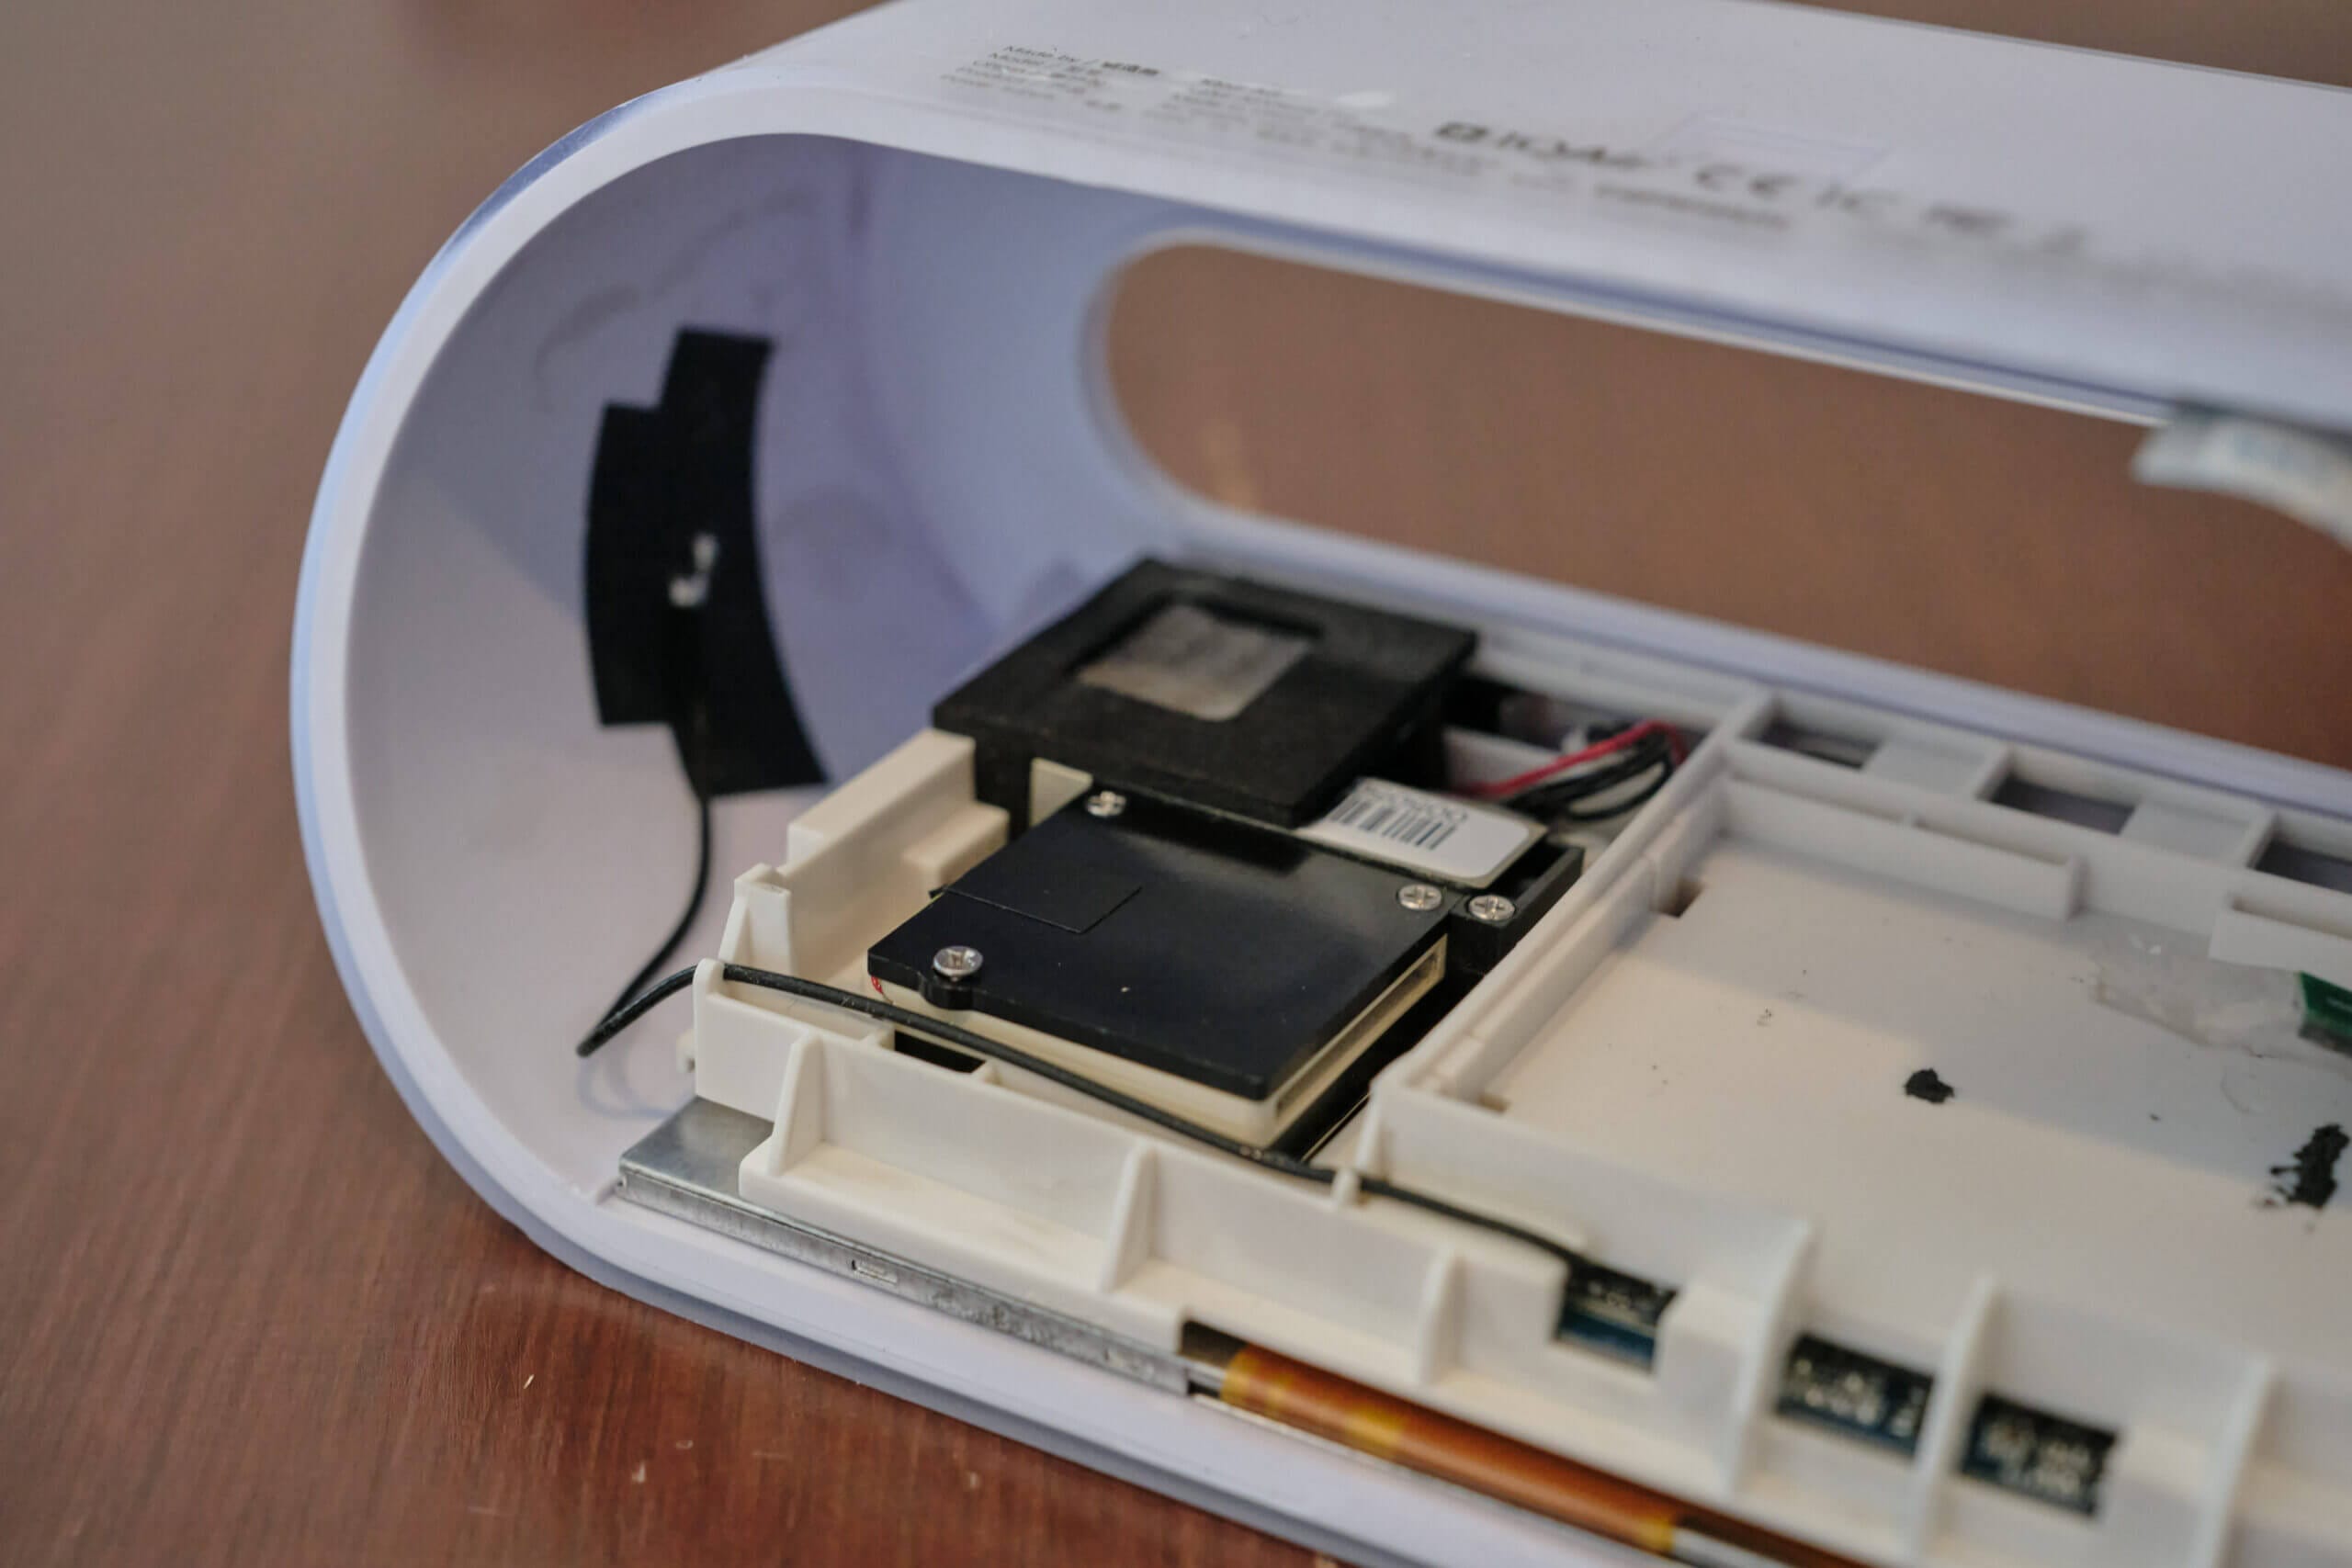
PM2.5 sensor and (I believe) temperature probe taped to the outer shell.
While the PM2.5 and CO2 sensors are accurate, you may have noticed this monitor’s omission of PM10 and VOC readings. Interestingly, PM10 was measured on the earlier IQAir AirVisual, but as you can see from the AQMD table, it was quite inaccurate. This is common among low-cost sensors, as they are typically unable to measure PM10 and, therefore, estimate the concentration using algorithms based on the particle count of smaller particles. While I can’t confirm this, I would assume this is why the monitor no longer measures PM10.
The same goes for VOCs. With these low-cost sensors, you can only purchase relative sensors which monitor increases and decreases in VOCs. Unfortunately, you can’t purchase VOC sensors that give an accurate absolute value at this price range. Therefore, the choice to remove the PM10 readings and not include a VOC sensor may have been made to keep the device only monitoring what it can monitor accurately.
Now, let’s conclude this section on accuracy. Overall, the IQAir AirVisual Pro is quite accurate when it comes to PM2.5 and very accurate when it comes to CO2 measurements. However, if you use the AirVisual Pro indoors (where it should be used), the PM2.5 accuracy should be very good. With that said, it’s far from the best-in-class and devices such as the far cheaper Qingping Air Monitor outperform it regarding PM2.5 accuracy. I would guess that the IKEA Vindstyrka has better PM2.5 accuracy, too.
While the device is still accurate, I’m a bit disappointed that it isn’t more accurate due to its high price point and the fact that IQAir co-developed this sensor, making it quite unique. Perhaps it’s because the sensor seemingly hasn’t been updated in quite some time, but it seems like an off-the-shelf PM sensor would have been a better idea.
Design
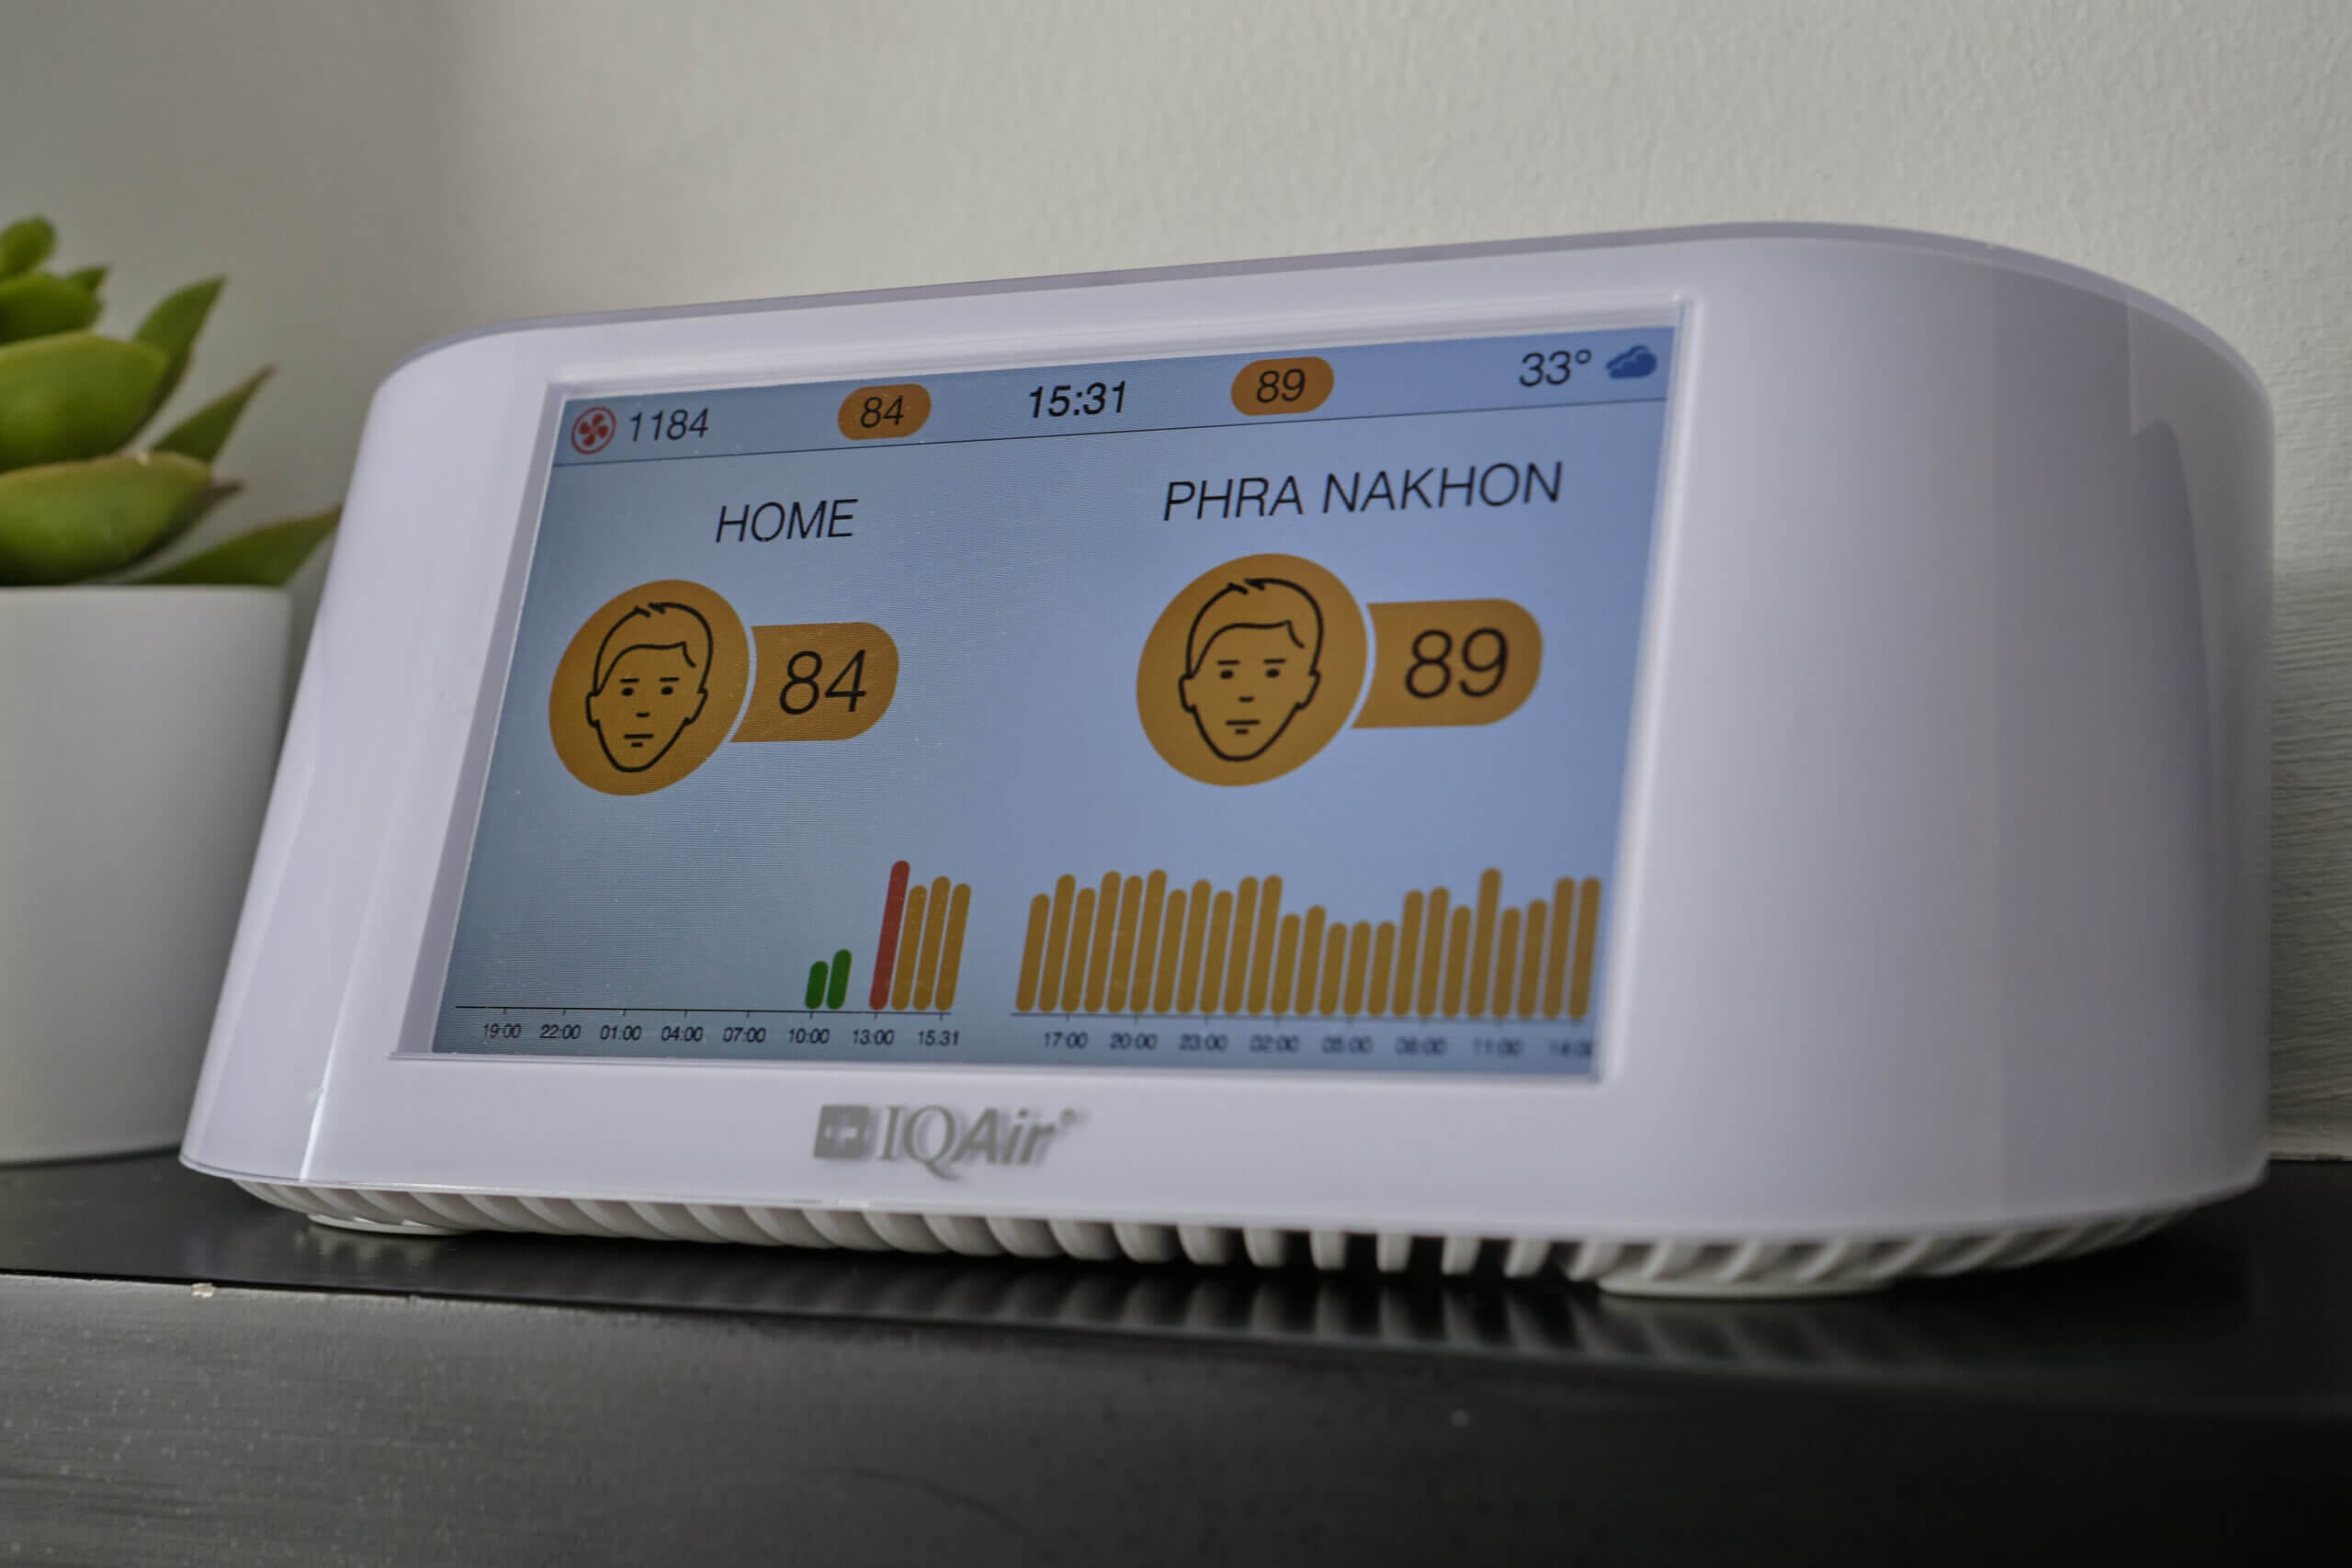
If you like big screens and a wealth of information, it’s hard to beat the AirVisual Pro. I’ve used many air quality monitors over the years, yet none come close to having the AirVisual Pro screen size. Some users will love this, and some will not be so fond of the large screen.
The screen resolution is 800×480 pixels, which means it is clear and easy to read from a distance of a few metres. However, upon closer inspection, you will see pixels and smaller text can be hard to read (such as the bottom text on the graph in the image above, which shows the time). The screen can also go quite bright and is easily readable in all but the brightest conditions. Screen brightness can be adjusted in the app settings.
Perhaps what makes the IQAir AirVisual Pro so unique is that alongside displaying PM2.5 and CO2 concentrations taken locally, on the device, you can also set the monitor to display data from an outdoor station. This station can be your own IQAir Outdoor Air Quality Monitor or any monitor already in IQAir’s network and can be found on the app. This is a very nice addition, as it allows you to see the air quality both inside and outside from a glance.
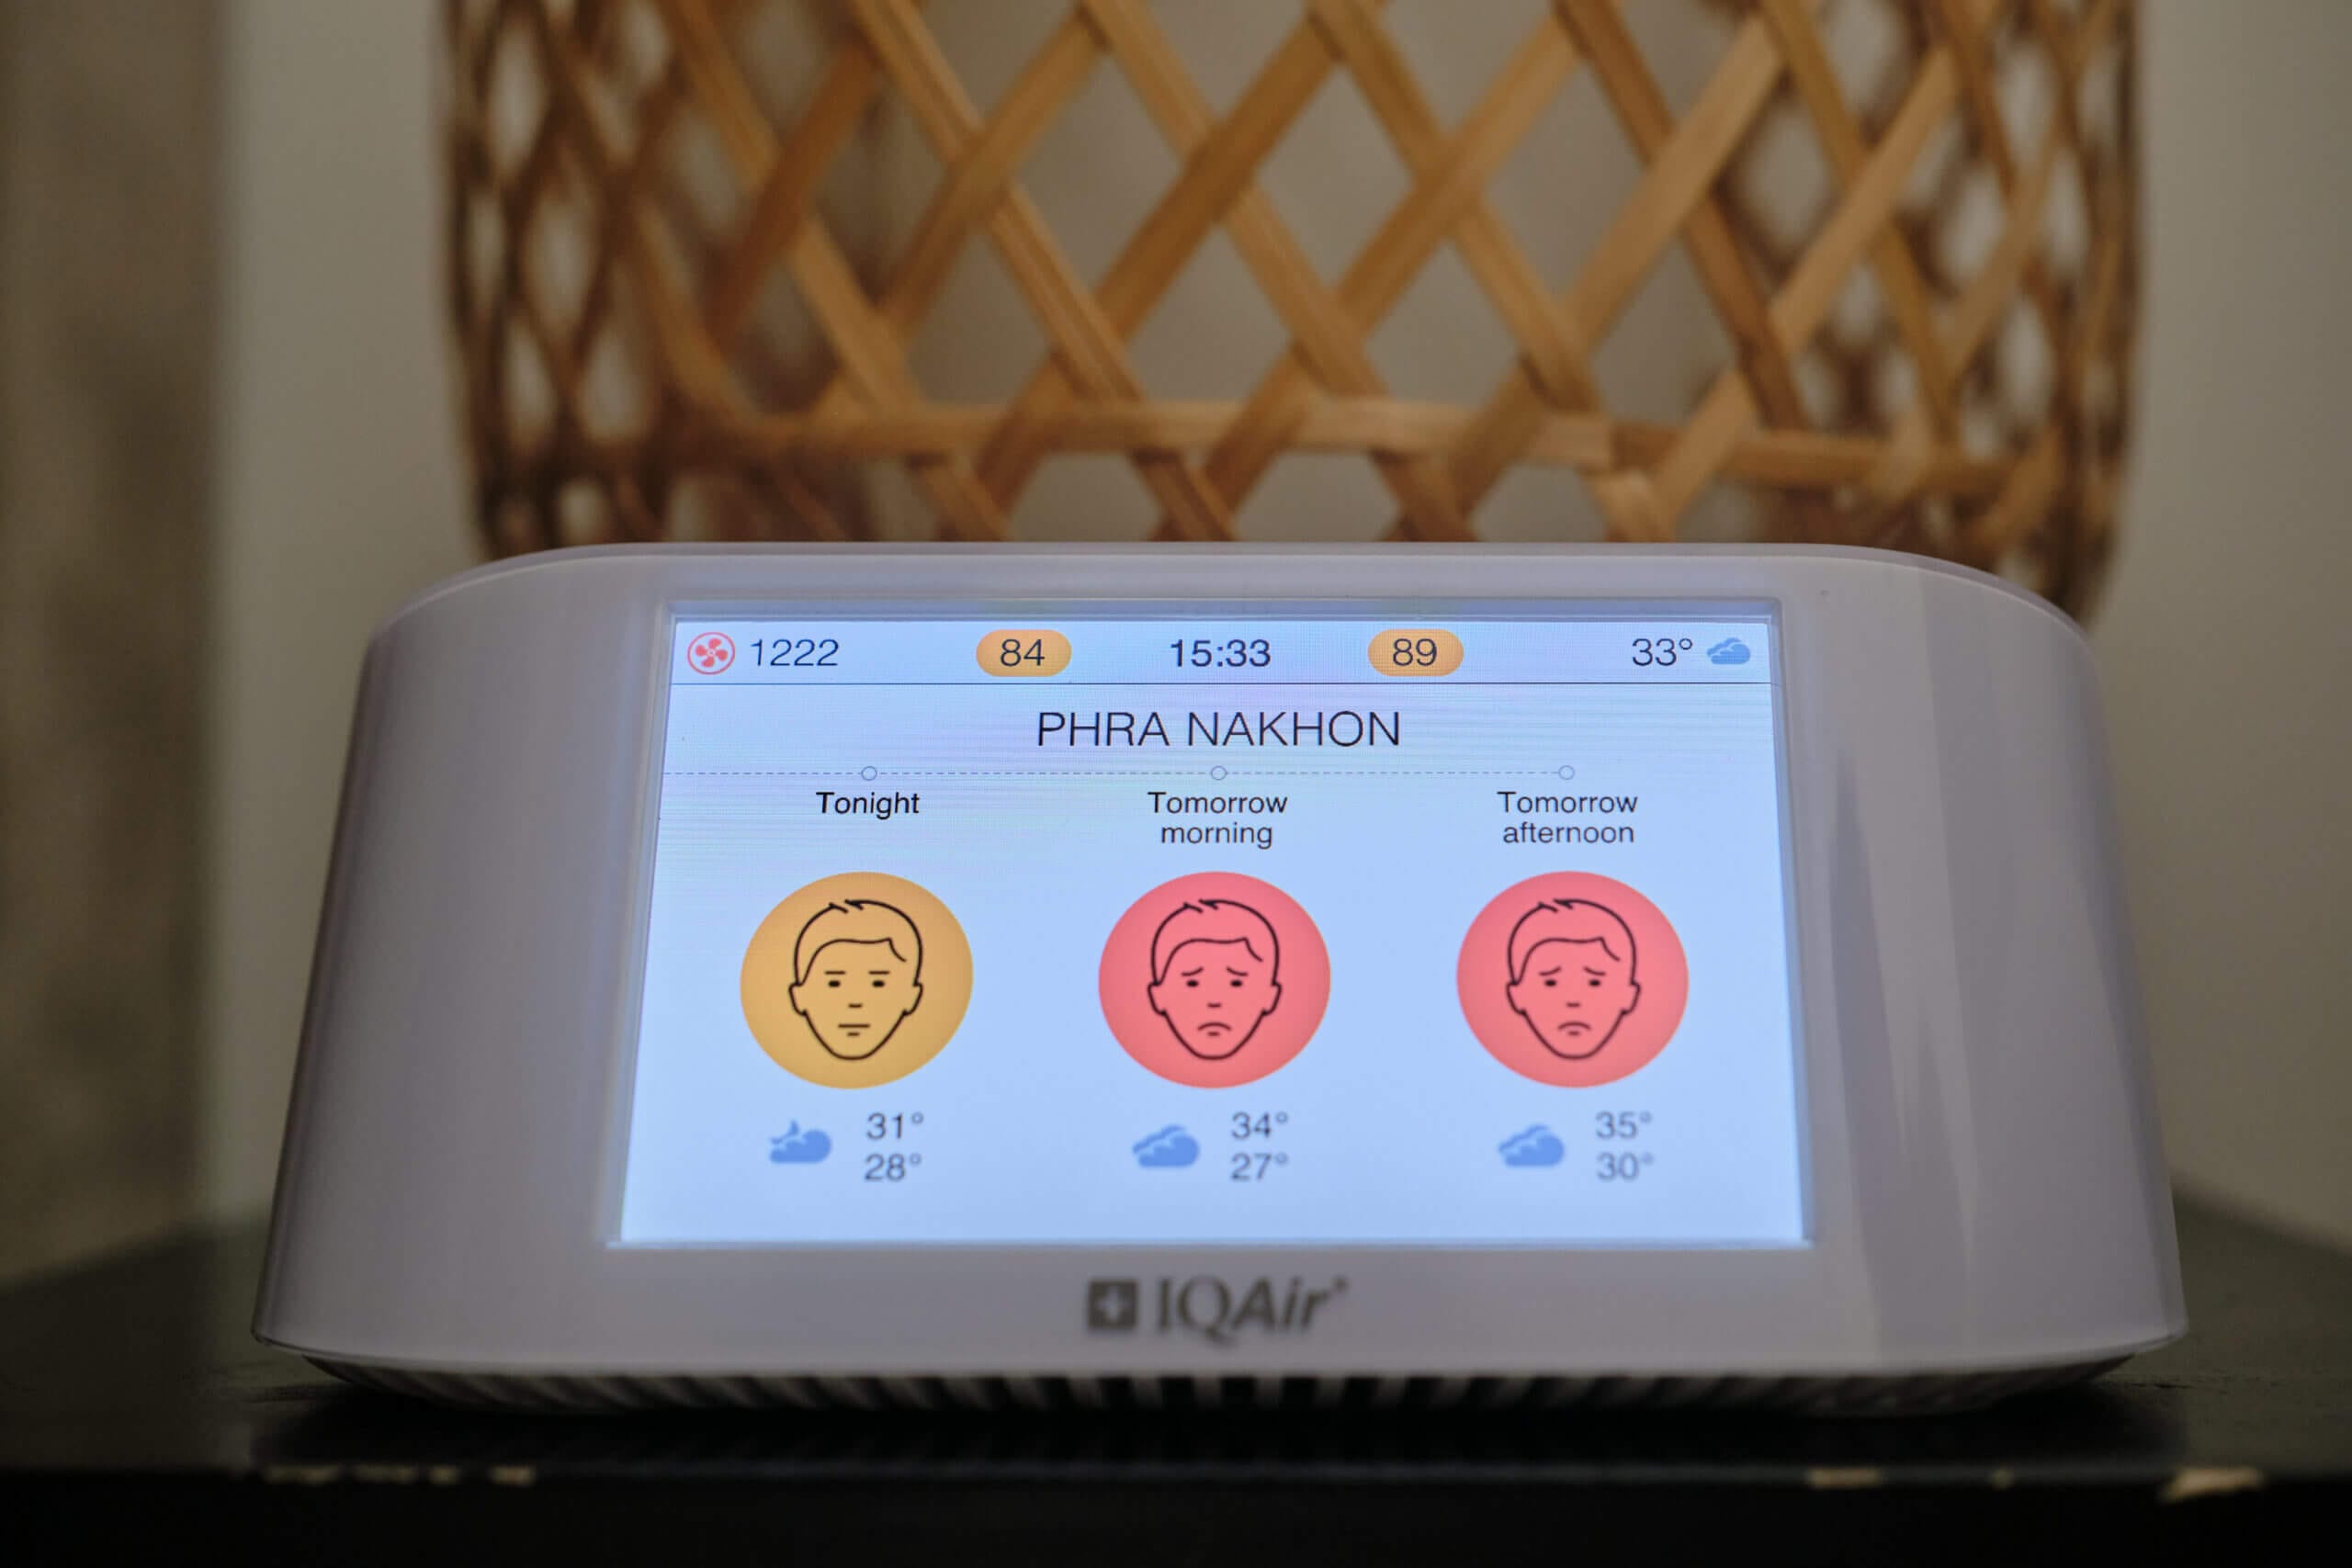
Another nice benefit of having this feature is that the monitor can show air quality forecasts based on the outdoor monitor it’s drawing data from. While air quality forecasts are a bit hit or miss, it’s nice to be able to get something of a forecast for tomorrow. Alongside this forecast, the AirVisual Pro will also show information on temperature – but it won’t show full weather forecasts. It seems like the monitor is trying to be a complete weather station, but it’s only halfway there. To fulfill this role, I would love the see the AirVisual Pro also show the weather forecast outside of air quality.
To show all this information, the AirVisual Pro constantly cycles through four displays. The first display shows the indoor air quality that the monitor records and the outdoor air quality from the monitor you’ve chosen. It also shows a small graph representing PM2.5 trends over the past day.
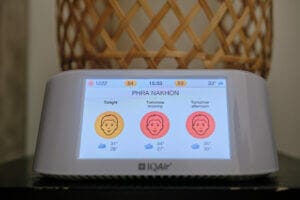
The second screen is the one in the image above. This screen shows the air quality forecast from the connected outdoor air quality monitor, not the AirVisual device itself. Despite showing three icons, the monitor only shows the forecast for the next 24 hours, as the first icon is for ‘tonight’ (if seen in the morning), while the next two are for the air quality tomorrow morning and evening, respectively. The device also shows the high and low temperatures for those periods.
The next screen is like an alarm clock, showing the time in big, bold letters. On this screen, you will also see some icons and tips which indicate what actions you should take based on the indoor and outdoor air quality. This is a very nice addition for anyone not particularly aware of air quality, as the device tells you the exact steps you should take. If your CO2 indoors is high and the air quality outside is good, it will tell you to open a window. If the indoor and outdoor air quality is poor, it will tell you to use an air purifier. I am a fan of this simple, actionable approach.
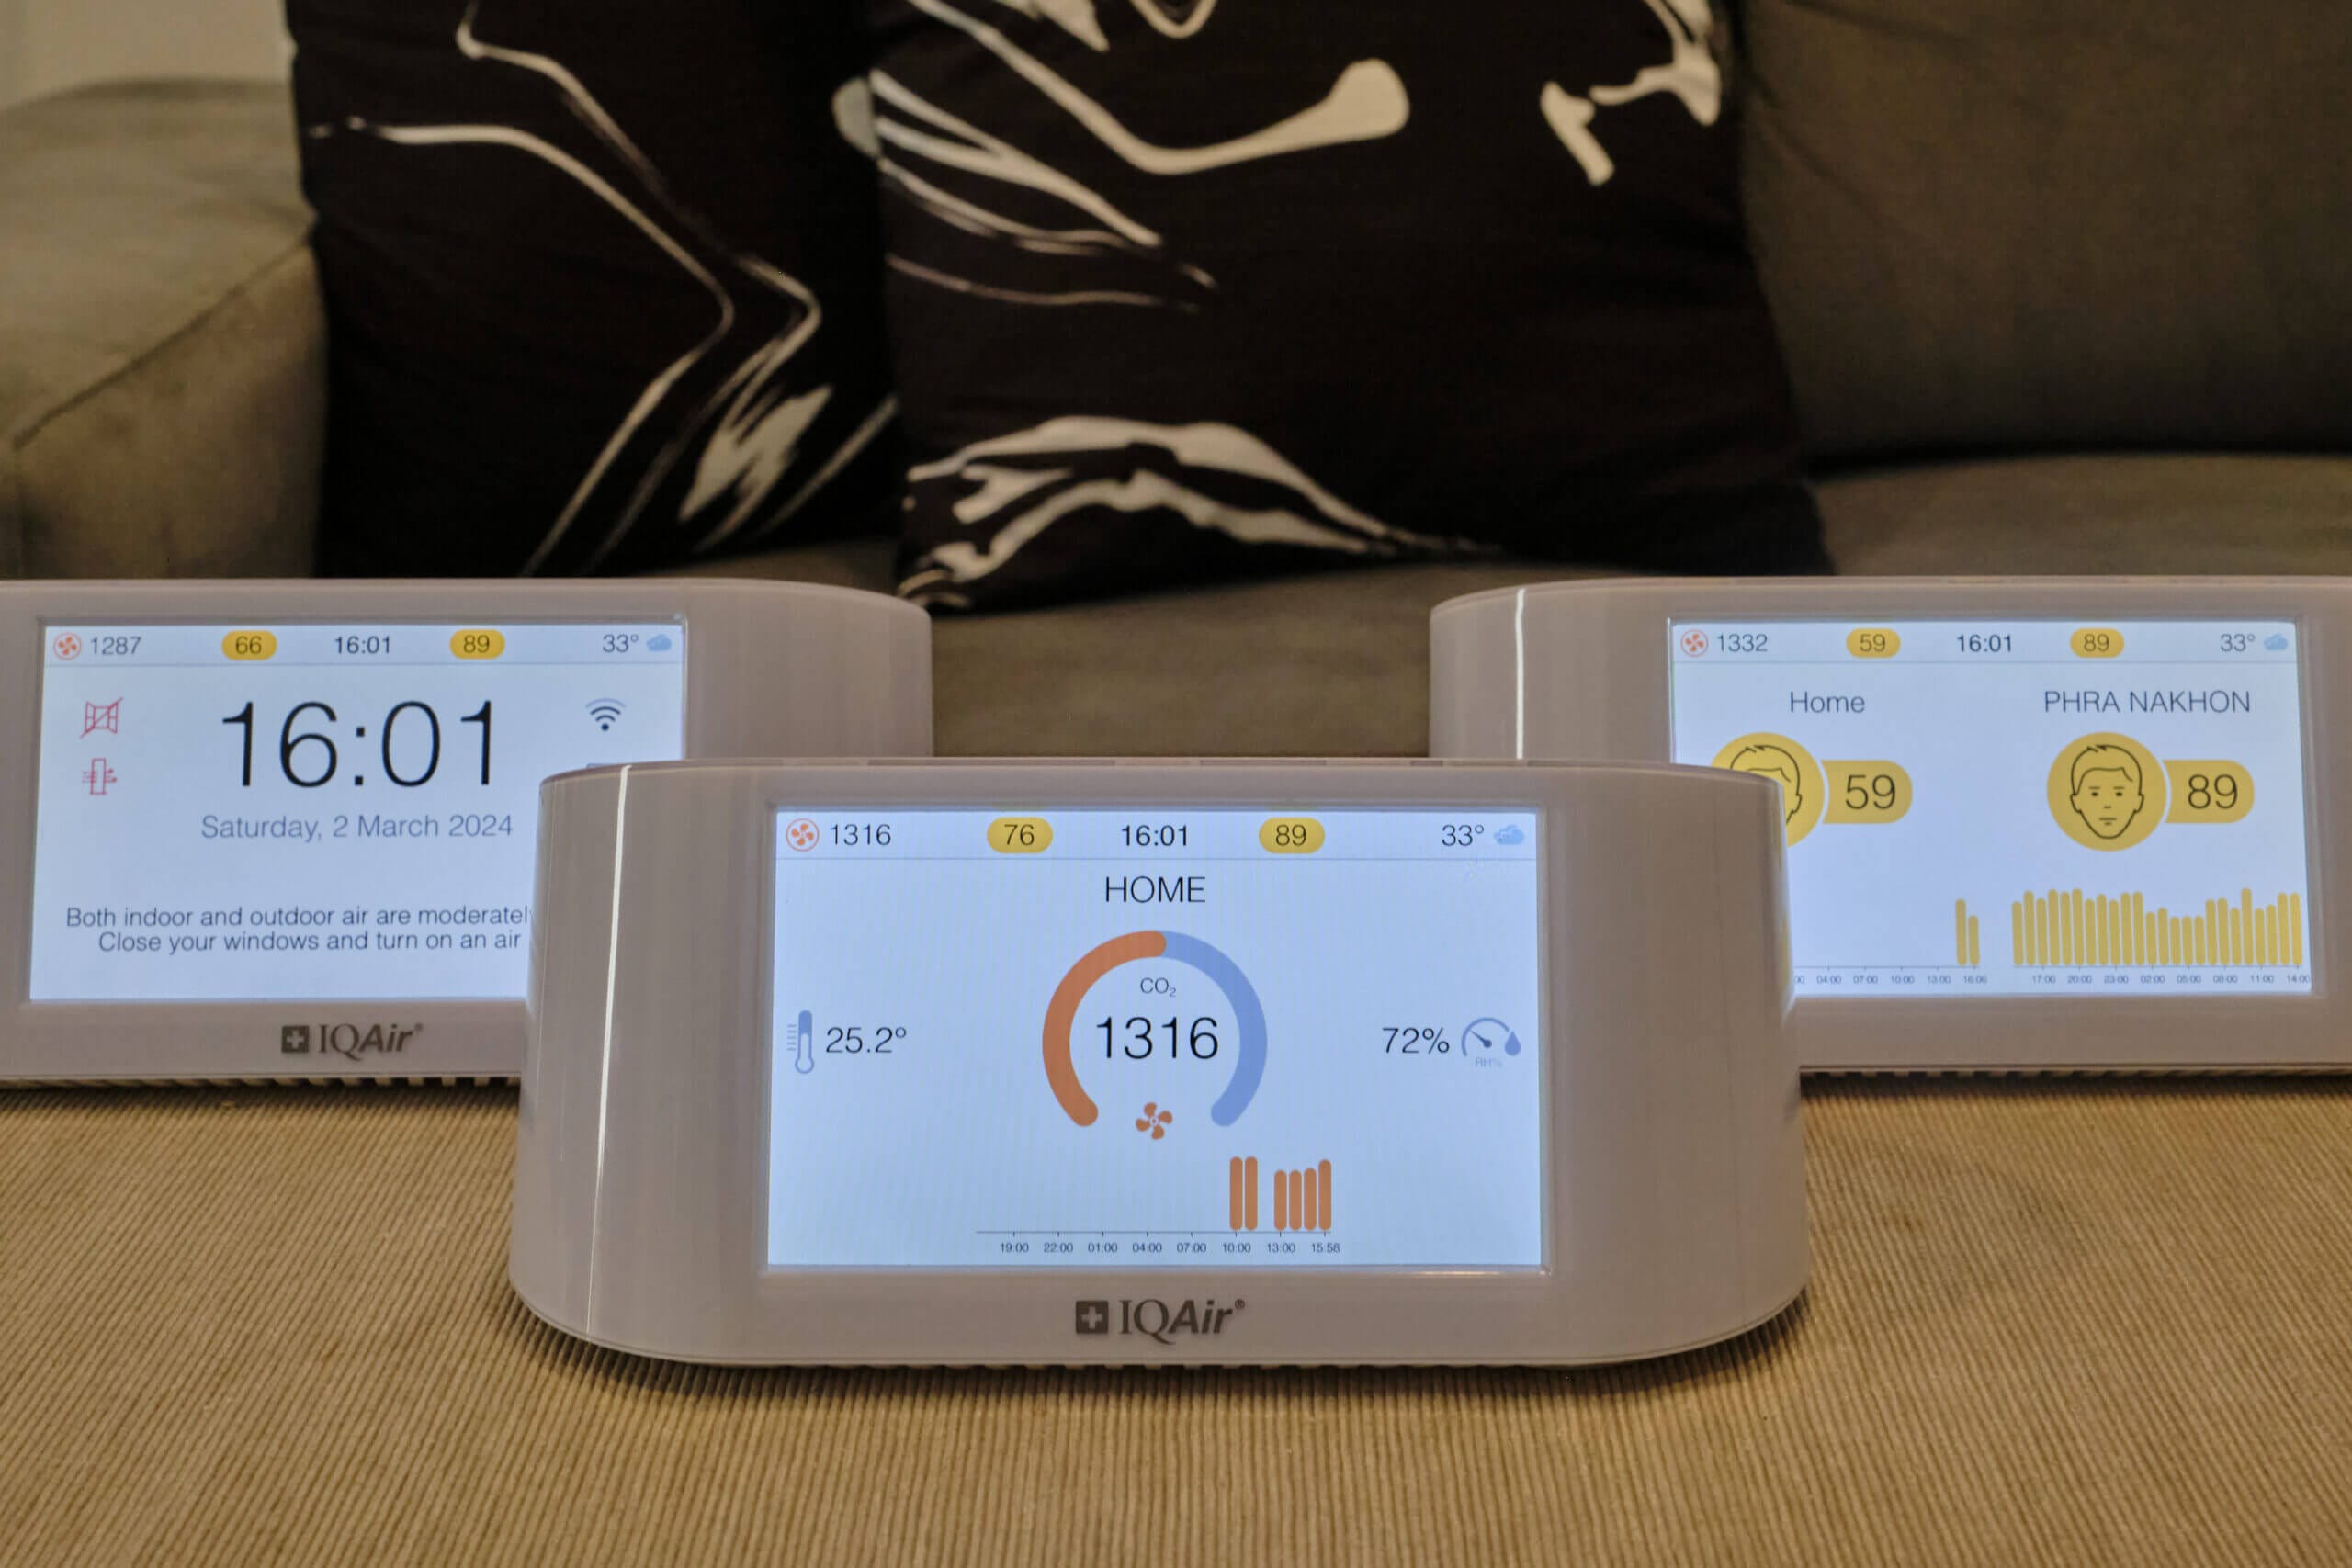
The final screen shows the remaining indoor data: temperature, CO2, and relative humidity, which are all monitored on the device itself. This screen is essentially your all-around indoor air quality update (except for PM2.5, shown on the next screen).
It’s worth mentioning that the most important data is visible no matter what screen is currently being displayed. On the notification bar at the top of the screen, you can see the CO2 concentration on the left, the temperature (outdoors) on the right, and the indoor PM2.5 concentration and the outdoor PM2.5 concentration on either side of the current time in the centre of the bar. I appreciate having this information on hand, as waiting for the screens to cycle until you get the information you want is no fun.
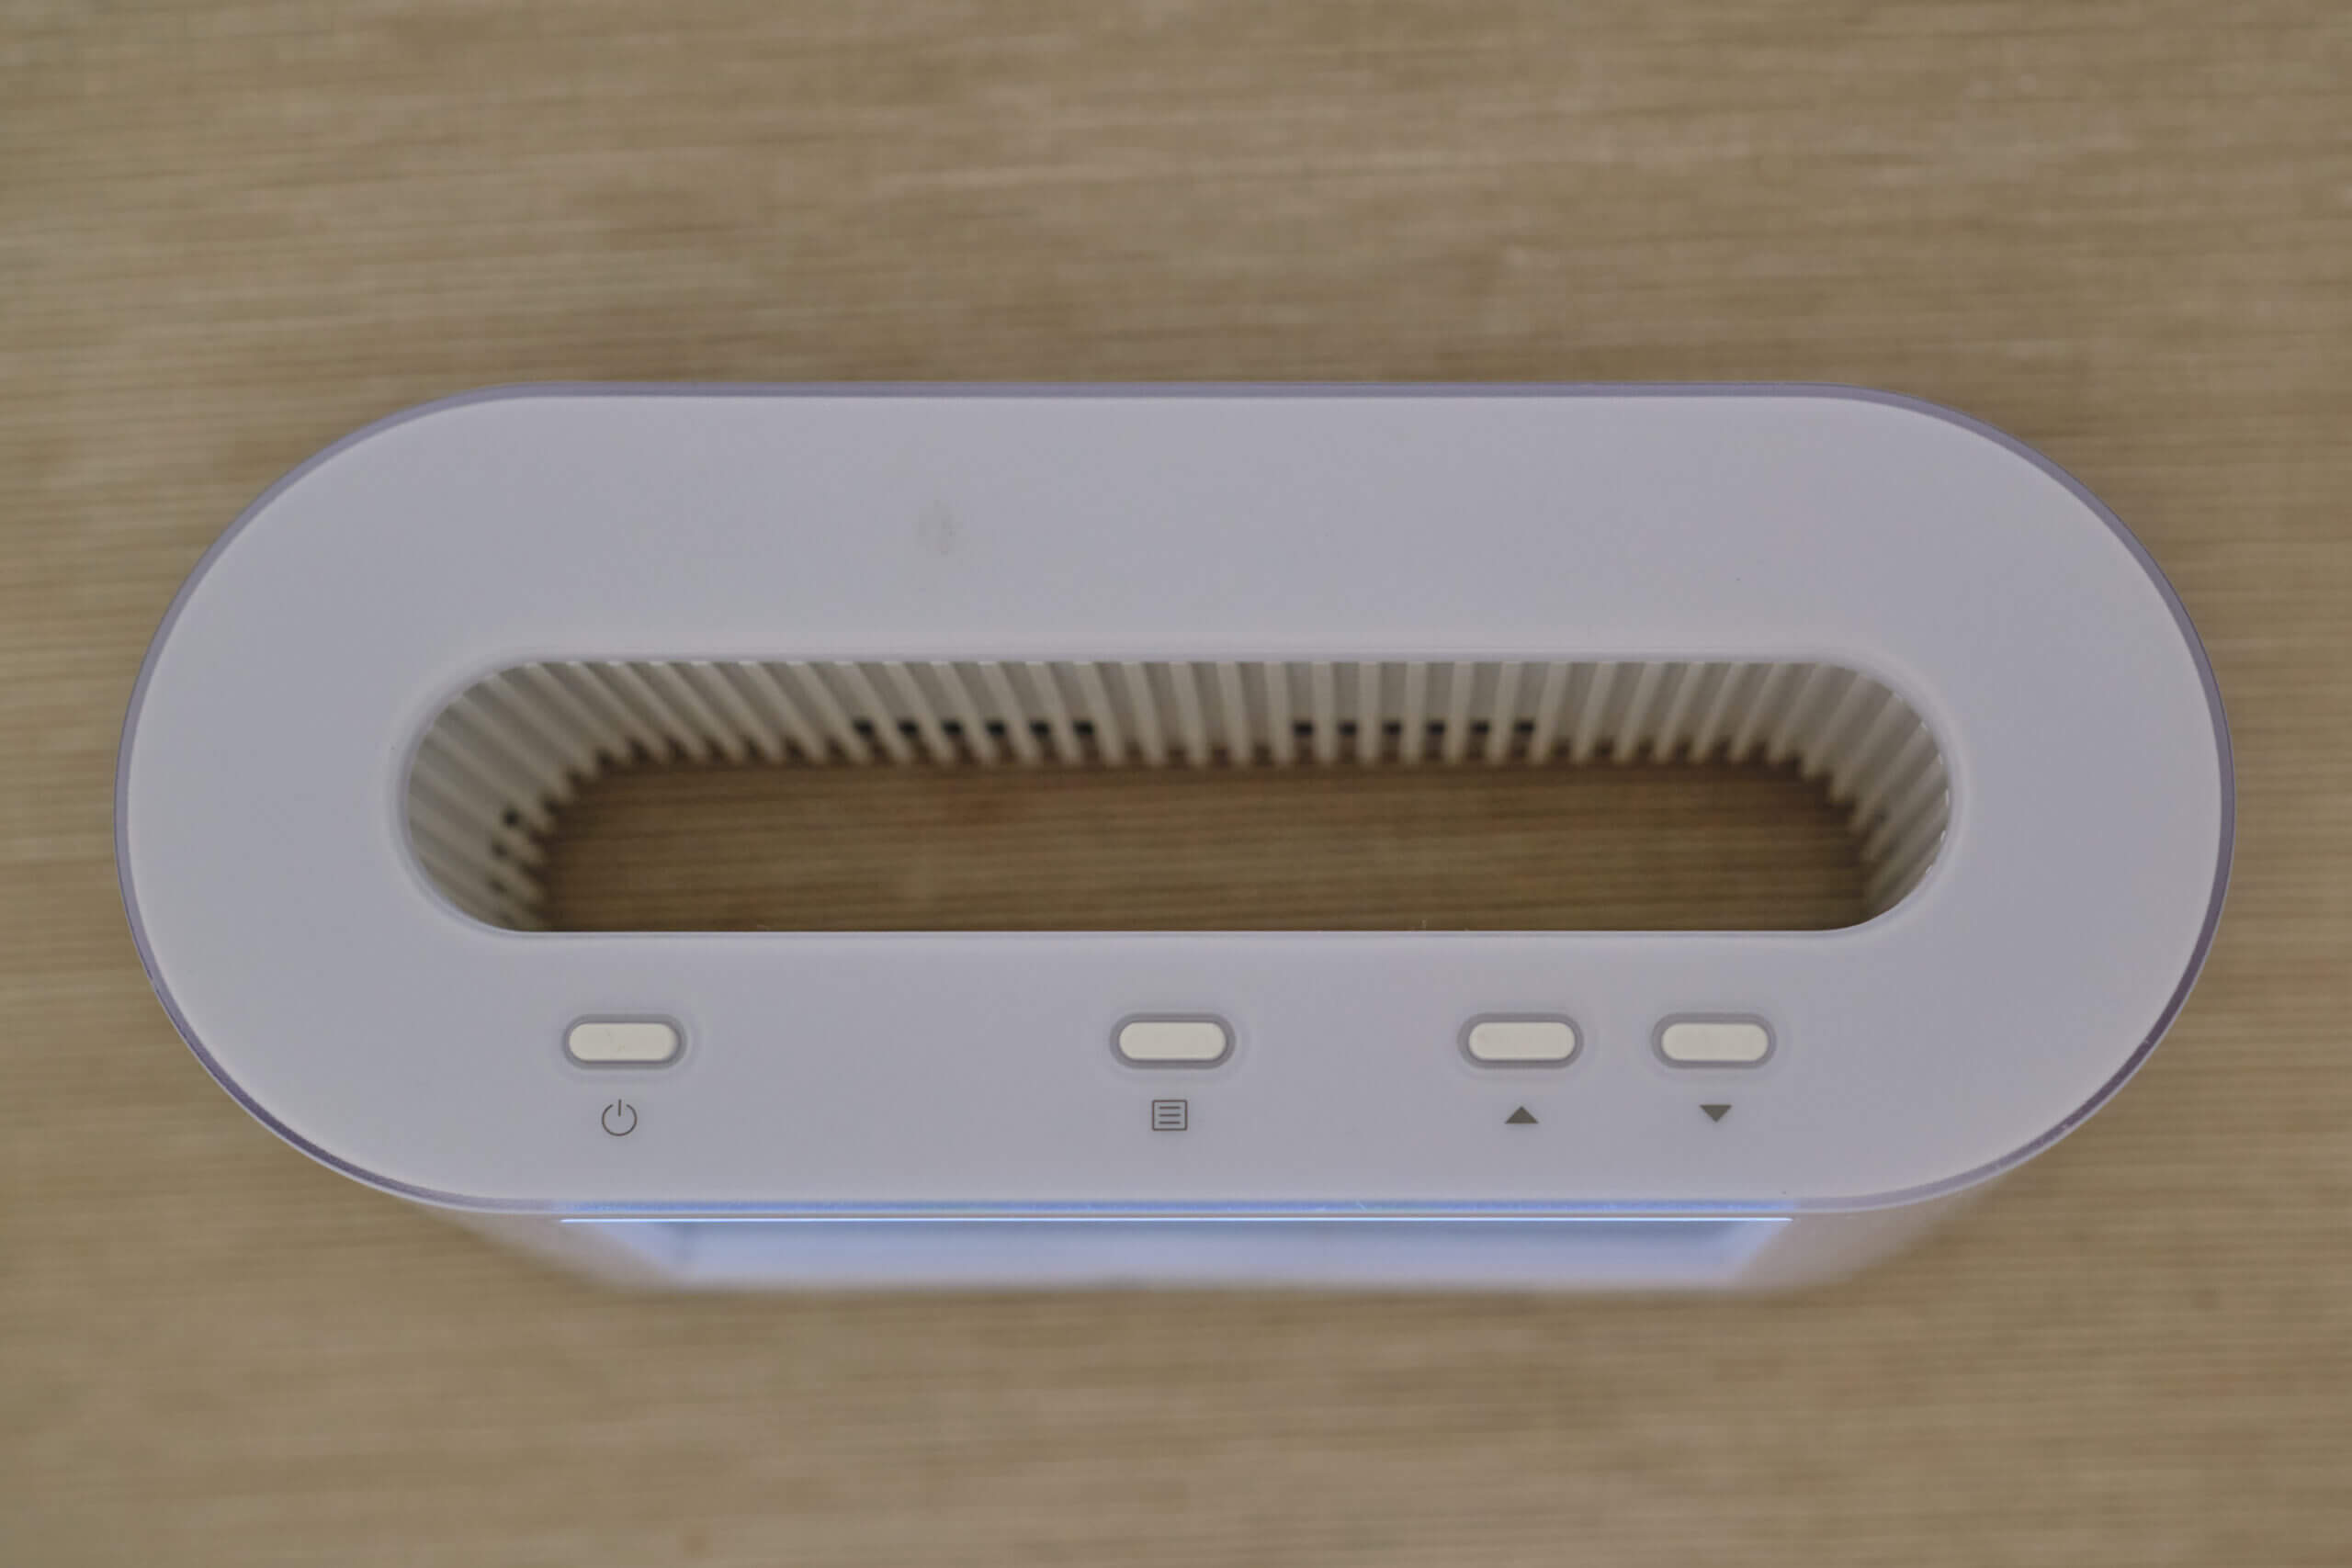
You will need to use the four buttons on top of the device to interact with it. Unfortunately, it’s not a touchscreen, and I’m slightly disappointed because the screen on this device is large and would easily be useable as a touchscreen. It’s also not unrealistic to expect that at the price point of the AirVisual Pro, the Qingping Air Quality Monitor is around 1/3 the price of the Pro and has a fantastic touch screen. Again, it feels like IQAir designed the AirVisual Pro back in the days of the AirVisual Node and never felt the need to update it.
These buttons work well, and I had no issues changing the device’s settings with them. However, it’s just a bit disappointing to see this relatively crude control method when much cheaper air quality monitors are far more pleasant to interact with.
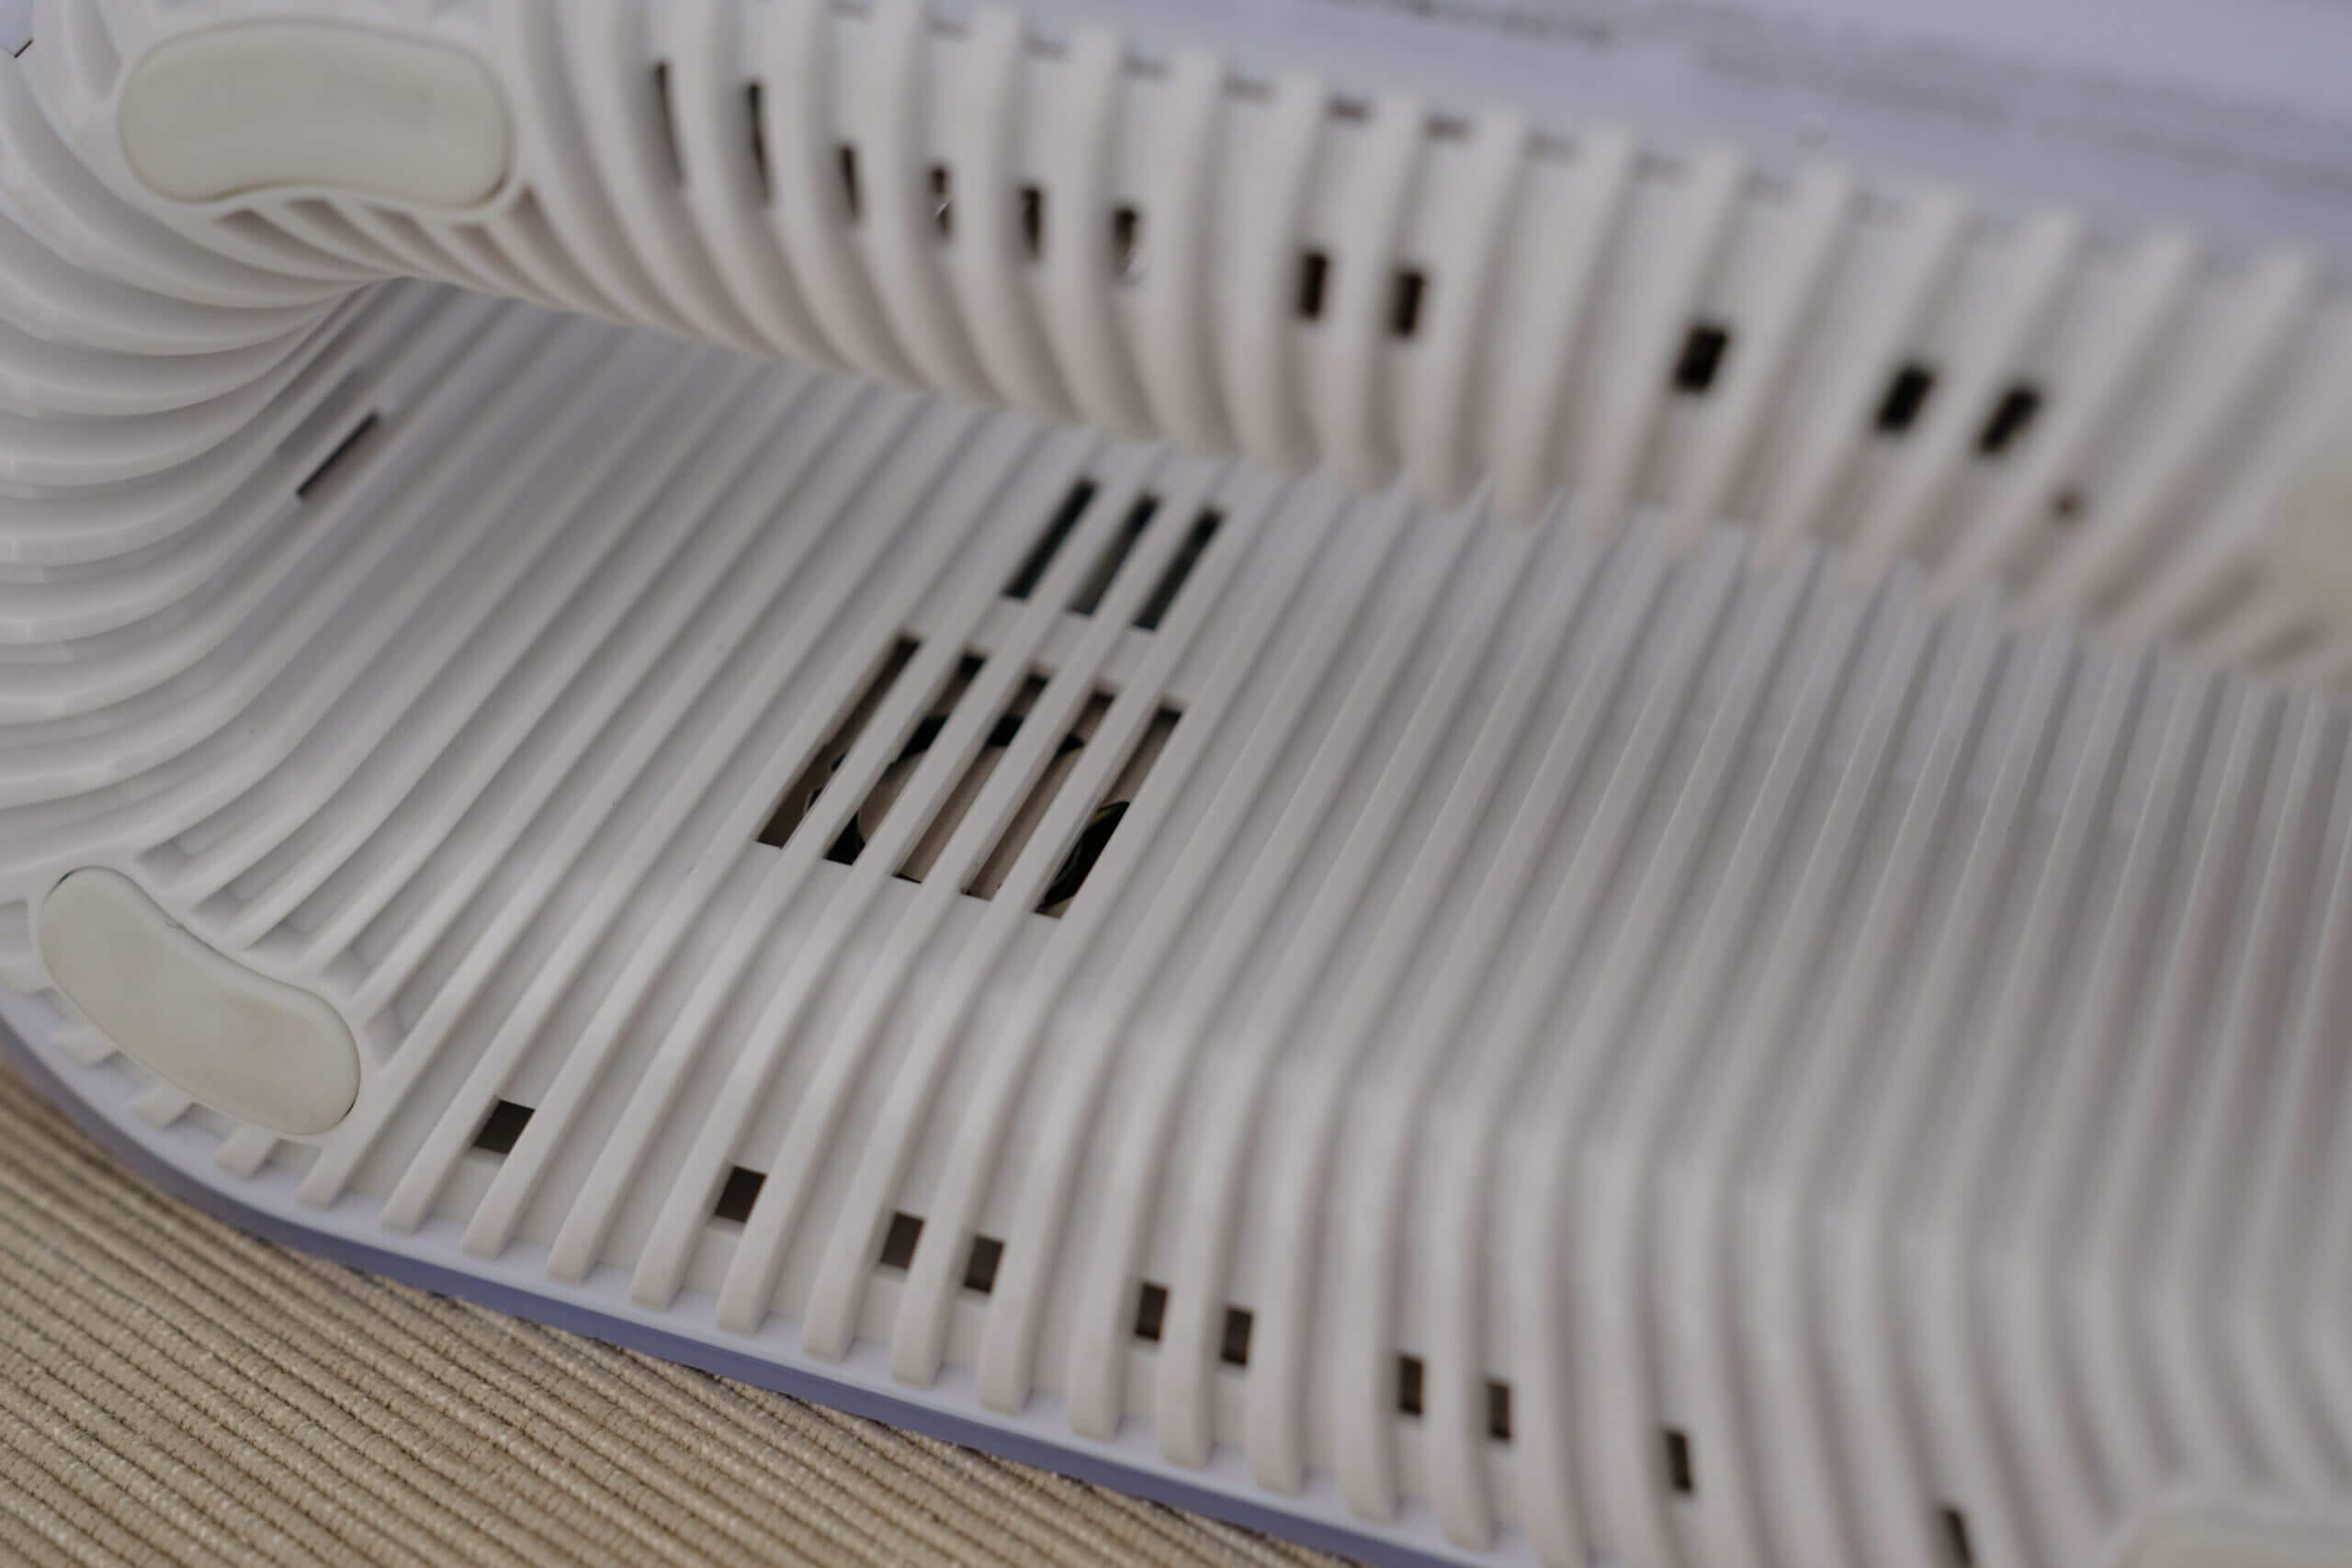
The ring in the centre is quite interesting in terms of the AirVisual Pro’s design. You won’t notice it unless you look closely, but inside this ring is where the sensors are housed. Below, you can see where the PM2.5 sensor is hidden in the inner ring of the device. While I’m not entirely sure why this design decision was made, it could be to ensure the device’s sensors can take in clean air, as all too often, the vent is on the back of a device, which is then placed against a wall. While it does make the device much larger than it needs to be (the monitor is largely empty inside), if it ensures more accurate readings in a wider range of use cases, I’m all for this design choice.
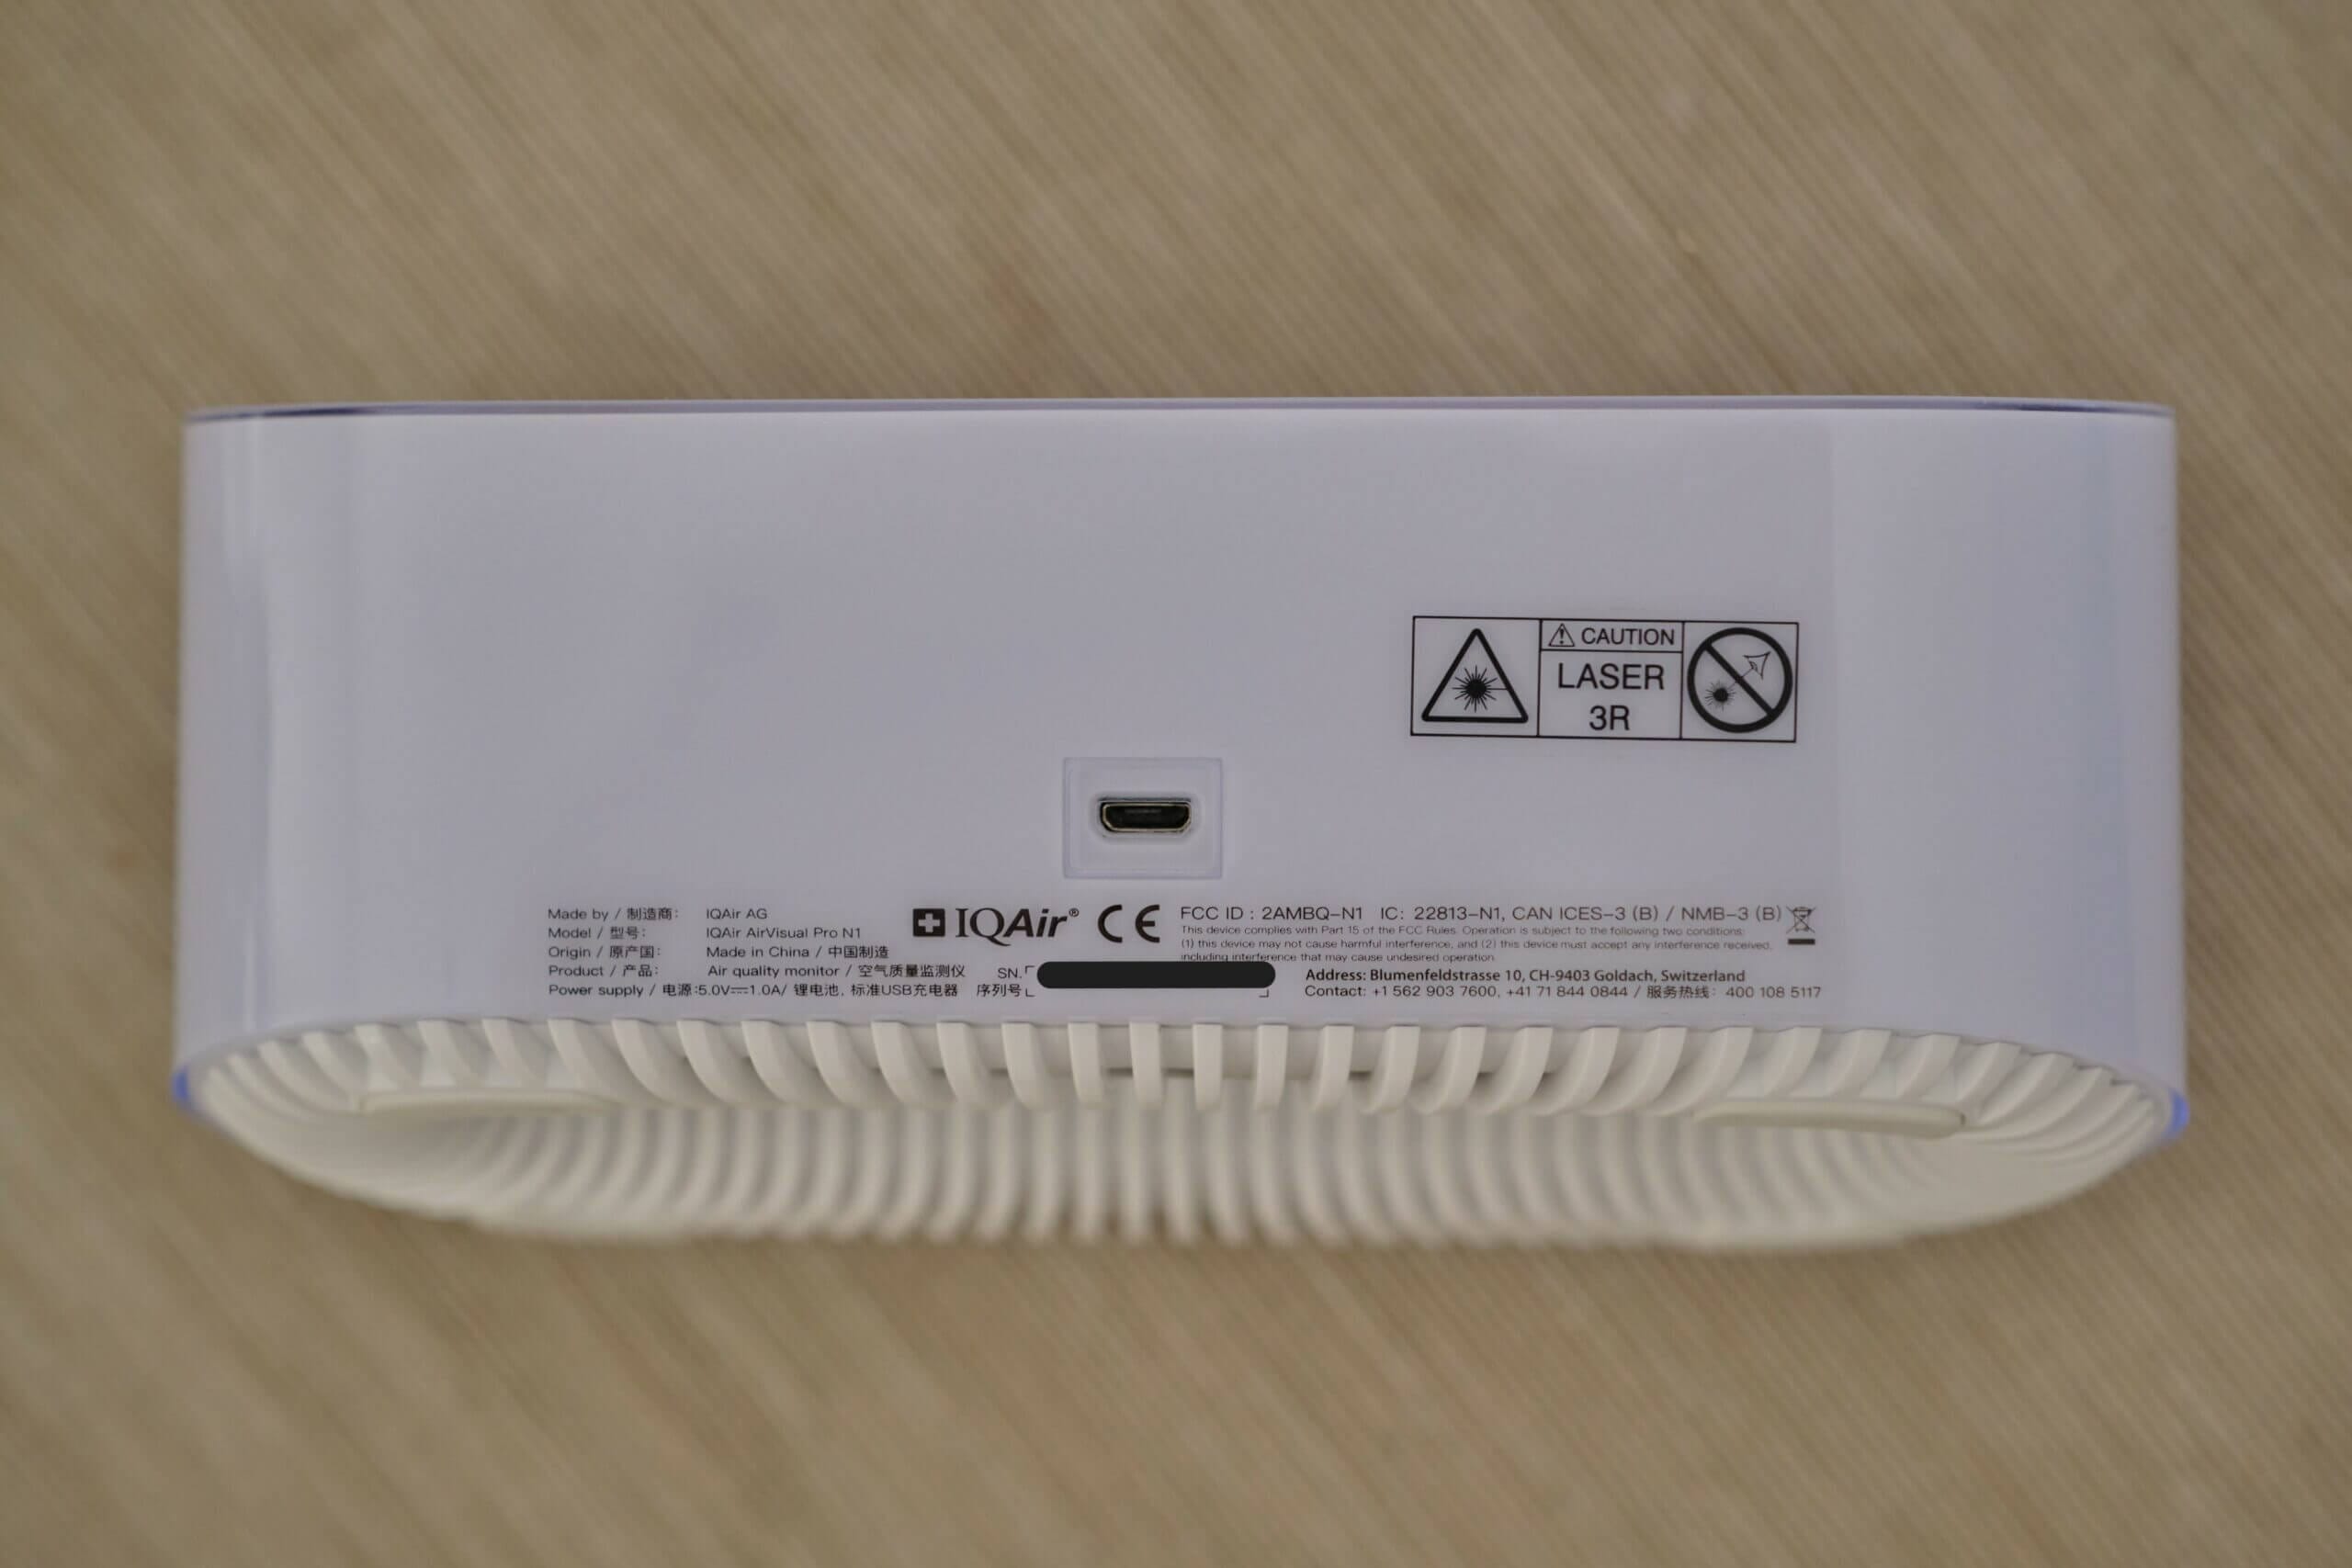
Turning the device around, we can see another element of the device, which is very outdated in 2024 – the micro USB charging port. At the time of the AirVisual Node’s release in 2016, USB Type C was already on many devices – especially more premium devices. USB Type C was even more common when the AirVisual Node became the AirVisual Pro in 2018. In 2024, it’s simply outdated. I don’t even have micro USB cables anymore, and I wish IQAir would update this port because it’s antiquated now.
A feature I do like is the inclusion of an internal battery. While the battery life is only around 4 hours, this is handy as it ensures the device will stay on if there is a power cut. It’s also helpful to test the air quality in different rooms around your house without setting up the USB power cable and adapter in every room. Coupled with this device’s ability to store data locally, you have a monitor that can keep monitoring for a few hours in case of a loss of power and internet.
While it might seem like I’m complaining a lot about this monitor, I feel these points are valid. The AirVisual Pro is one of the most premium air quality monitors on the market, yet it is beaten in many aspects by far cheaper alternatives. That said, I like some features of this device.
One of these is the device’s performance. The AirVisual Pro runs quite a complex operating system for an air quality monitor, and it stores data locally for up to one year – this is by far the largest amount of data stored locally on a monitor that I know about. Despite storing this data and running a complex OS, the device is very responsive and rarely hangs. It’s also never crashed, likely due to the powerful hardware running this monitor.
Overall, I quite like the design of the AirVisual Pro. However, there is no denying that the monitor needs a refresh. For this price in 2024, I would at least like to see a Type C port for charging. Also, with such a large screen, I don’t see why the device hasn’t implemented a touchscreen – it’s certainly possible for the high price this monitor demands. On the software side, it seems like the monitor is trying to be a complete weather station, yet it doesn’t pull any actual weather data for forecasts. This could be done via an update, and I would love to see this monitor become a full weather station that implements air quality.
Connectivity & App
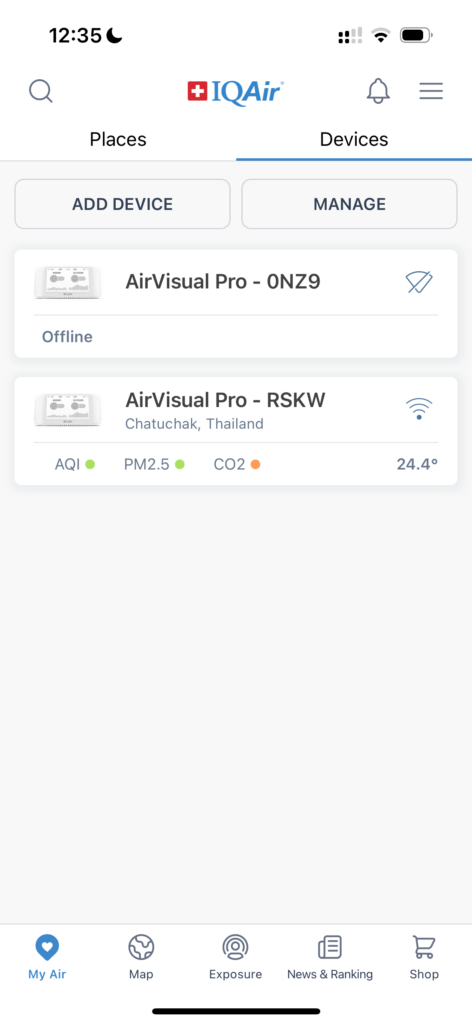
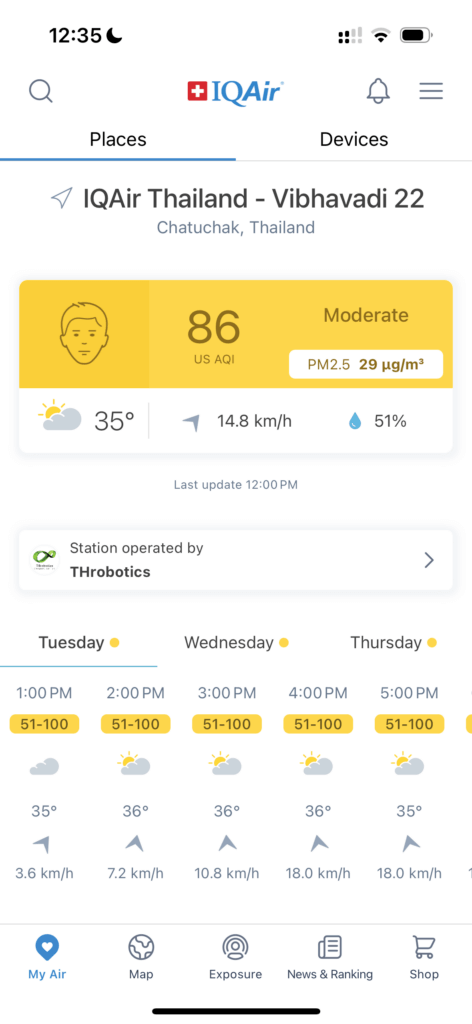
Connectivity is probably the AirVisual Pro’s biggest strength. Why? Well, if you’ve ever used an air quality app, you’re likely already aware of this monitor’s namesake – AirVisual. AirVisual is the most famous air quality app, which many people, such as myself, use daily. Being from the same company, the AirVisual Pro integrates with the AirVisual app, giving you a one-stop location for all the air quality information you need.
But let’s take a step back before we discuss the app. How does the AirVisual Pro connect in the first place? It connects via 2.4 GHz WiFi, which can easily be set up on the AirVisual app. To do this, you will first want to power on your AirVisual Pro and download the AirVisual app on your phone. From there, open the app, go to ‘My Air’ and swipe right to the ‘Devices’ screen. Tap ‘Add Device’ and select the AirVisual Pro. You will then be asked to enter a serial number, which can be found on the back of your monitor (it will be labelled S/N).
After this step, you must put the device in pairing mode and connect to its local WiFi. This is all explained within the app, and the process is quite straightforward. Once you’ve connected to the device’s WiFi network, return to the AirVisual app and enter your local WiFi network’s password – this will connect the monitor to your network and is now ready to be used! After a few minutes, you should see the device under the ‘Devices’ tab, and you can tap on it to get further information.
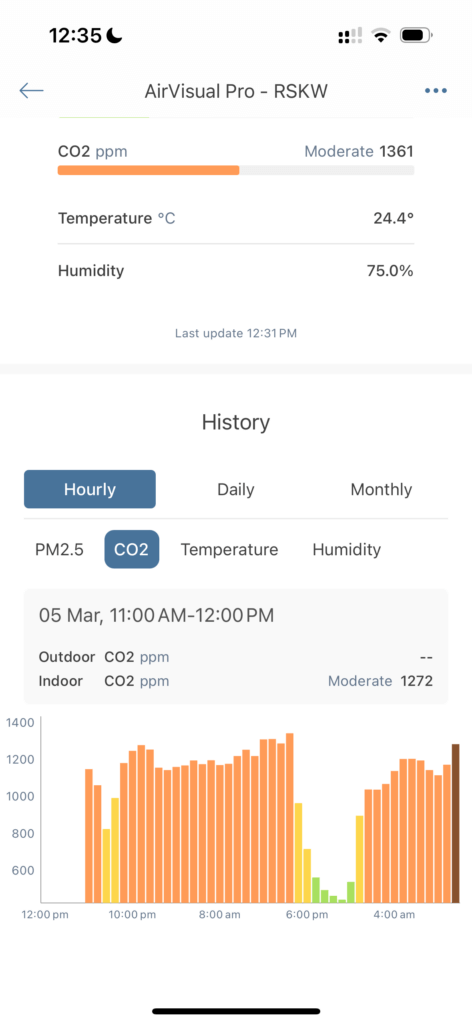
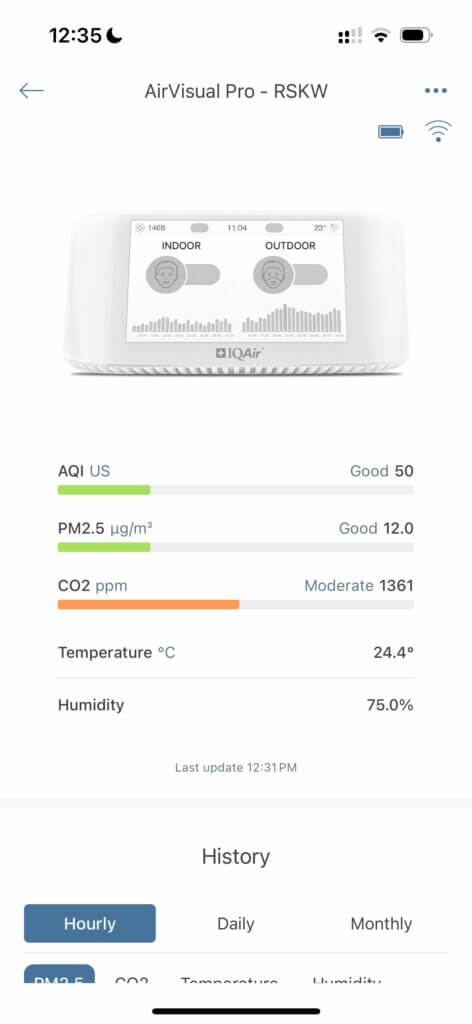
By selecting the device from this tab, you will be able to get all of the current information from its sensors and a historical graph showing trends in air quality over the past day, week, and month. This view helps identify air quality trends, but you can’t manipulate the graphs, meaning you won’t be able to zoom in to see more information. Unfortunately, you also can’t export data through the app. Luckily, however, there is another way to do this, and we will discuss that soon.
Through the app, you can also change a range of settings that aren’t available on the device (and a few that are). From this menu, you can reset the CO2 sensor calibration, change display settings (such as units, timezone, etc), change the WiFi network, and change the outdoor location shown on your AirVisual Pro. You can also publish your AirVisual Pro data to the AirVisual platform through this menu if you want. Still, again, I don’t recommend using this monitor outdoors – get the outdoor monitor if you want to publish data.
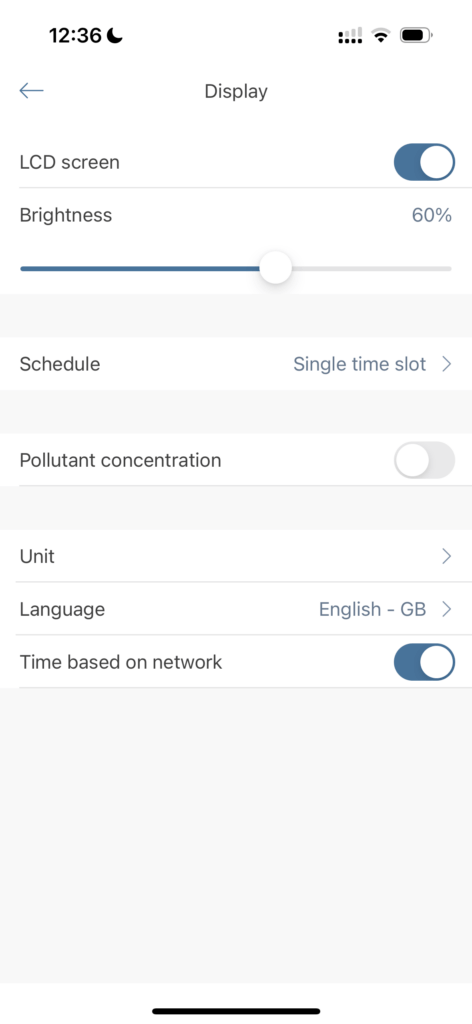
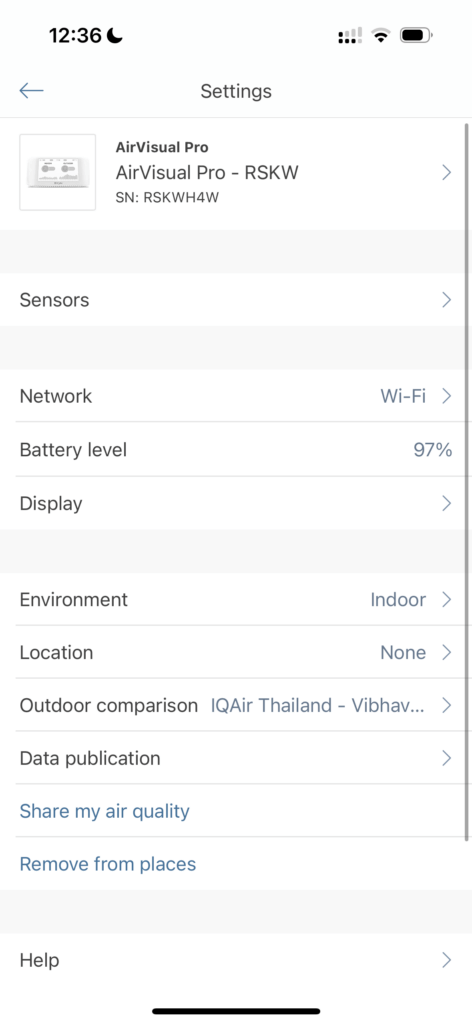
Settings applied through the app take a while to be reflected on the monitor, and even something as simple as changing the screen brightness can take a minute or two to be applied on the monitor. This isn’t a big deal at all, but I would like to have a quick and easy way to adjust the brightness on the monitor. Another setting worth noting is the option to show pollutant concentration (instead of AQI). I always enable this as I much prefer to see the PM2.5 concentration than the AQI.
Overall, the app is perhaps the biggest strength of the AirVisual Pro. Even without your own air quality monitor, the AirVisual app is already one of the best air quality apps on the App Store and Play Store. Therefore, it is no surprise that with your own monitor (or monitors) integrated into the app, it becomes an even better experience. However, I also alluded to the fact that there is another way to access the AirVisual – that is, through Samba on Windows or Mac.

To do this, you must go to the connectivity settings on the AirVisual Pro and select ‘Access Pro Data’. Here, you will be given an address, username, and password to access the data on the AirVisual Pro. This is incredibly useful for two reasons – first, you can access the .txt file with all the device’s historical data, convert it to a spreadsheet, graph all the information, and identify trends.
Even better, you can do this without an internet connection! While the device will need to be connected to WiFi, it doesn’t need to be a WiFi network with an internet connection. Of course, your laptop or computer will also need to be connected to the same network. While most people probably won’t need this feature outside of potentially importing the data into Excel, being able to connect without the internet means this monitor is suited well to some more niche uses.
Overall, the AirVisual Pro’s connectivity is fantastic. Whether through the app or through Samba, the device provides a wealth of information, and no major features have been overlooked. While I do wish data could also be exported through the app, this isn’t a big deal, as it’s still possible through a Samba connection.
Pricing & Lifespan
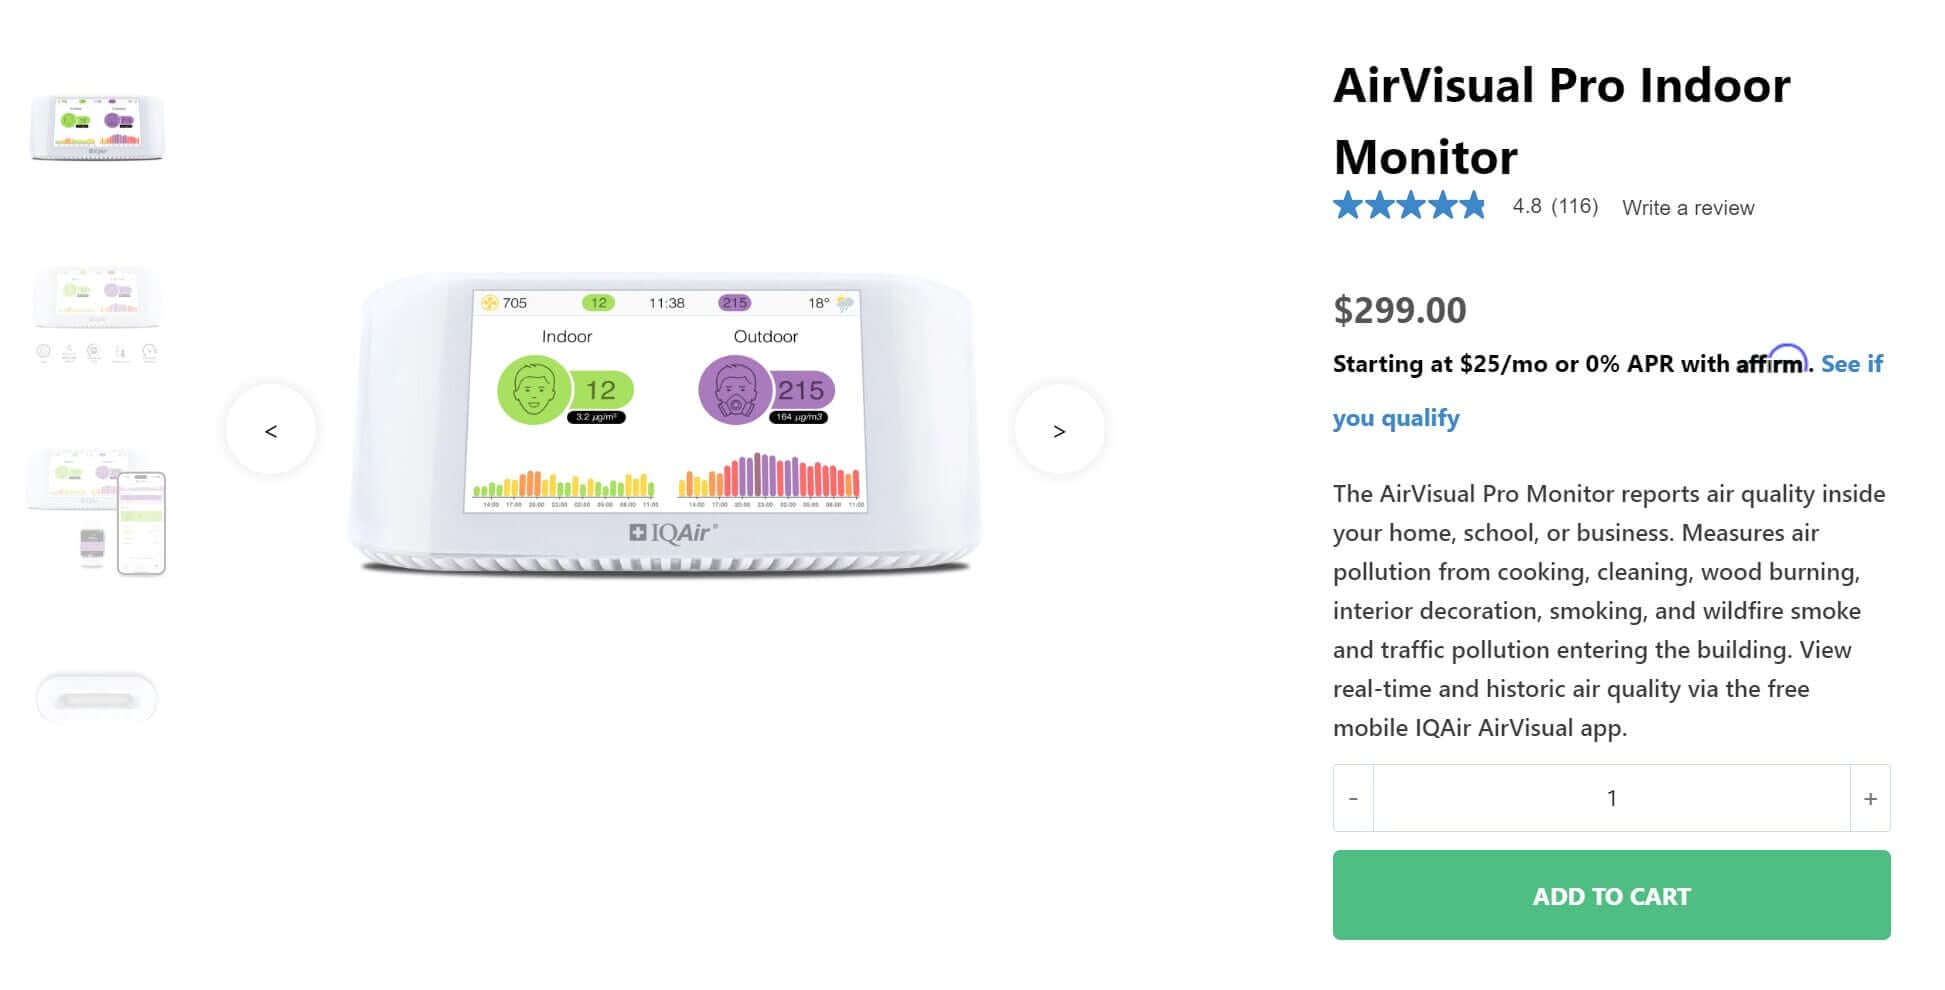
Pricing on the /us store.
As I mentioned in the introduction, I’ve had my eyes on the AirVisual Pro for a long time. However, it’s always been a pricey monitor, and that’s always deterred me from testing these monitors. For some reason, AirVisual uses two different prices – $299 and $389. On iqair/us, the monitor is currently $299; however, if you visit the global website and shop in USD, the same monitor is $389.
I do not know why this is, as the devices seem identical. It’s worth noting that these prices exclude shipping, so that should not be playing a role in the pricing of either monitor. Either way, this is a very significant discrepancy and at $389, I don’t think this monitor is worth it unless you are really a fan of the AirVisual app because even well-rounded monitors such as uHoo are almost $100 cheaper.
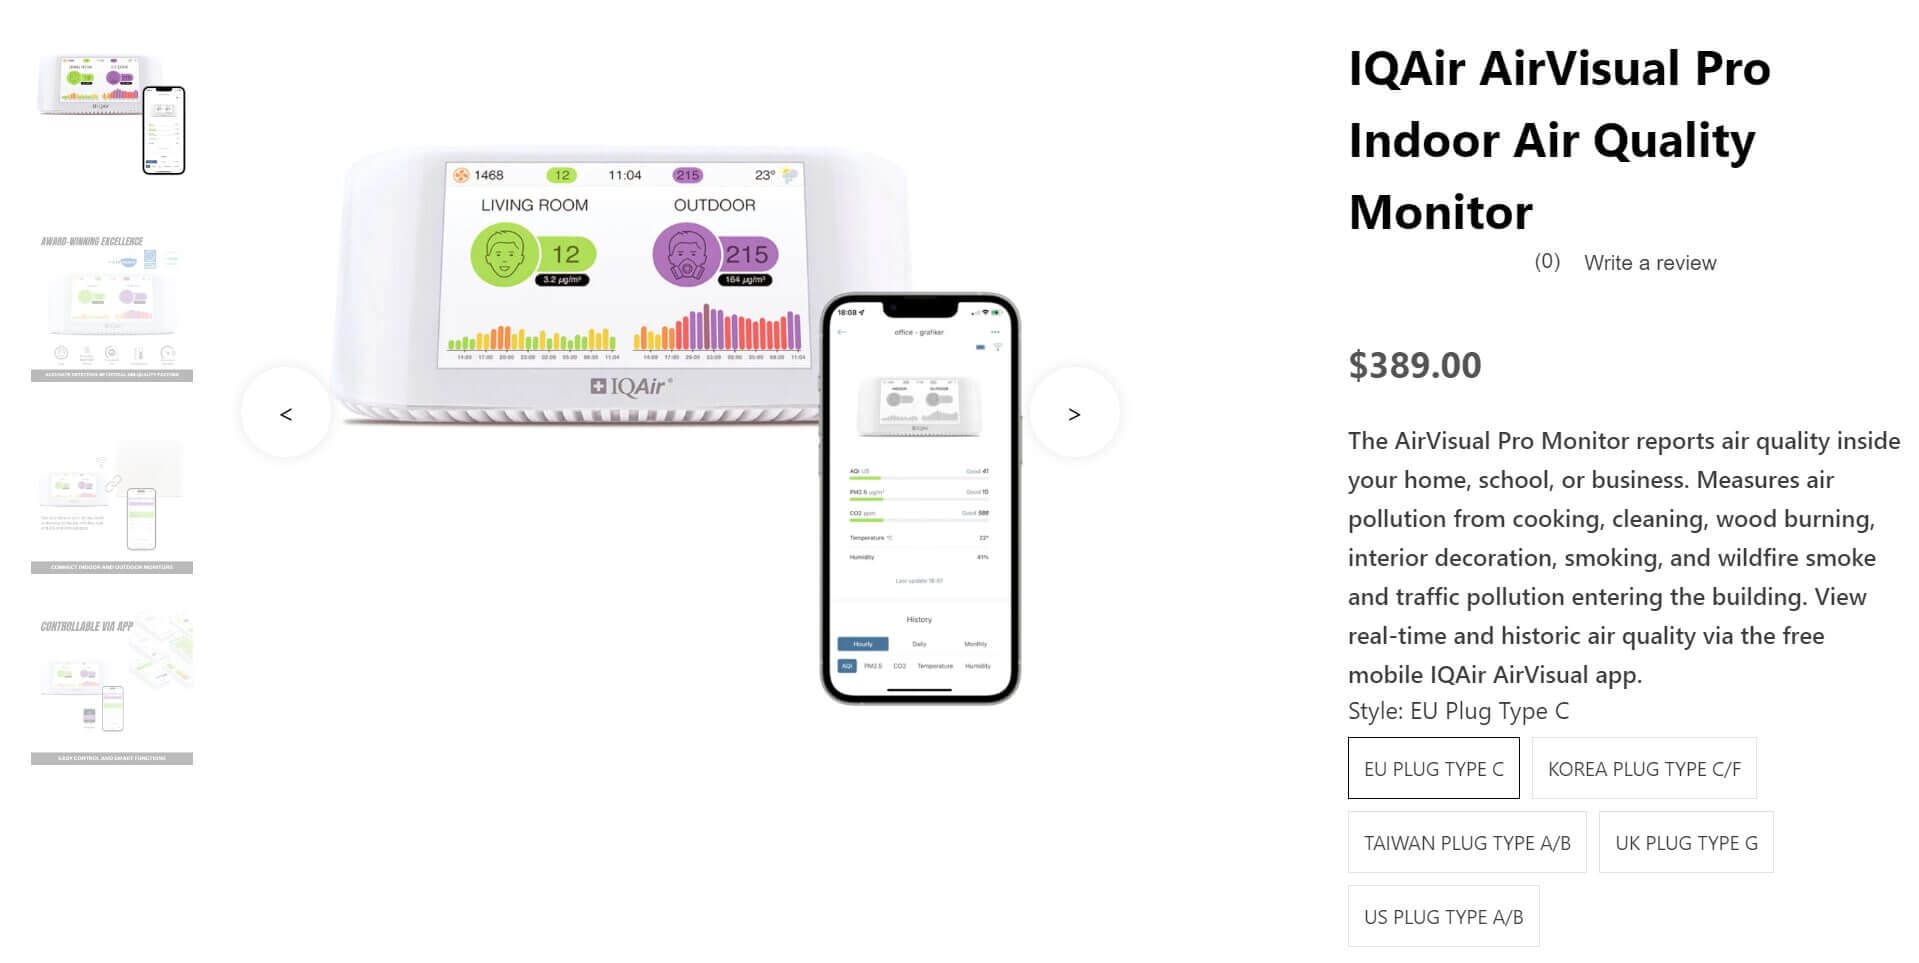
If you’re on the fence about this monitor, the price is probably the determining factor, and I think it will push a lot of people towards other monitors. While the U.S. price of $299 is in line with other high-end monitors, the international price of almost $400 is far less common and hardware-wise, the AirVisual Pro is behind many similarly priced and even significantly cheaper monitors.
When it comes to lifespan, from my experience, you should be able to get around four or five years from these devices – if you clean the sensor, you might be able to get longer. Unfortunately, since the sensor is unique to IQAir, you won’t be able to replace it if there are any issues – this is very starkly different from the open-source AirGradient ONE.
Conclusion – Is the AirVisual Pro Worth it?
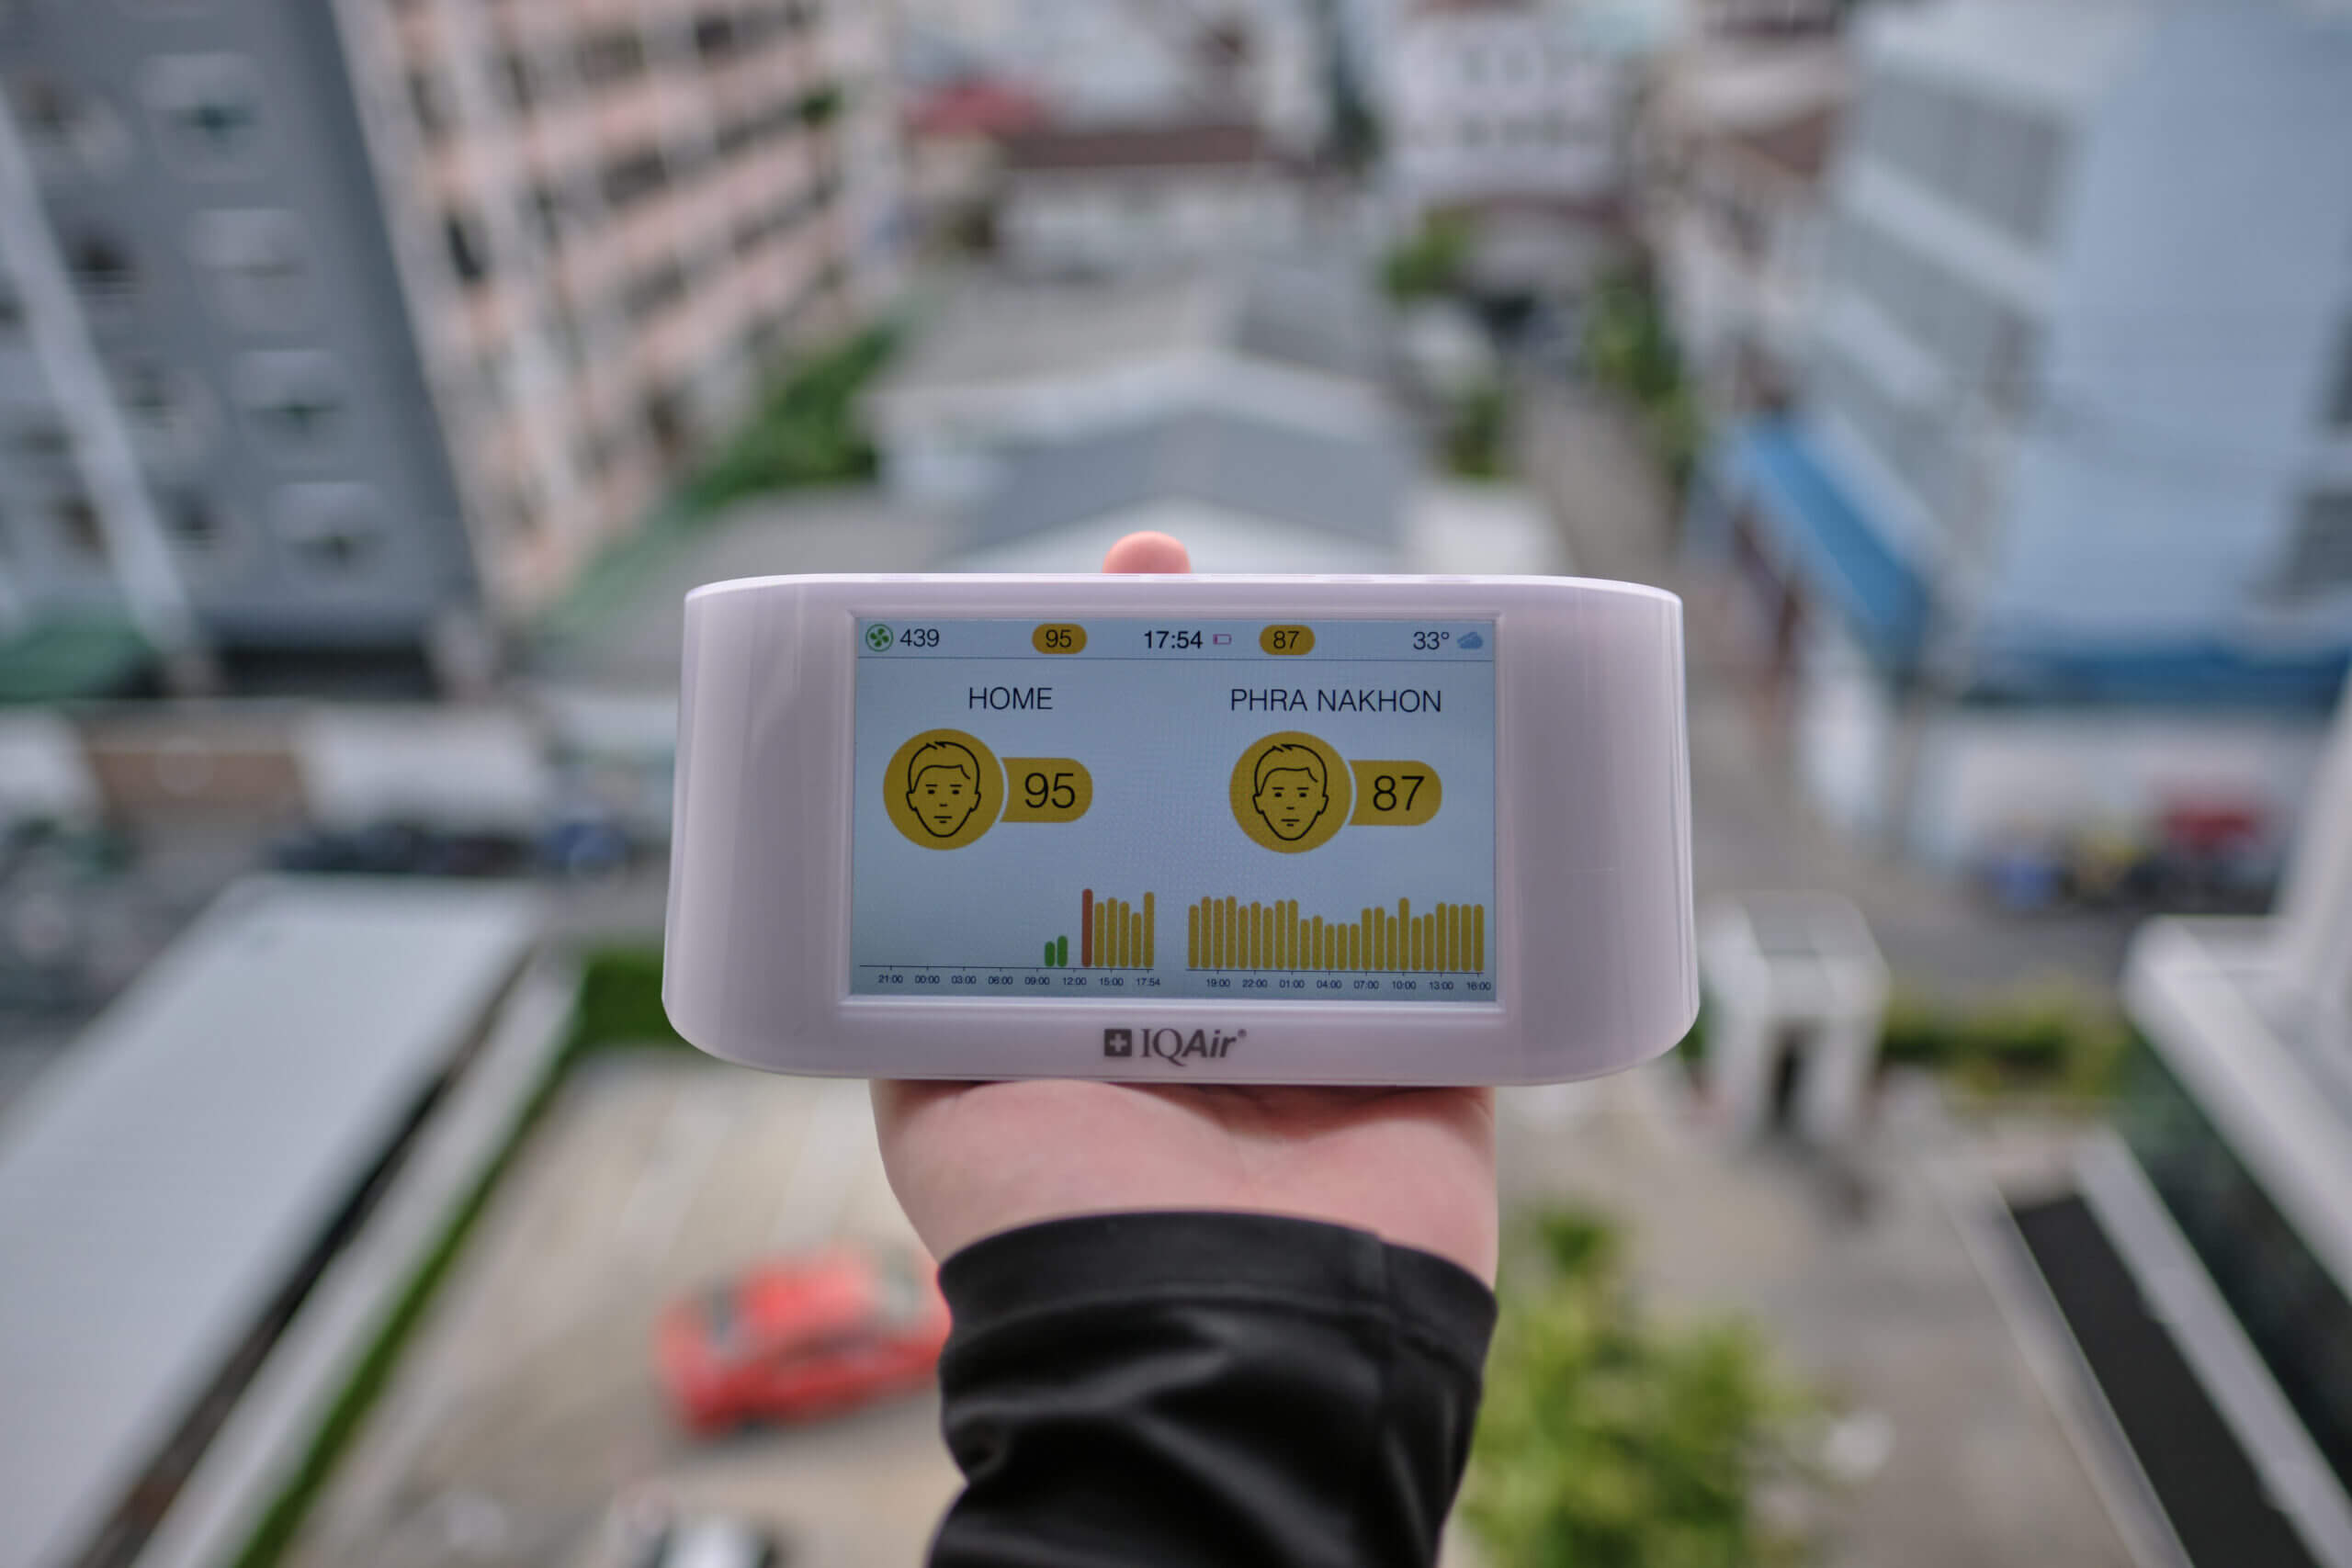
So, where does that leave me when it comes to my overall thoughts on the device after using three of them for a while? Well, I’m torn. I want to like this device, but there are two main issues: it’s outdated and so expensive in 2024.
According to the AQMD report, the PM2.5 sensor in the AirVisual Pro is accurate but far from best-in-class as < $150 devices beat it. On top of this, it still uses the outdated Micro-USB standard, and it lacks modern features like a touchscreen. This points to the fact that IQAir hasn’t thought it essential to update the AirVisual monitor since its accuracy was updated in 2018. I could be wrong, and maybe some changes have been made internally, but from a user’s point of view, this is the same monitor you could buy in 2018. While it may have been a good deal then (it was also $269), there is far more competition now.
That leads me to the price – at $389, this monitor is not worth it. You can get the far more complete AirGradient ONE or uHoo air quality monitors for significantly less. At $299, you might want to consider the monitor if you love the AirVisual app or are already invested in IQAir products. However, I would still recommend a more complete monitor such as the uHoo, which also costs $299 as it monitors far more pollutants.
Don’t get me wrong, the AirVisual Pro does have some very big strengths, and I don’t dislike the monitor. The app and Samba connectivity are fantastic. I love the concept of a ‘weather station’ that implements air quality data, and seeing both outdoor and indoor air quality data on one device is great. However, these features are hard to sell at $299, and $389 is just too expensive.
If you can find the AirVisual Pro on sale, depending on the price, it could be a very compelling option. However, I would like to see this monitor updated for 2024 with all the new features and improved accuracy we’ve become accustomed to over the past few years.
AirVisual Pro FAQ
What Does the AirVisual Pro Monitor?
The AirVisual Pro monitors PM2.5, carbon dioxide, temperature and relative humidity.
What Sensors Does the AirVisual Pro Use?
It uses an AVPM25b PM2.5 sensor co-developed by IQAir. It also uses a Senseair S8 for carbon dioxide.
Does the AirVisual Pro Have Connectivity?
Yes! It connects via WiFi and can be accessed through a local network or the AirVisual app.
What Are Some Alternatives to the AirVisual Pro?
There are many alternatives. Check out this post on the best air quality monitors for more information.
Is AirVisual Pro the Same as the AirVisual App?
No. The AirVisual Pro is an indoor air quality monitor. The AirVisual app relies on monitoring stations for outdoor air pollution data.
Is the Airvisual Pro Worth It?
It depends. While you can get much cheaper monitors with similar or better accuracy, none are integrated with IQAir’s platform, and the ease of using this monitor makes it appealing for some.
Have Questions or Comments?
Join the discussion on the BreatheSafeAir Community Forum. Ask any questions you have about air quality or adjacent topics and get quick answers!
AirVisual Pro
The IQAir AirVisual Pro is perhaps the most famous air quality monitor on the market. However, is it deserving of its reputation? In this post, we will investigate.
Product Brand: IQAir
2.5
Pros
- Very accurate CO2 measurements
- Accurate PM2.5 measurements (but not best-in-class)
- Great integration with AirVisual app
- Easy-to-read display
- Shows both indoor and outdoor air quality
- Internal battery to cover power cuts
- Internal storage for up to one year
- Local connectivity without internet
Cons
- Very expensive
- Old technology (old sensor, micro-USB and no touchscreen)
- There are more accurate monitors for less than half the price
