Over the past few years, we’ve seen inexpensive air quality monitors not only become available but also widely accessible. While this is primarily driven by increasing awareness around indoor air quality and its dangers, it’s also partly due to many large brands getting on board and manufacturing their own air quality products.
One of these brands is IKEA. Over the past couple of years, it has created two inexpensive air quality monitors, which are now on sale in all of its stores worldwide. Not only is it great to see new air quality monitor options, but it’s fantastic to see such a large store stocking these products and bringing more awareness to them.
The two IKEA air quality models – the Vindriktning and Vindstyrka, come in at only $15.99 and $49.99, respectively, making them some of the cheapest air quality monitors on the market. However, how do they compare to other, pricier alternatives? Furthermore, how can they even be accurate at these price points?
While I will leave the Vindriktning to another review, today, I want to delve into the Vindstyrka (the $49.99 option) and see what it has to offer. If this monitor is capable, it will be a very tempting deal – especially considering the price. But will it hold up, or is it better to save up and invest in a more expensive air quality monitor?
Regardless of how well these devices perform, it’s fantastic that we are beginning to see large stores such as IKEA and Amazon now creating and selling their own air-quality products. This shows a paradigm shift towards how we treat indoor air quality and how we’re quickly seeing increased awareness around the matter.
Subscribe to BreatheSafeAir
We spend 90% of our time indoors. Make sure the air you breathe indoors is healthy.
This post contains affiliate links. For more information, please refer to my affiliate disclaimer. I was sent a product for review, but the article is not sponsored. All opinions expressed in this post are my honest thoughts. I only recommend products that I genuinely believe in.
Information on this blog is for informational purposes only. Readers are encouraged to confirm the information herein with other sources. Furthermore, this information is not intended to replace medical advice from professionals. This website assumes no responsibility for the accuracy of the information, and information is subject to change without notice. Devices mentioned on this website are not medical devices and do not guarantee protection.
Accuracy & Sensor
The most important aspect of any air quality sensor is, of course, the accuracy. Since you will be relying on this device to keep you informed about the quality of your indoor air (and any pollutants that may have entered), it’s of paramount importance that you can trust your device.
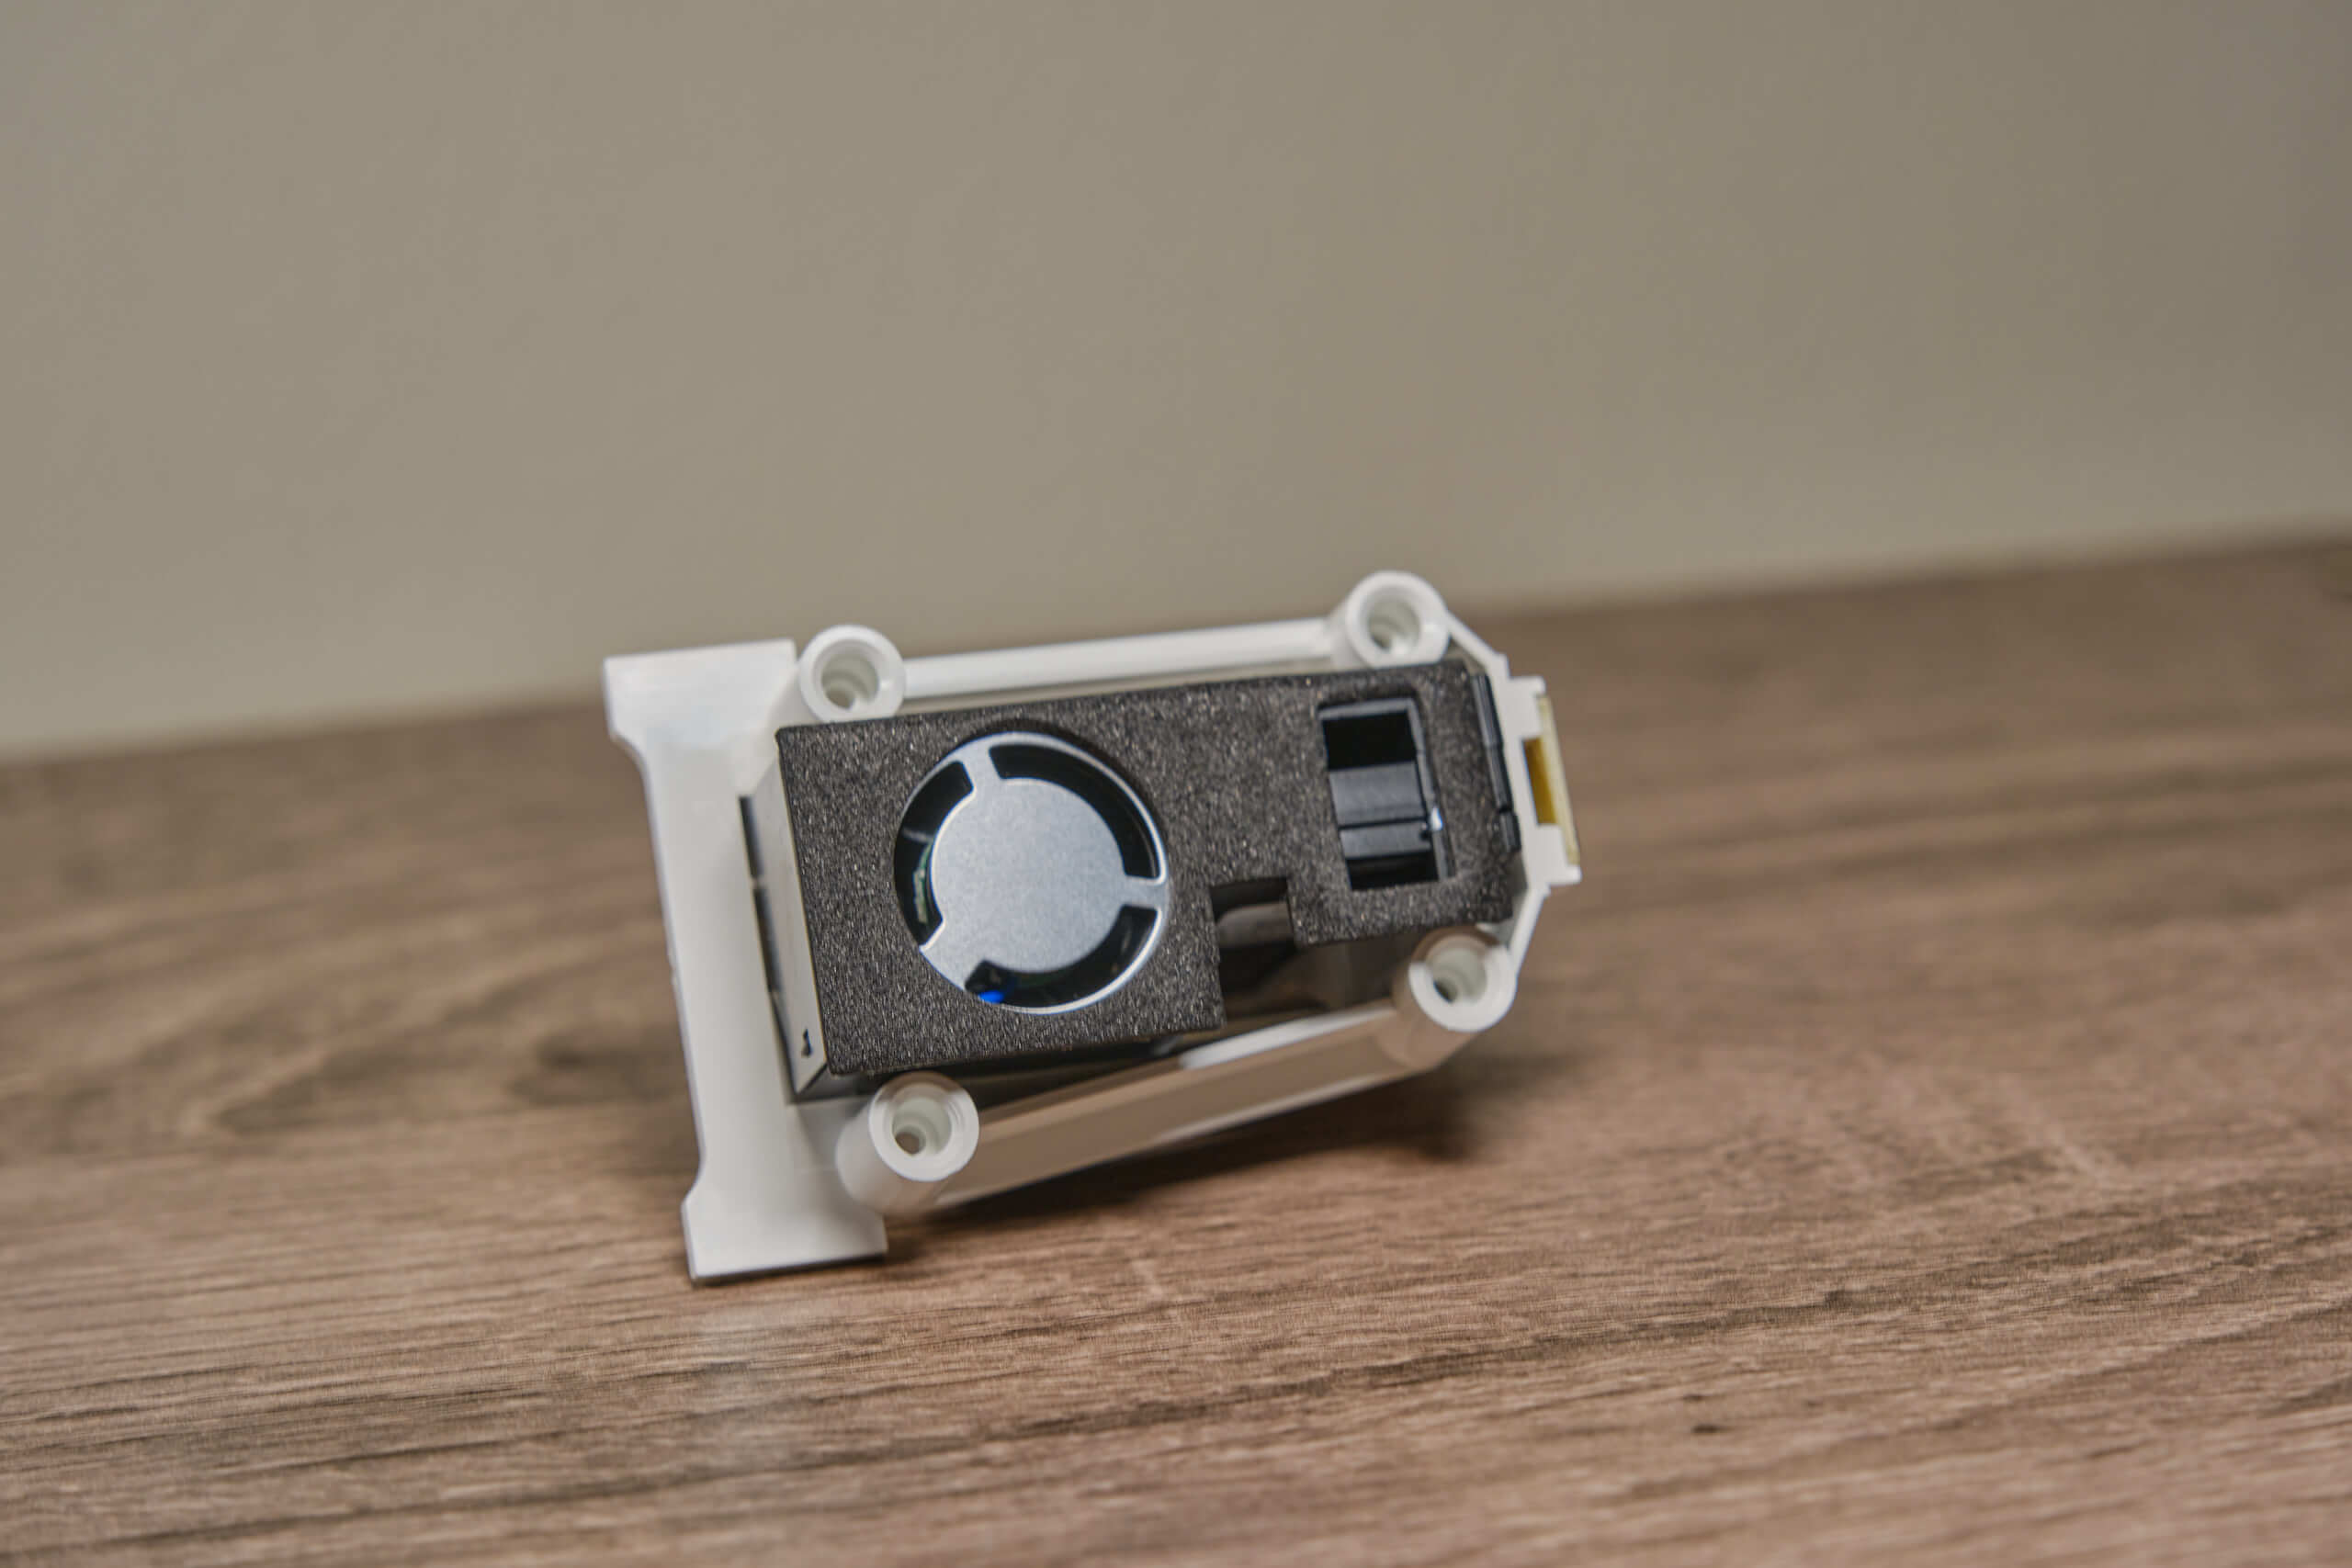
As I am currently travelling, I lack a reference monitor to compare the Vindstyrka to. For this reason, I instead decided to tear down the device and find what sensor it relies on to take its readings, as this will give us a good indication of whether the device can be trusted.
Taking apart the device was relatively straightforward, but I damaged the screen as it was stuck to the plastic case with adhesive. If you plan to look inside the device for whatever reason, this is worth keeping in mind because unless you have specialised tools, you will likely ruin the device’s appearance.
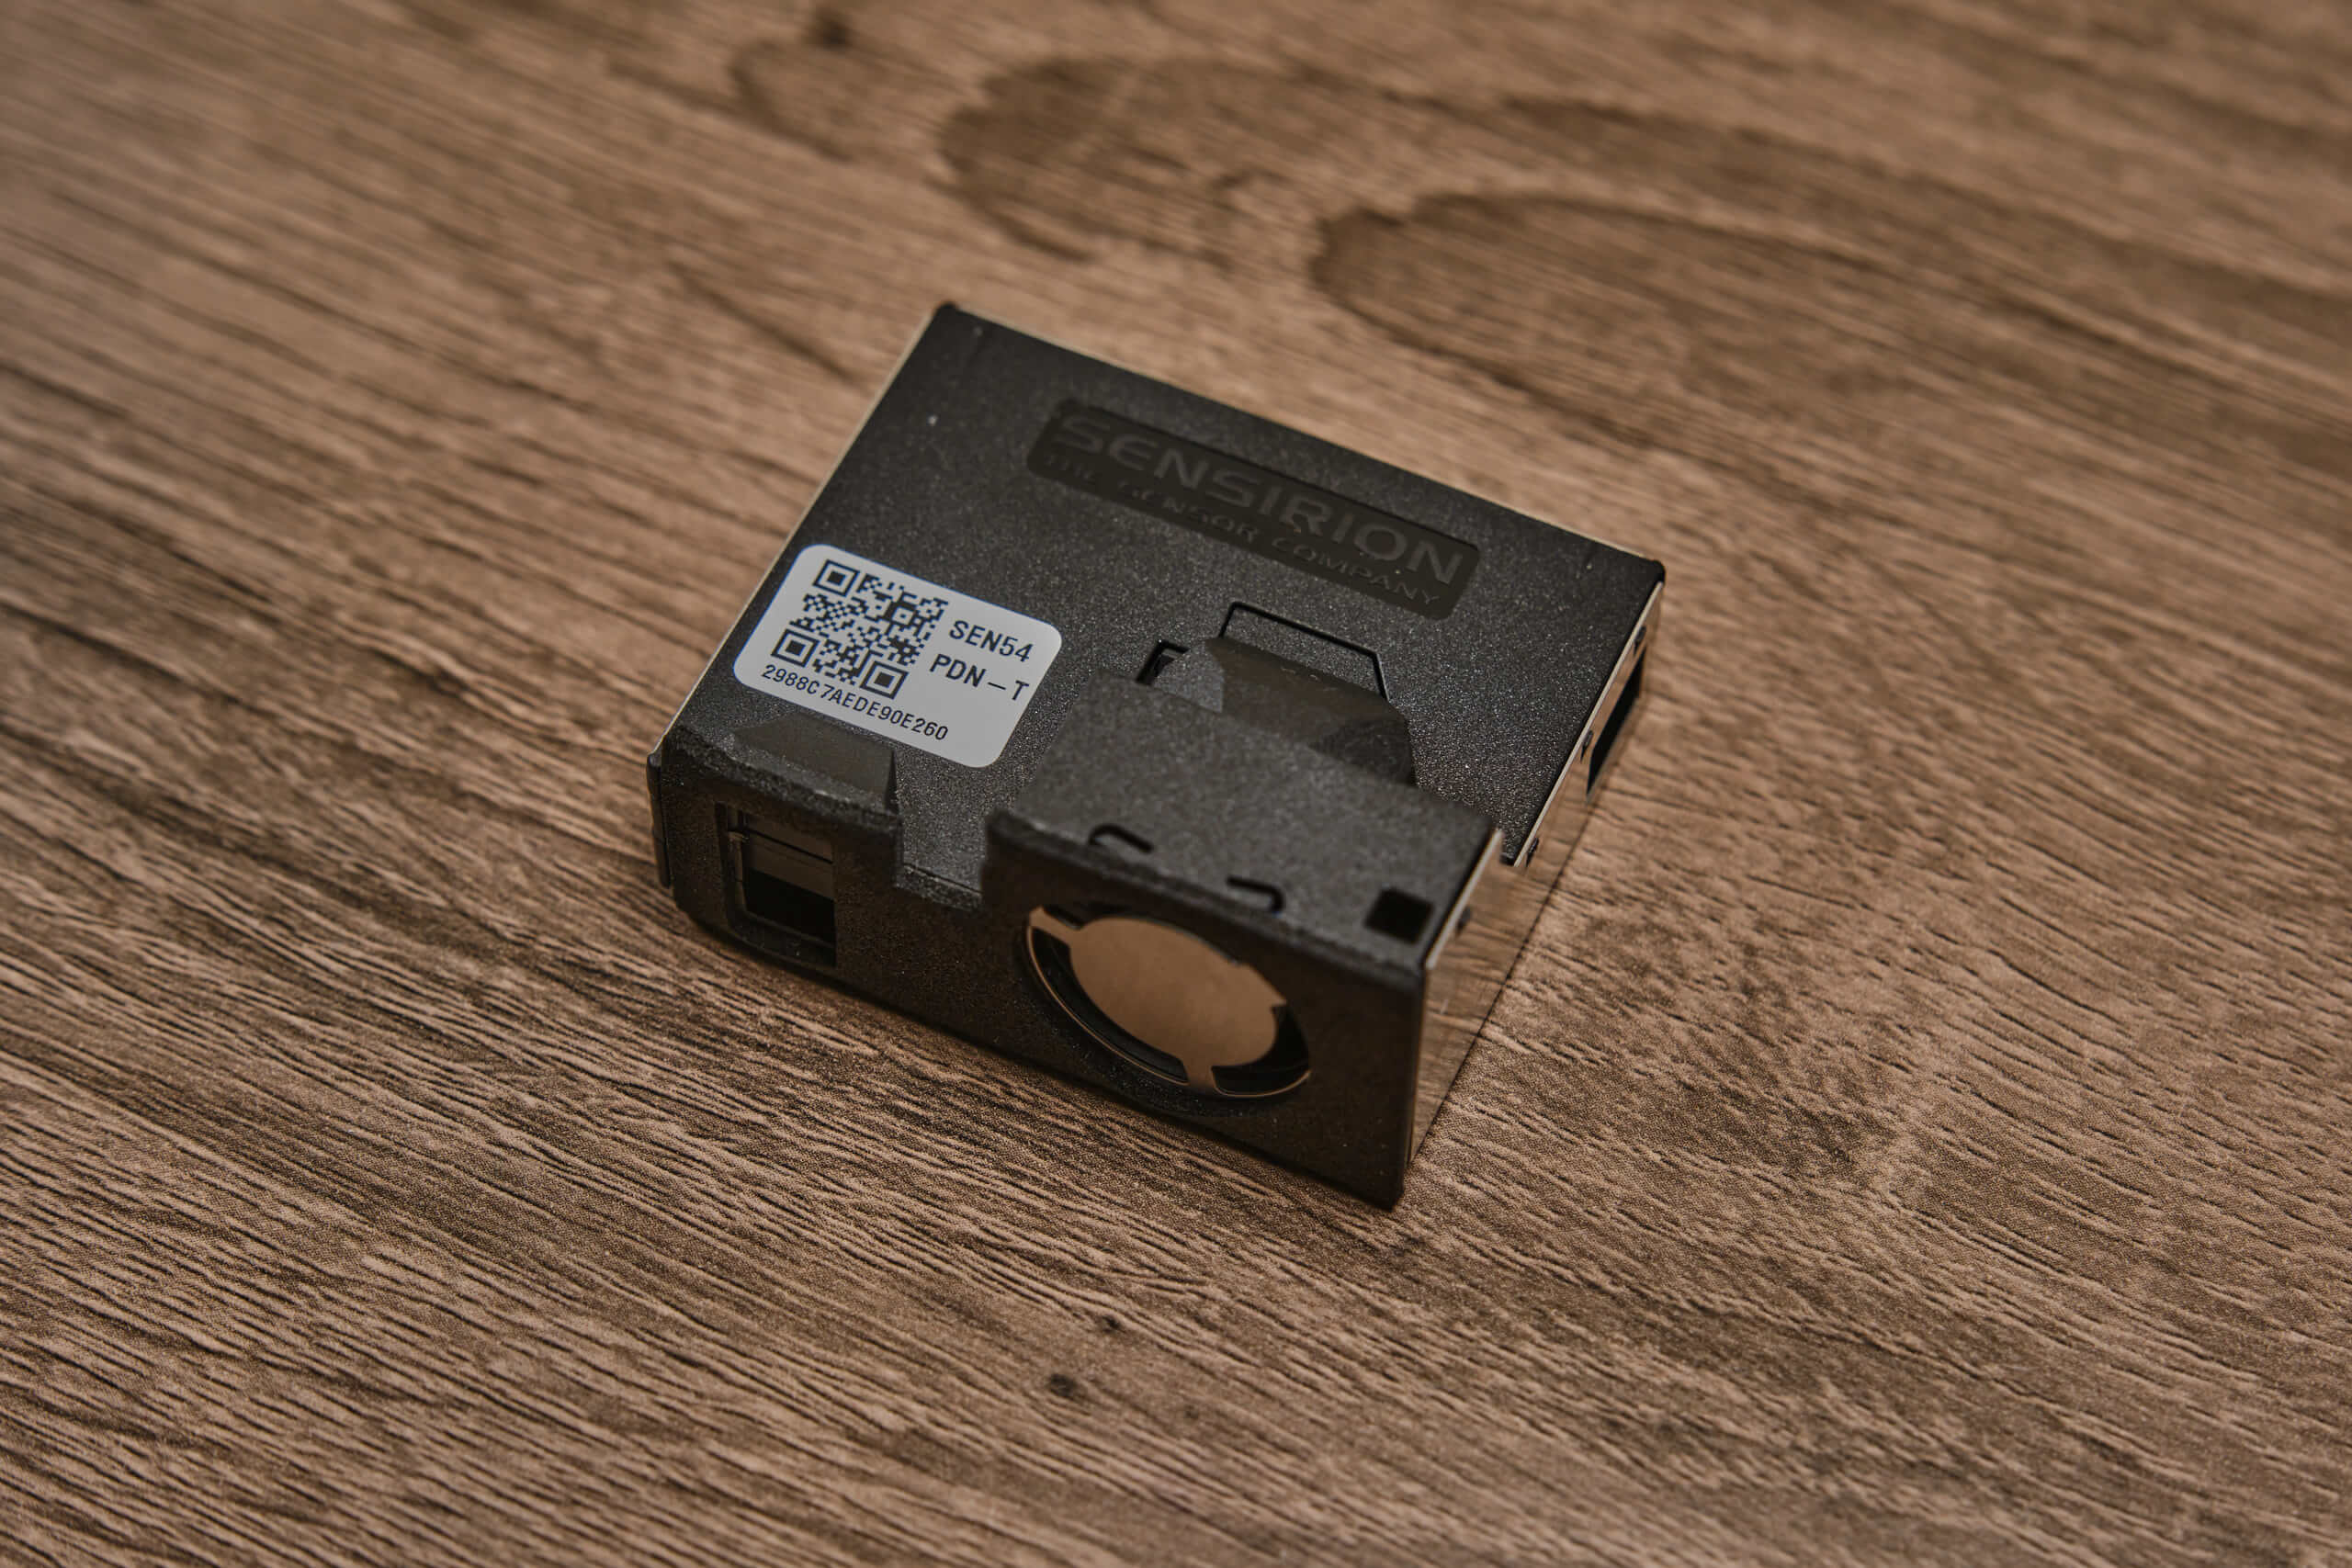
Luckily, the process was worth it, as what we found inside the Vindstyrka was promising. Housed near the back of the device (near the vents) is a sensor from Sensirion, a well-trusted Swiss company that has specialised in environmental sensors for decades. Sensirion makes hundreds of different sensors, and they are found in all kinds of devices worldwide.
The sensor in the Vindstyrka is an all-in-one SEN54 sensor, meaning the one sensor monitors particulates, VOCs, temperature, and relative humidity. The sensor node also includes a fan (which is inaudible unless you are very close to the device) to push air through the sensors.
As per Sensirions specifications for the SEN54, the accuracy for the individual variables are as follows:
| Pollutant | Accuracy |
|---|---|
| Particulate Matter | ±10% |
| VOC | ±15% m.v. |
| Temperature | 0.45°C |
| Relative Humidity | 4.5% RH |
Since the Vindstyrka primarily measures particles, let’s dive into that in more detail. Regarding particles, the SEN54 uses an optical particle counter that can sense the mass concentration of PM1, PM2.5, PM4 and PM10 and the number concentration of PM0.5, PM1, PM2.5, PM4 and PM10. However, only PM1 and PM2.5 are measured directly, while larger particle concentrations like PM4 and PM10 are measured based on the calculations on the distribution profile of all measured particles (source).
This means that the accuracy for the smaller particles (PM1 and PM2.5) is significantly better than that for the larger particles, which aren’t directly measured by the sensor. However, since the Vindstyrka only monitors PM2.5 (assuming it takes only PM2.5 readings and not an aggregate of all sizes), the lower accuracy for larger particles should not impact this device.
The good news is that this study found the Sensirion SEN54’s accuracy to remain within the manufacturer’s stated specifications. In other words, this sensor is accurate within ± (5 µg/m3 + 5%) or ± 10% depending on the particle concentration. The device will become less accurate as the particulate concentrations increase, but it should always stay within ± 10% of the actual amount.
While the Vindstyrka only measures PM2.5 particles, I wish it also showed PM10 concentrations. While the finer particles are more harmful to human health, I don’t see any reason not to show PM10 concentrations since the capability is already included in the sensor. This isn’t a big deal, but it would’ve made an excellent addition to the device.
Regarding VOCs, sensors tend to be a lot less accurate. However, IKEA may have already accounted for this as the Vindstyrka only has a qualitative measure of tVOCs rather than a quantitative one. Where you will see the exact PM2.5 concentration on the screen, the tVOCs are represented only by one of three arrows – one each for increasing tVOCs, stable tVOCs, and decreasing tVOCs. The tVOCs also aren’t reported through the smart home software, meaning you will never get an exact concentration.
The SEN54 has a tVOC accuracy of ±15%, and while this might seem quite large, this is common on tVOC sensors, especially in this price range. However, since we aren’t seeing any specific numbers for VOC concentrations on the Vindstyrka, I see this as accurate enough for the arrow system. I would trust it, but only for a general indication of VOC trends.
Both temperature and relative humidity sensors appear accurate within Sensirion’s stated specifications. While both have some variability (about 1°C for temperature and 9% on the relative humidity sensor), they mostly align with the readings on my Aranet4 Home CO2 monitors. The relative humidity sensor does have a significant amount of variation at times, but that is to be expected with this sensor.
Honestly, I’m quite impressed with the sensor that IKEA used in the Vindstyrka. Typically, this Sensirion sensor goes for around $30 by itself, and even though IKEA obviously would’ve got cheaper wholesale pricing, it’s impressive to see such a good sensor inside such an inexpensive product.
That said, I wish that IKEA allowed the device to display specific numbers for the VOC concentrations. However, I understand that this arrow system was likely used because the VOC sensor is not all that accurate. With that said, it would’ve been nice to have more than three brackets – perhaps a five or six-tier system similar to the Air Quality Index could have worked and still allowed some room for the ±15% variations.
Purchase IKEA Vindstyrka Air Quality Monitor
Design
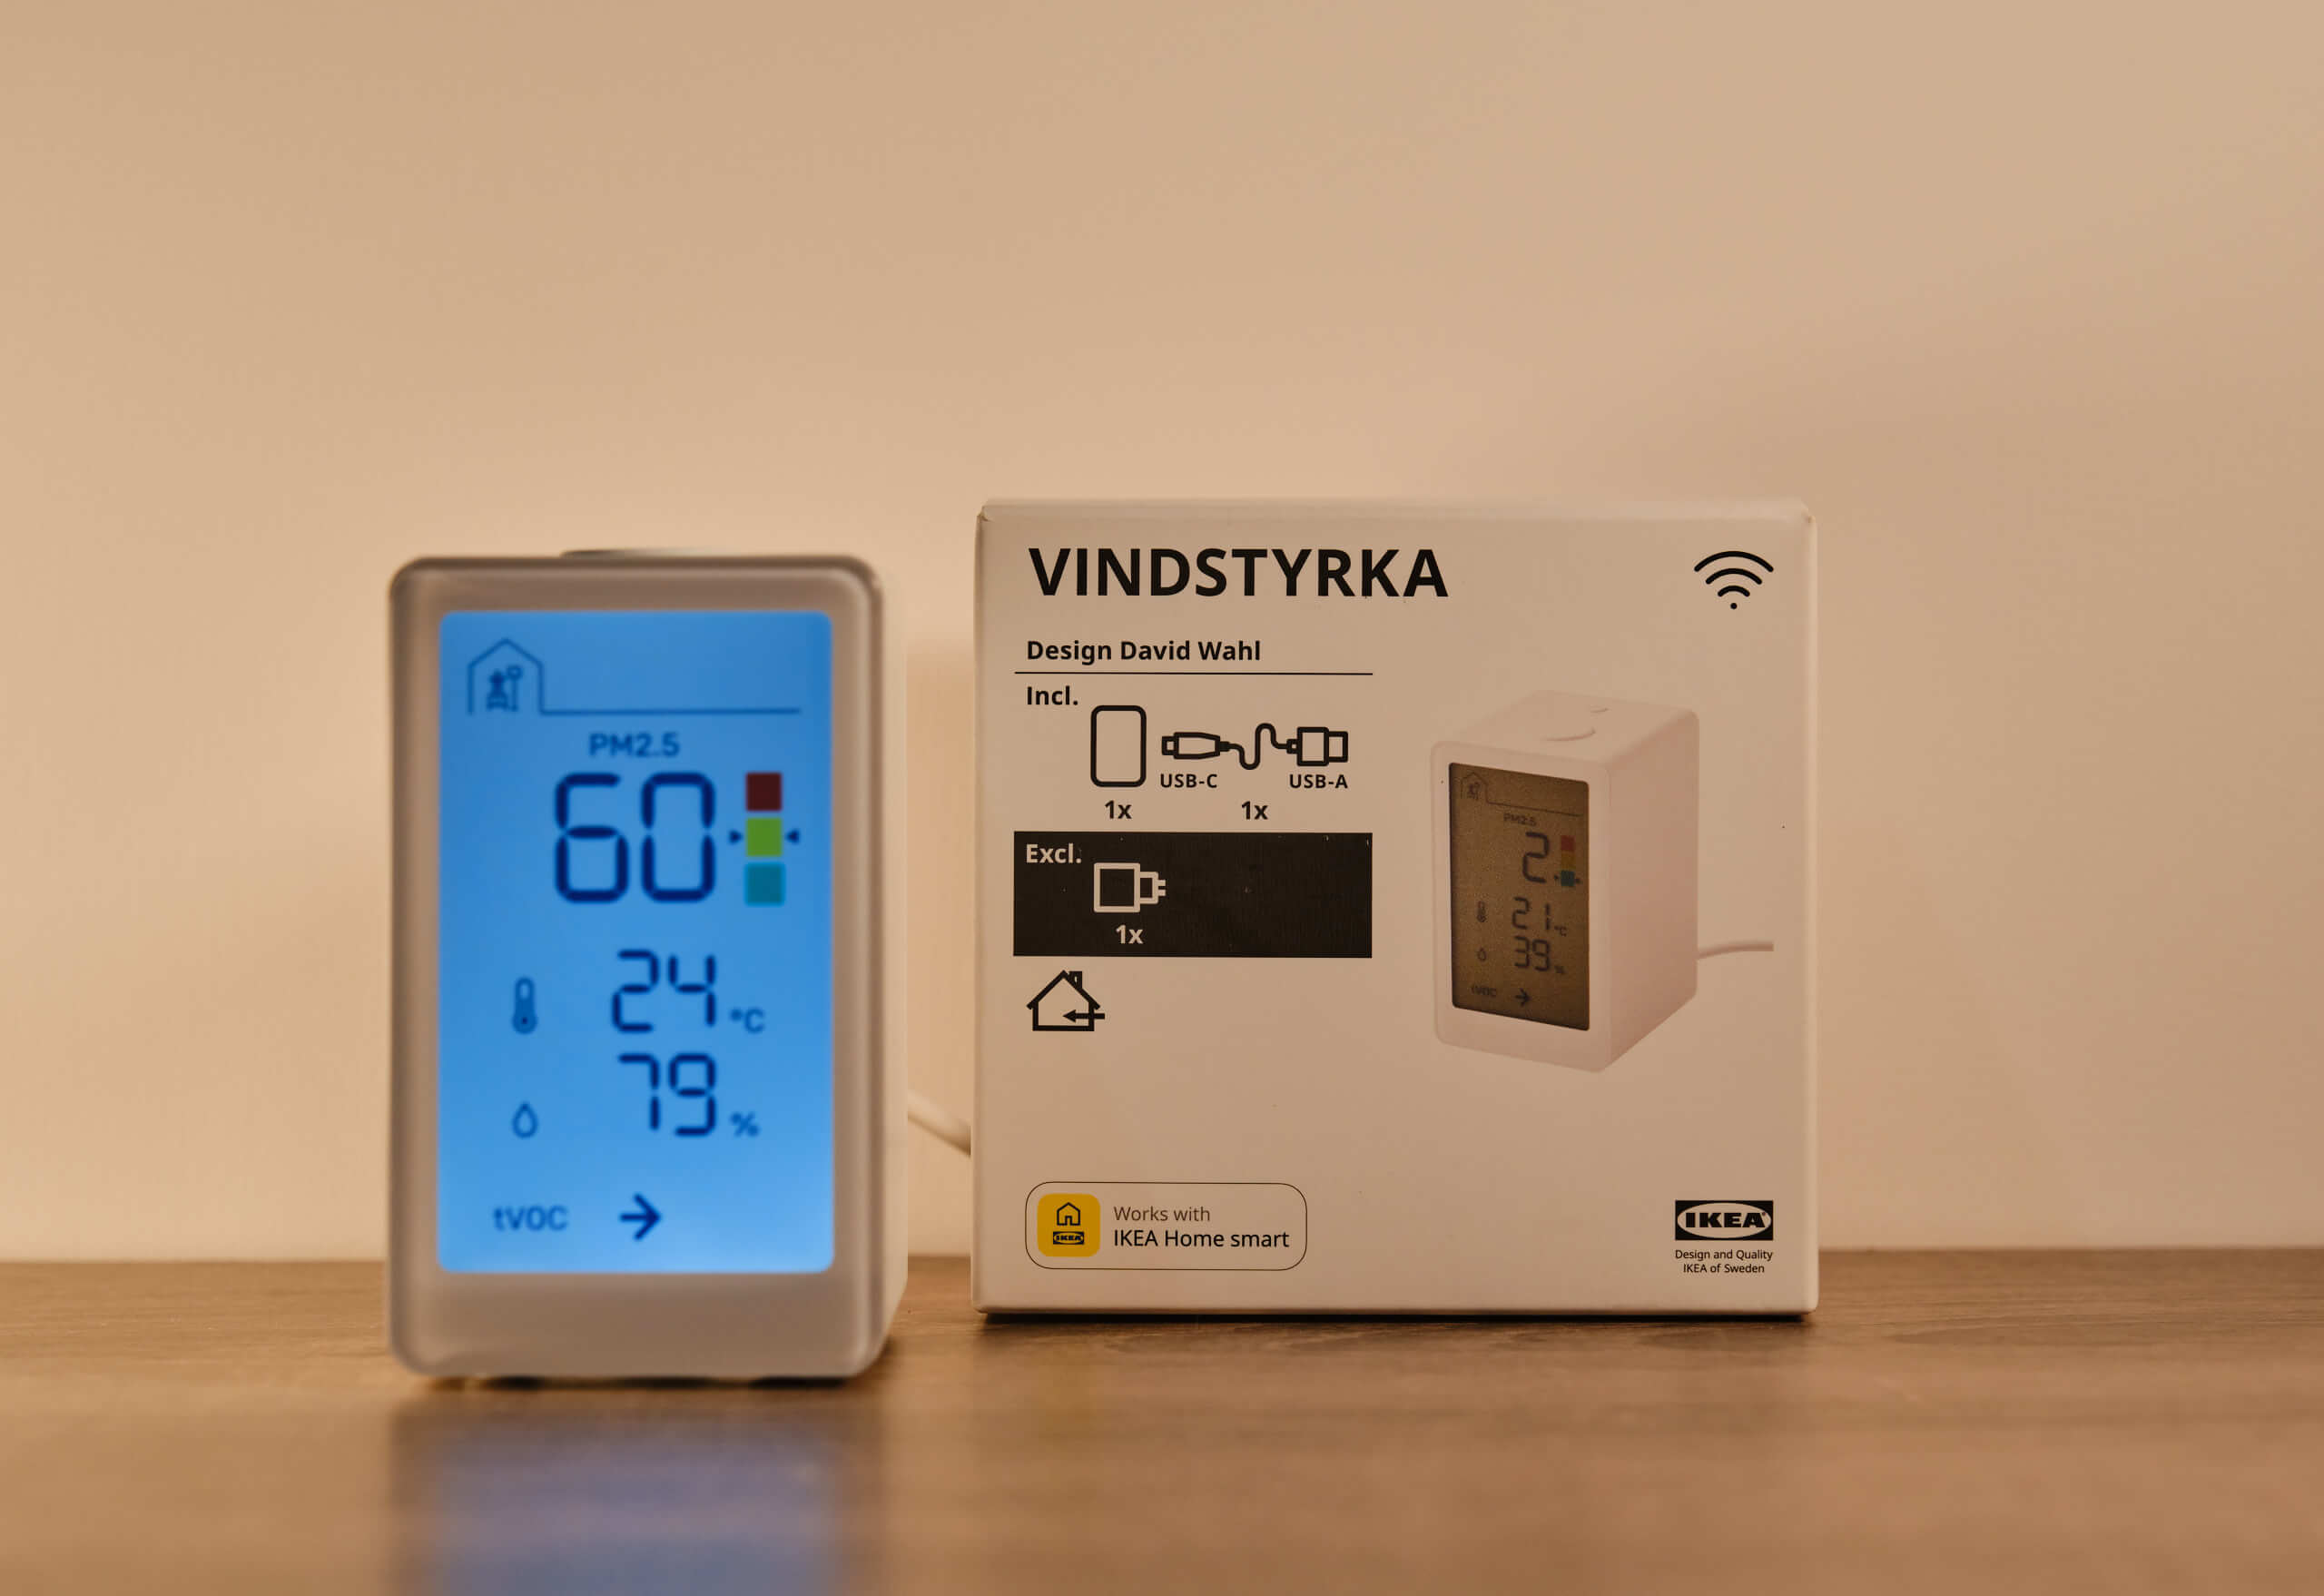
The design of the Vindstyrka is very minimalist, and it’s designed to fit into modern interiors. The device is cuboid and painted white, meaning it can easily sit on a kitchen bench, on top of a fridge, or even on a desk alongside your monitor. While IKEA seems to place a lot of emphasis on the design (as seen by the ‘Design by David Wahl’ text on the front of the box), I don’t think the design is anything special.
This isn’t to say the device looks bad – on the contrary, I like the simple design. However, I don’t think there’s anything exceptional about this device. Perhaps that was the idea, though. To make an air quality monitor that can seamlessly blend into any environment. If that is the case, then the design of the IKEA Vindstyrka is perfect.
Starting with the device’s exterior, you will find a large screen dominating the front. This screen has a plastic cover to protect it if it gets damaged in a fall or otherwise. Since the screen is the most important part of the device, we will get back to this soon! For now, let’s turn to the device’s back.
On the back of the device, you will find a couple of vents to allow air to access the device. You will find the fan from the device’s SEN54 sensor behind the larger of these two vents. This allows the sensor to constantly pull through fresh air to take accurate indoor air quality readings. While the back of the device is covered in holes, these are primarily there for the aesthetic, as only two sets of holes are actual vents.
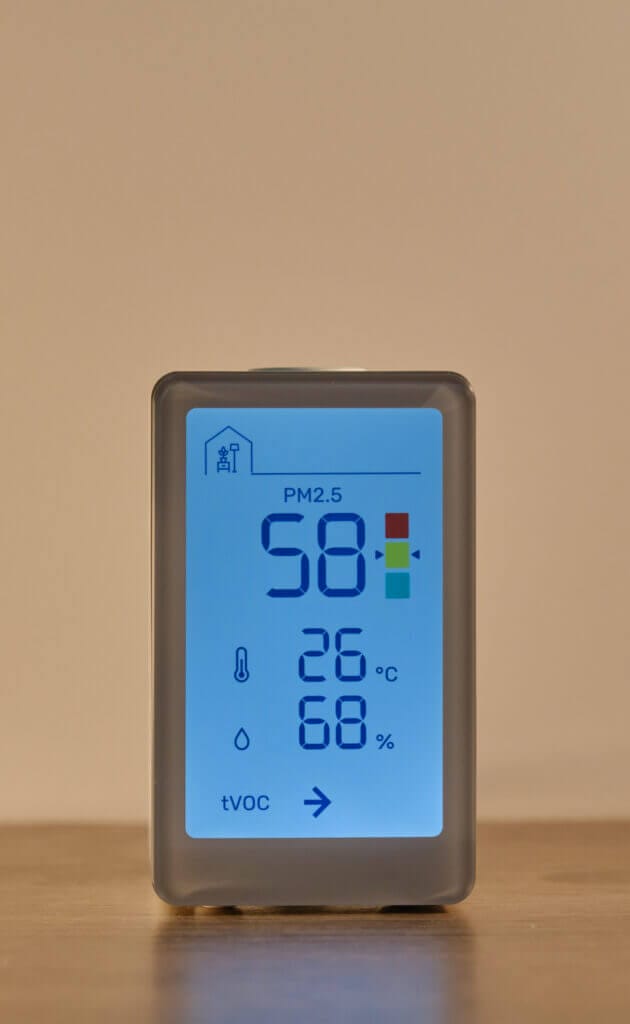
Hidden cable on the right.
At the bottom of the device, you will find an inlaid USB Type C port. I love this design choice because it makes it so easy to hide the power cable behind the device – so long as you view it from the front. I wish other indoor air quality monitors, such as the INKBIRD 6-in-1 Monitor, took this same approach, as I hate cluttering my desk with cables.
Besides this, there isn’t much to note about the back and bottom of the device. If you want to take the device apart, like I did, you will find four screws on the back of the monitor. Once removed, you will be able to remove the screen, but you will want to be careful not to damage it due to the adhesive.
On the bottom of the device are four rubber feet, allowing you to put it wherever you want without worrying about scratching the surface on which you are placing it. It’s a minor detail, but it’s good that IKEA hasn’t overlooked the basics. Interestingly, there is no wall mount on the back of this device, as it’s clearly intended to sit on a desk, shelf, or cabinet.
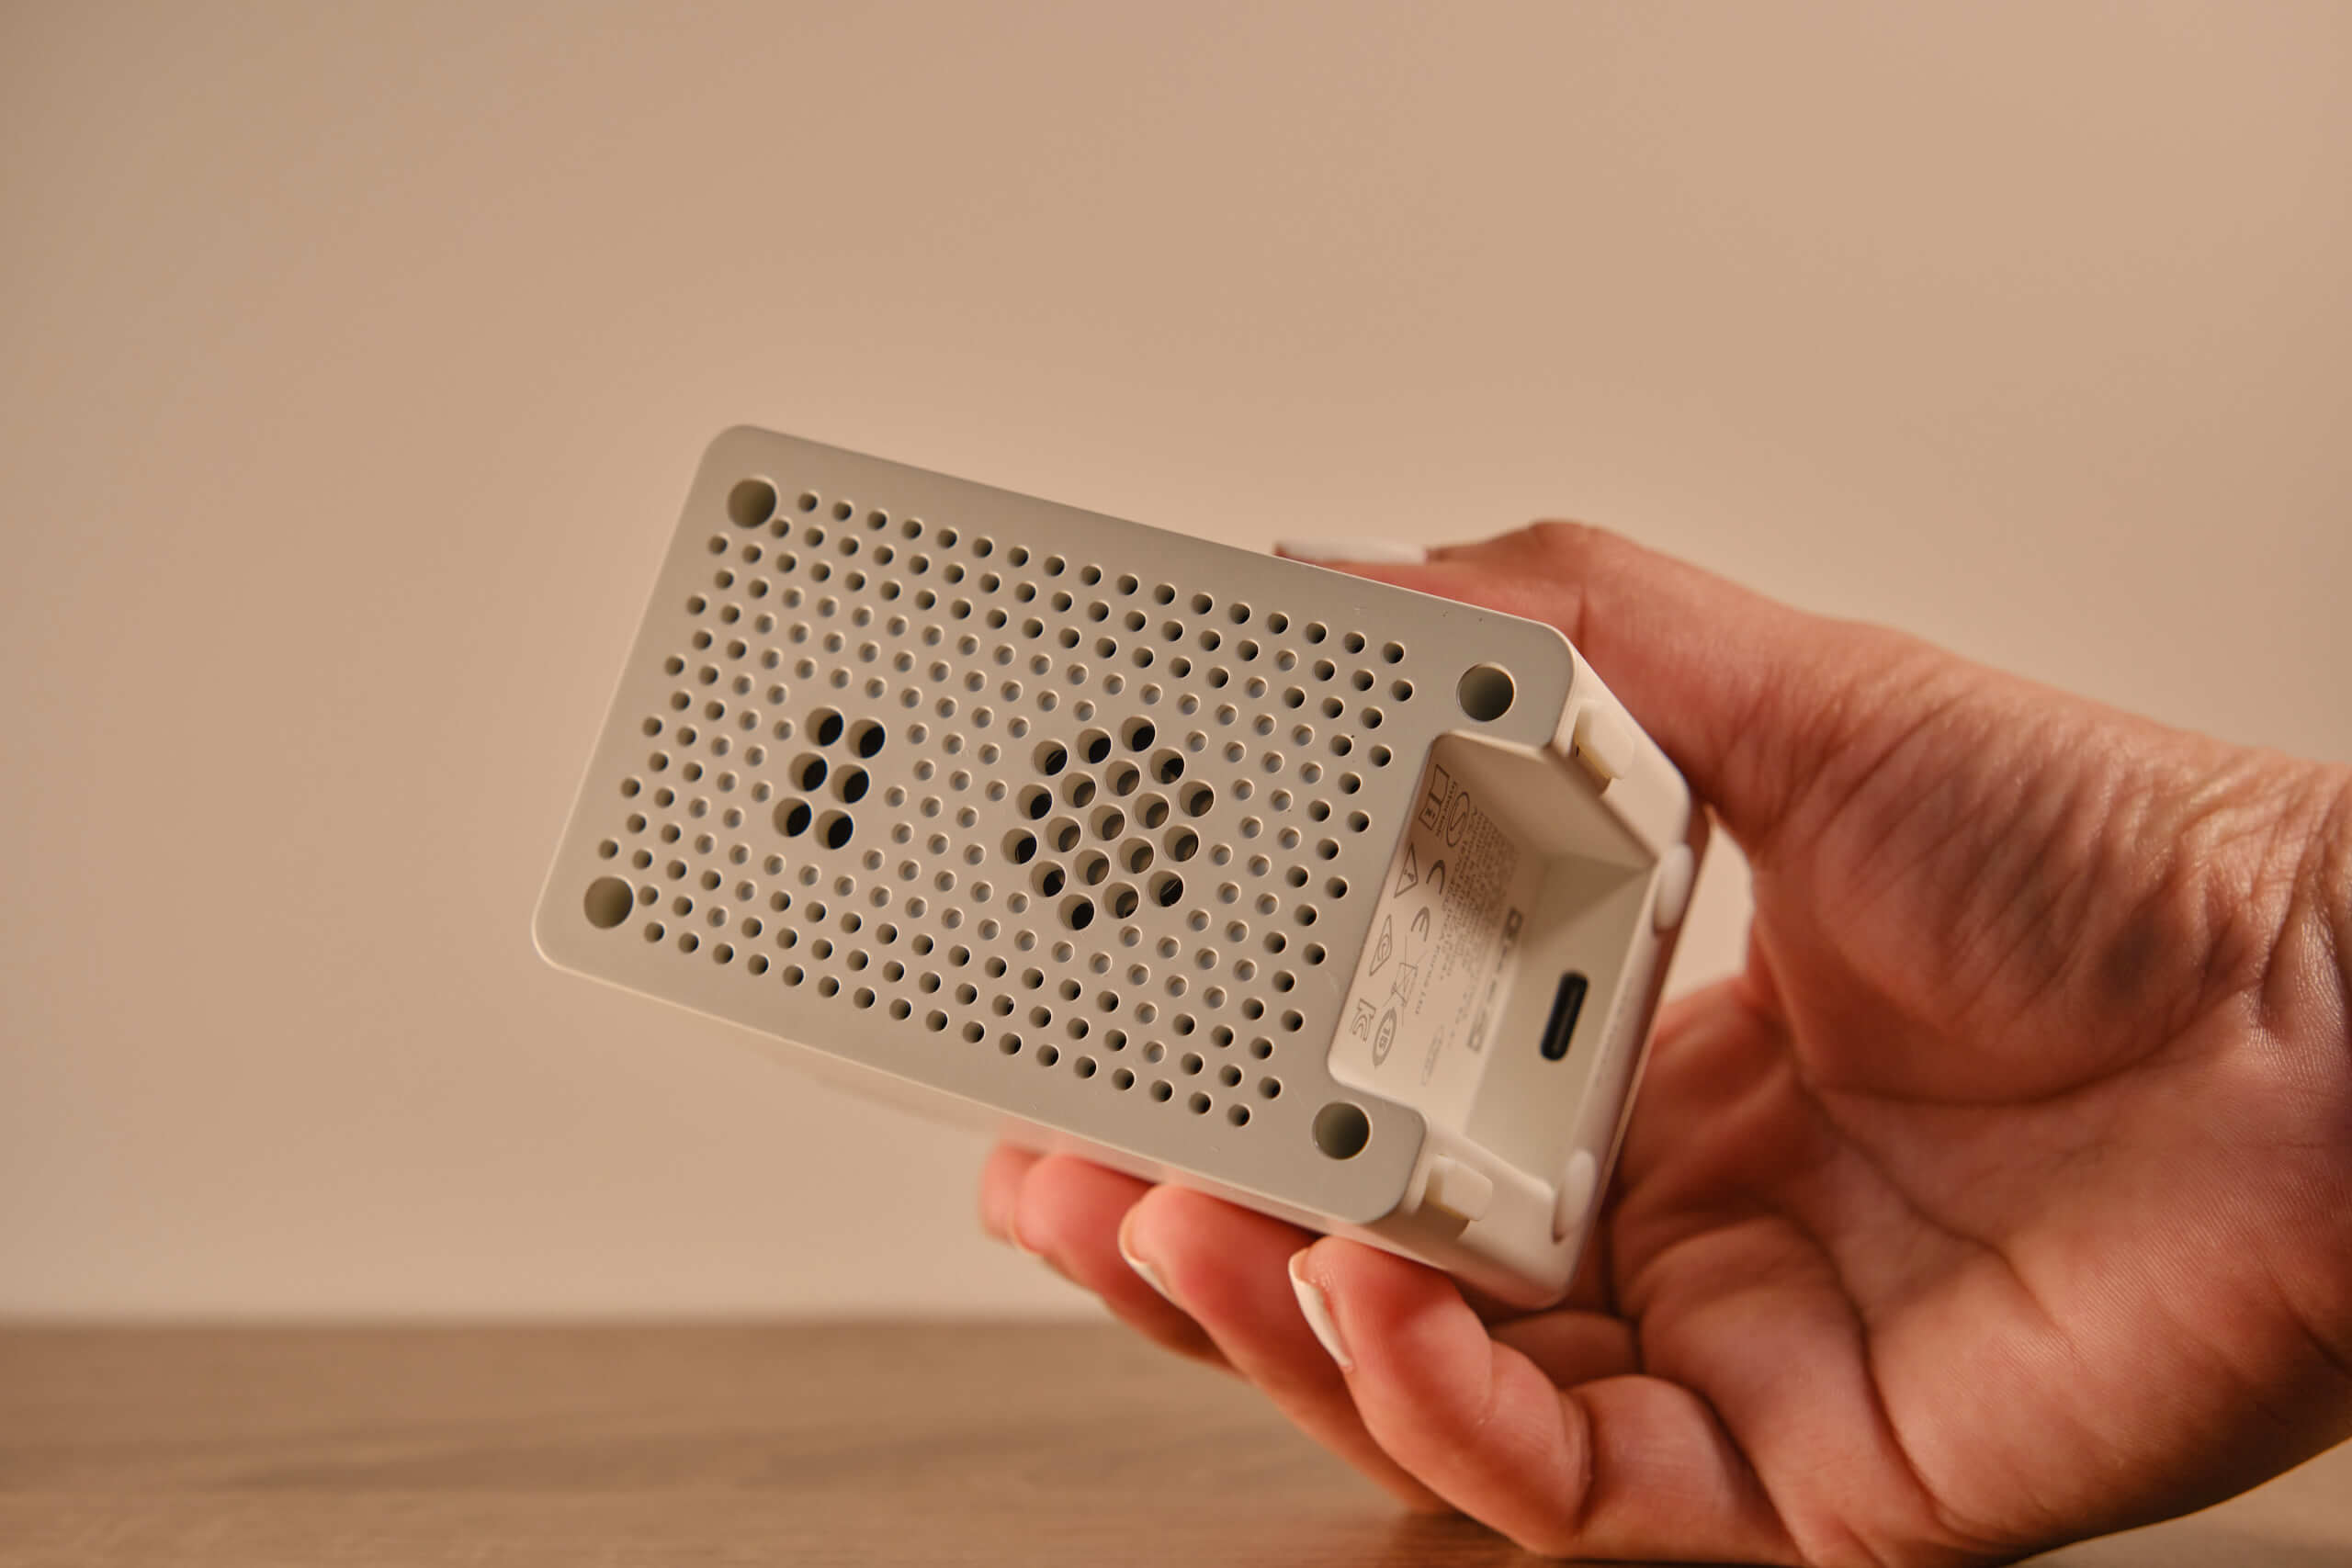
On the top of the device, you will find two buttons – one large and one much smaller. The smaller button is the ‘link’ button for smart home integration and connecting the device to the app. The larger button brightens the screen, much like an older digital alarm clock.
Again, having only two buttons (and only one you will be using) shows the minimalist design approach that IKEA has taken with the Vindstyrka. With essentially only one button, you won’t change settings or customise the device from here.
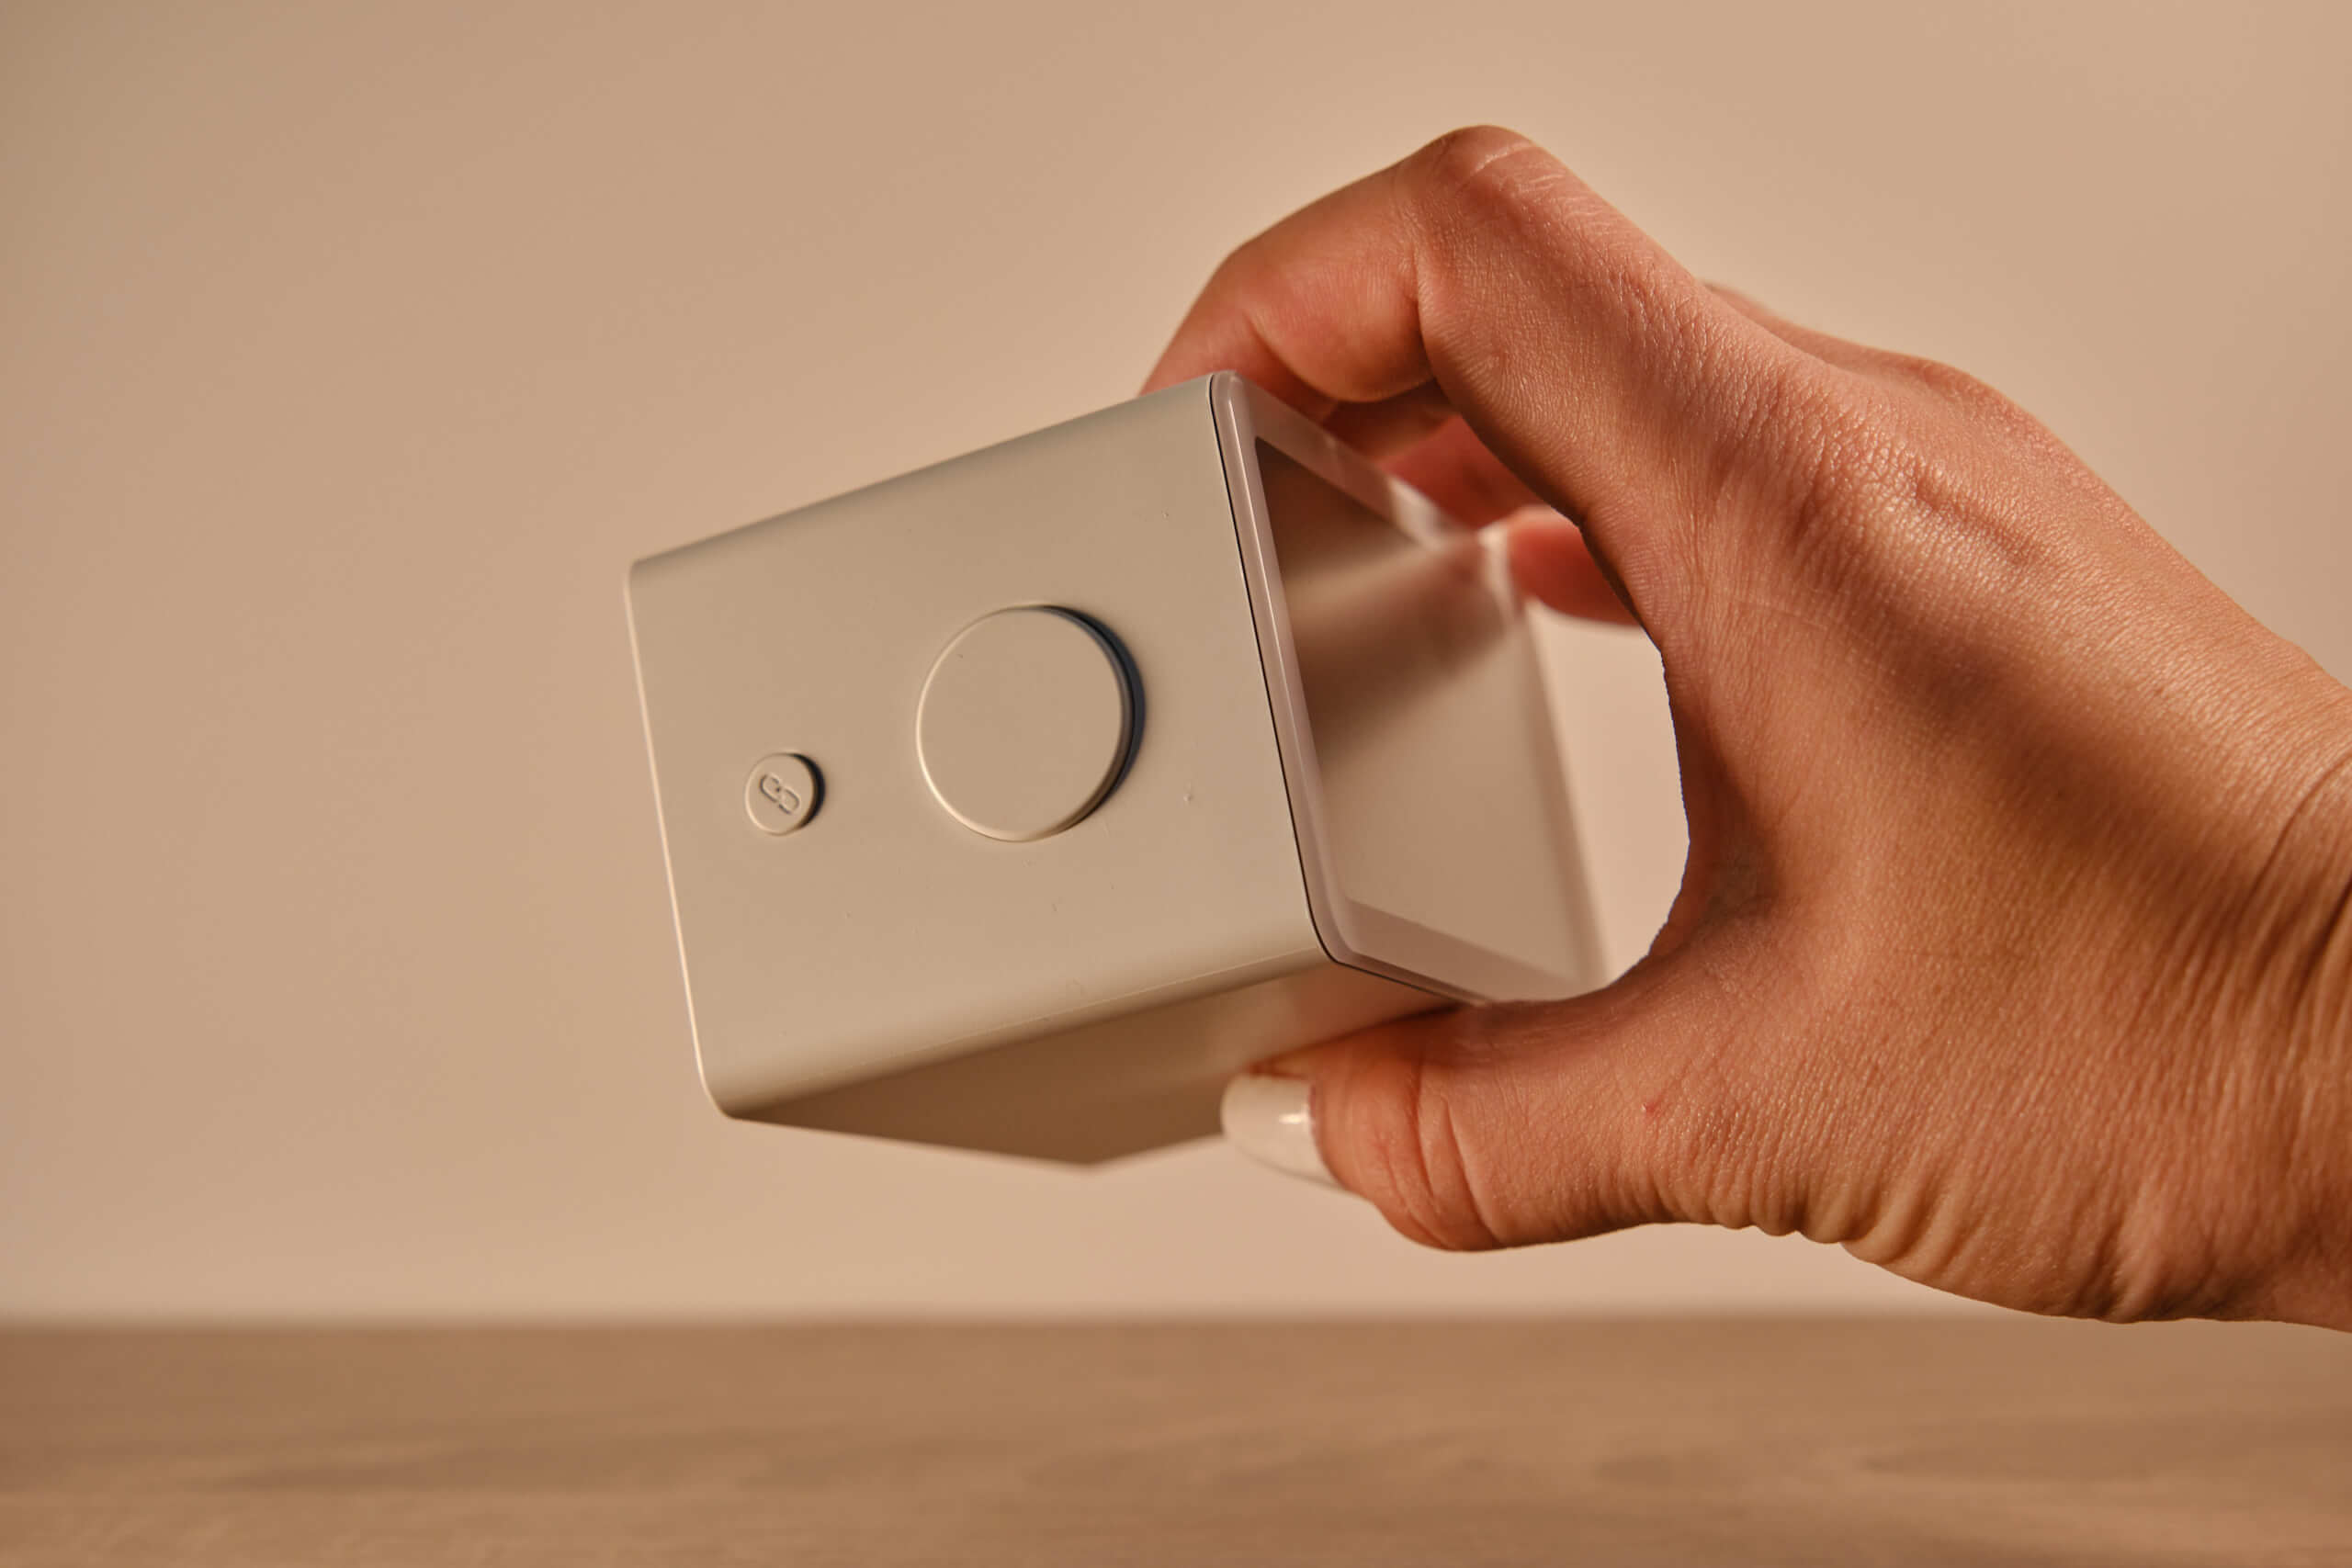
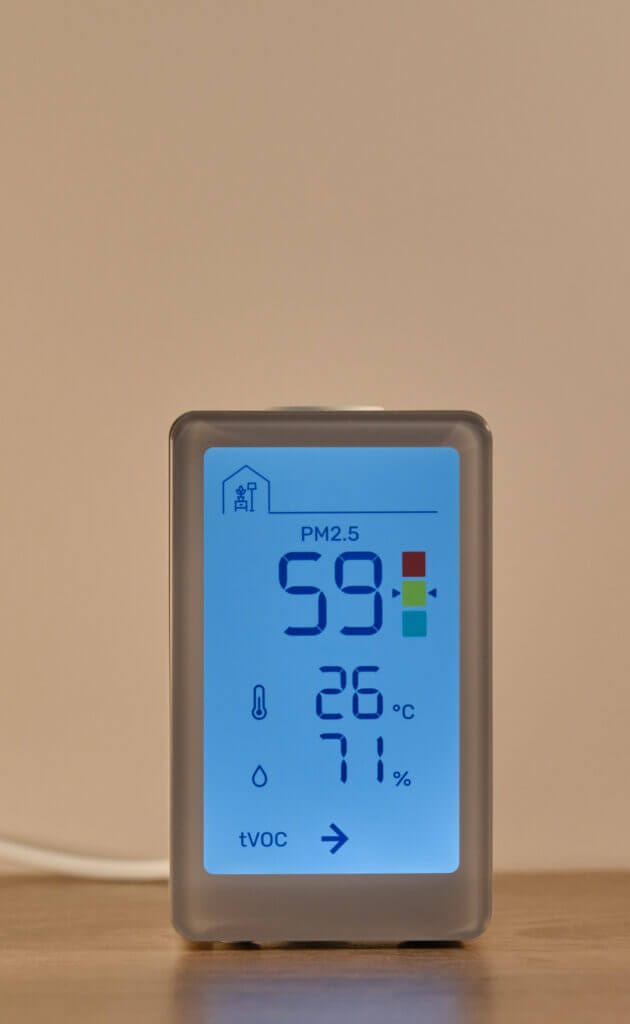
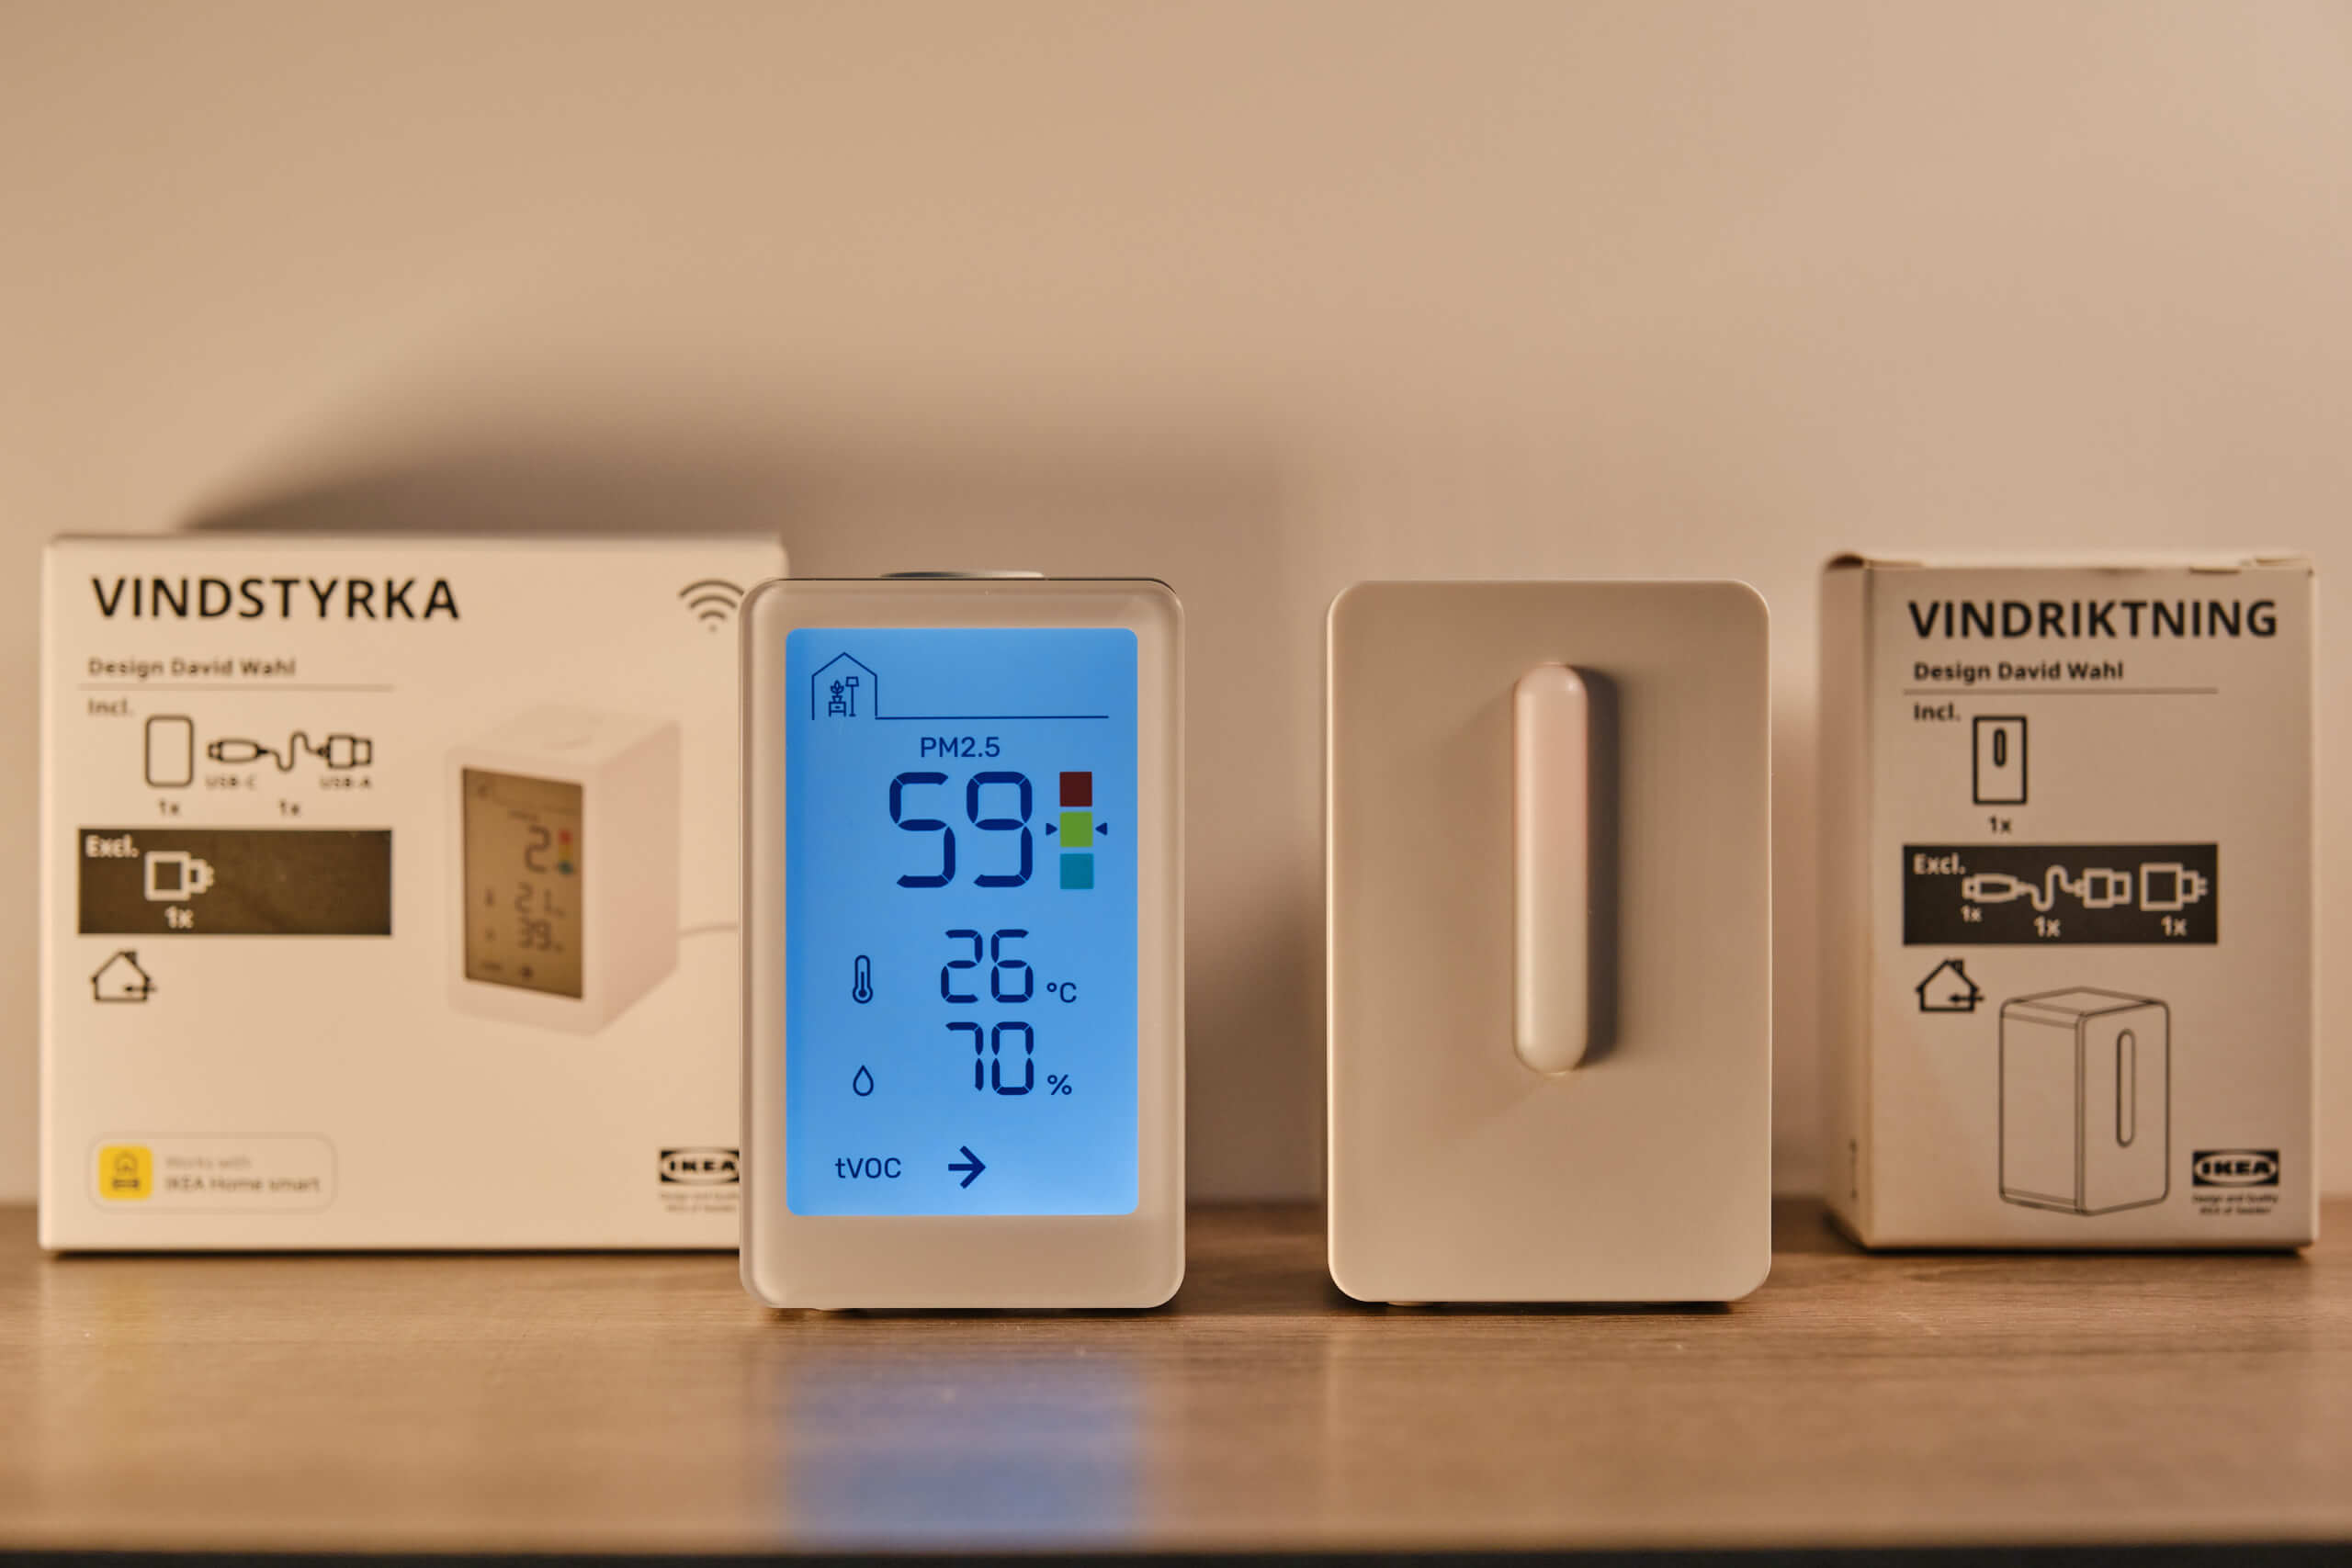
Now, we can move on to the device’s display. This is the most important part of the device, as it’s what you’ll look at every day when you want to check the air quality. At first glance, the display is very simple, and this is true even after using the device for a few weeks. However, while simple, it conveys all the essential information quickly and easily (although I wish it gave a number for the VOC concentration instead of an arrow).
At the top of the device, you will see the PM2.5 concentration. It’s important to note that this concentration is displayed in μg/m3 and is not an AQI scale. There is a big problem with these coloured squares, though, as here is how IKEA splits the scale:
- Green: 0-35μg/m3
- Yellow: 35-120μg/m3
- Red: 120μg/m3 +
Why is this scale not great? Well, the WHO states the average 24-hour exposure to PM2.5 should not exceed 25 μg/m3. Considering that this is considered ‘good’ (green) on the IKEA device, an issue quickly becomes apparent. Luckily, while this colour scale isn’t a great reference, the screen also displays the exact concentration. If you’re going to use this device, refer to the number as opposed to the scale.
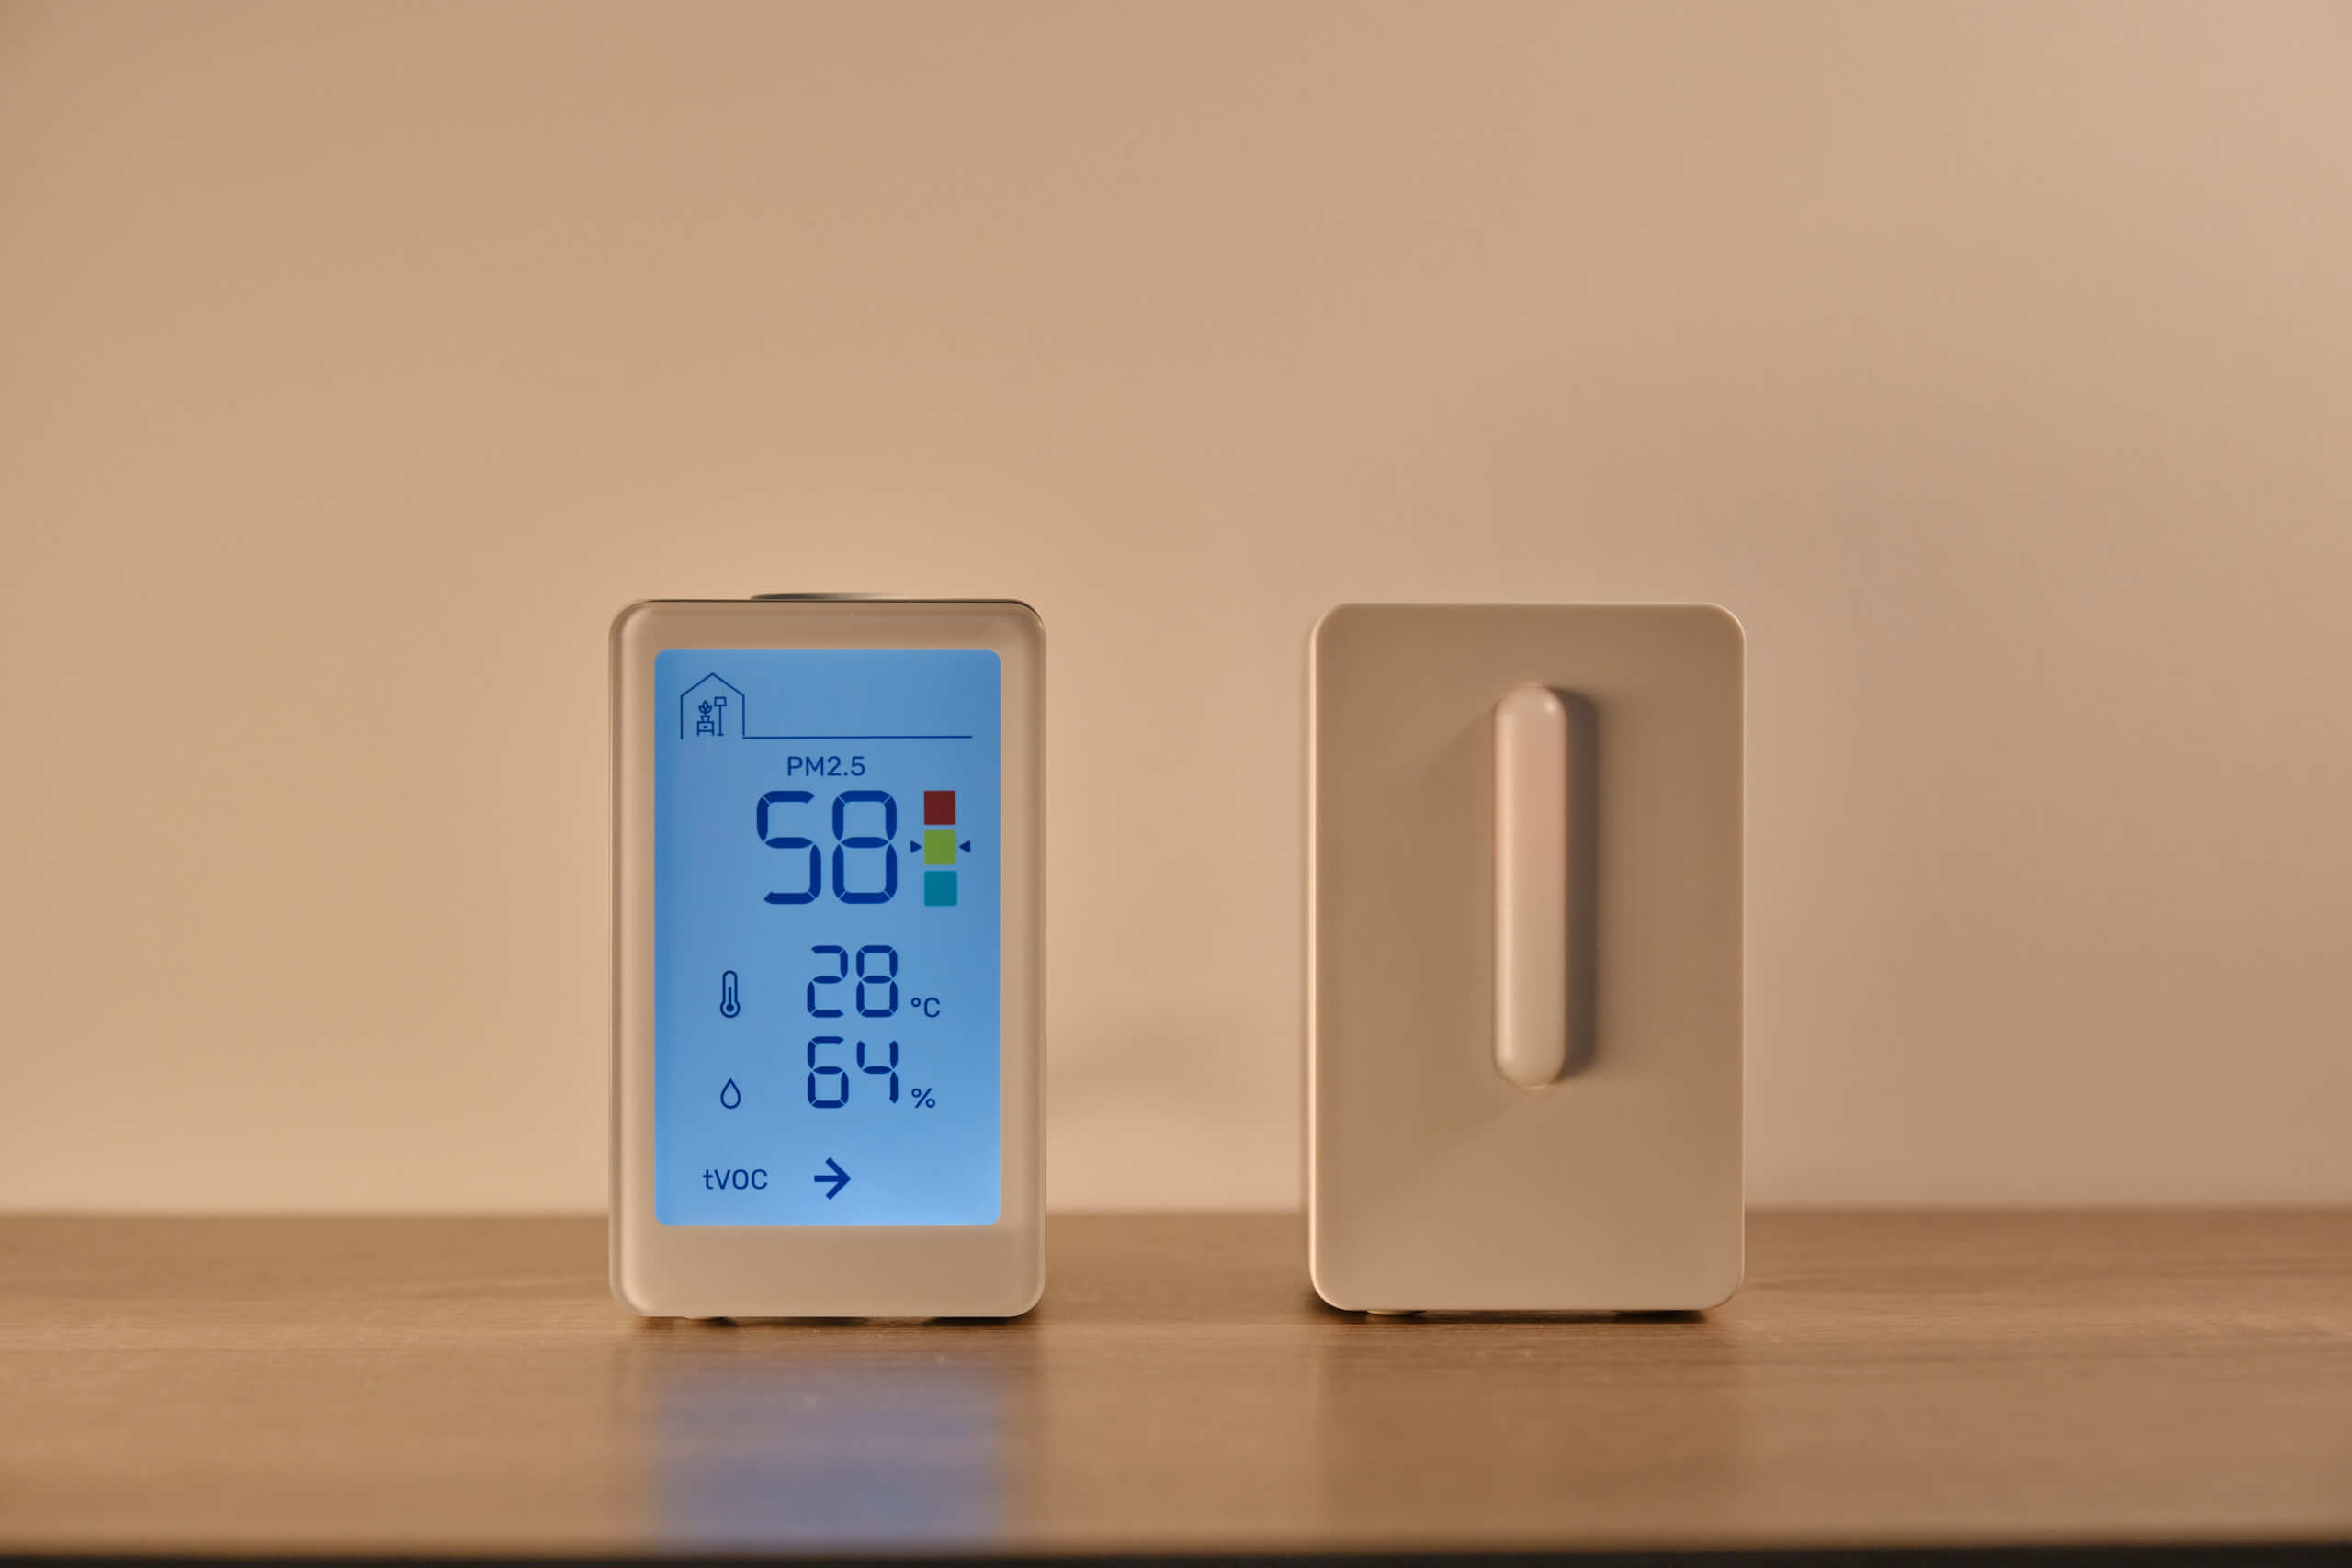
Below the PM2.5 concentration, you will get temperature and relative humidity readings with corresponding icons. Again, these are displayed as numbers, which is much better than using a scale. Unfortunately, the VOC concentration, displayed at the bottom of the device, is the opposite – it is displayed with only one of three arrows, and there is no corresponding number.
The arrows (up, right, and down) represent increasing, stable, and decreasing VOC concentrations. Unfortunately, there is no information on the actual VOC concentration, and it can be hard to act knowing this very minimal information. There is also no further information on how these levels are judged in the manual, so it’s hard to say whether this is useful. For example, would the device show stable levels even if the VOC levels are very high but steady? If so, this is a big issue because although the levels are stable, they aren’t safe.
The final aspect of the screen to talk about is the backlight. Generally, the screen will be dim (unlike in the pictures above), and the backlight will only be activated when you press the large button on top of the device. I don’t mind this system, and it feels very much like a digital alarm clock of old. It isn’t easy to view when the screen is dim unless it’s in a well-lit area. However, as soon as you press the button, the screen is easily viewable from metres away. The screen will stay on for a while after you press the button, too!
Design-wise, I don’t have any issues with the device physically. It’s a well-made air quality monitor for the price, and I didn’t find any serious design issues in my time with the device. However, there is a bit to be desired regarding the screen. I wish the tVOC display system was better and the colour thresholds could be changed. With that said, neither of these is a deal-breaker to me, and I think many will agree.
Purchase IKEA Vindstyrka Air Quality Monitor
Connectivity
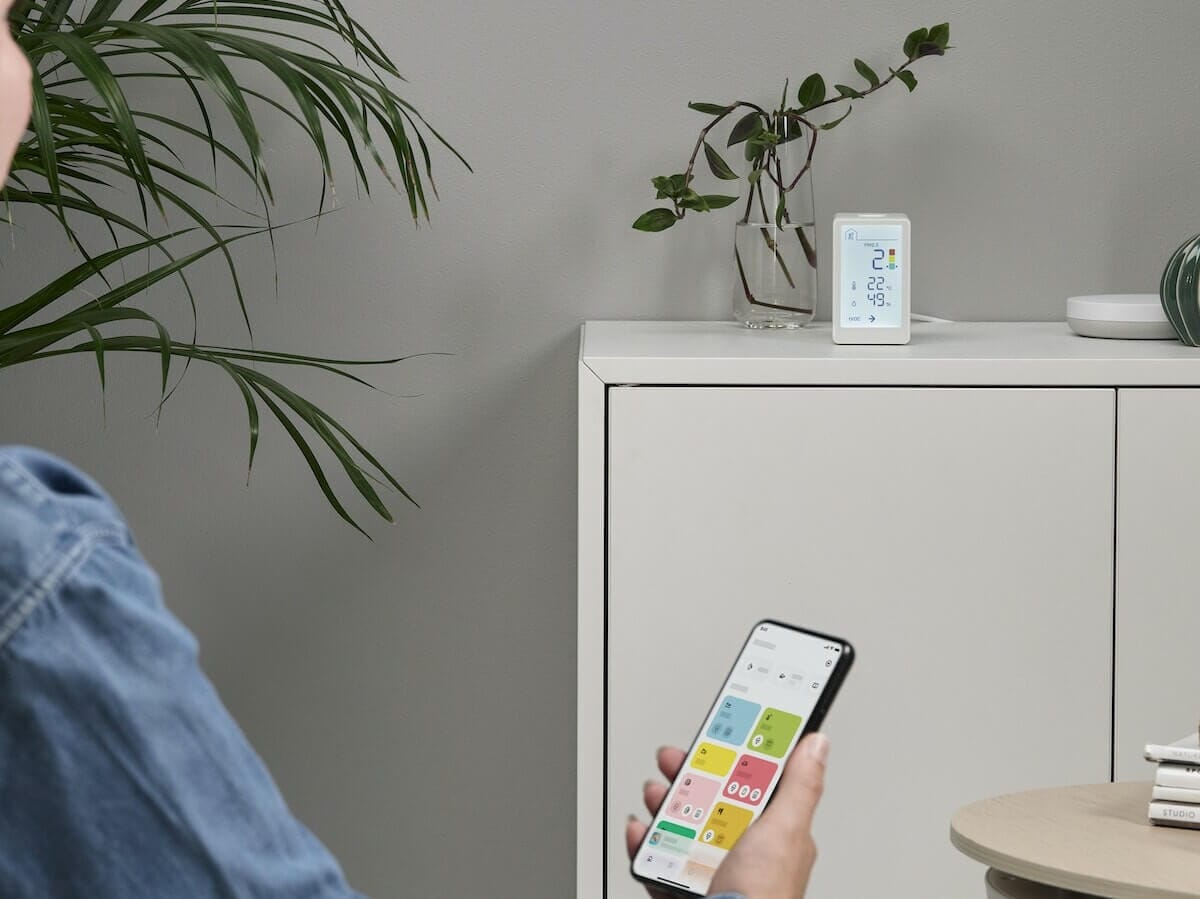
Image from IKEA.
Something I am impressed with is the connectivity of this low-cost monitor. While it does come with some caveats, I’m happy to see it included. So, what are those caveats? Despite the Vindstryka having a connectivity chip that supports Zigbee, Bluetooth and Thread, only Zigbee is currently supported. Unfortunately, this means there is no way to connect with the IKEA Vindstyrka by itself (without some workarounds), and you will need the DIRIGERA Hub (also from IKEA) to connect to this monitor.
I haven’t had the chance to test the connectivity because I am unwilling to pay the extra money for the hub, as this is the only IKEA product I own that is Zigbee enabled. However, if you have other IKEA smart products (or already own the DIRIGERA Hub), you can access the full potential of the Vindstyrka.
There are some workarounds to get the Vindstyrka to send data to Apple’s Homekit without the hub. However, these require more technical knowledge, and if you aren’t comfortable with some experimentation, you’ll want to stick to the IKEA app and DIRIGERA Hub. Here is a thread on Reddit from someone who got the Vindstryka to display its data on Homekit.
Once you have the air quality monitor connected either through the DIRIGERA Hub and the IKEA app or otherwise, you can view the temperature, RH, and PM2.5 readings from the device. It’s important to note that, similarly to the device’s display, you can’t view the VOC concentration through any integration.
The most interesting part of these smart home platforms is the ability to set up automation with other devices, such as air purifiers and dehumidifiers. I’ve always been a fan of smart home integration, and it’s good to see the inclusion here. While it’s frustrating that another accessory is needed for connectivity, it might be a good investment if you already have IKEA smart products or the hub itself.
Purchase IKEA Vindstyrka Air Quality Monitor
Price & Competition
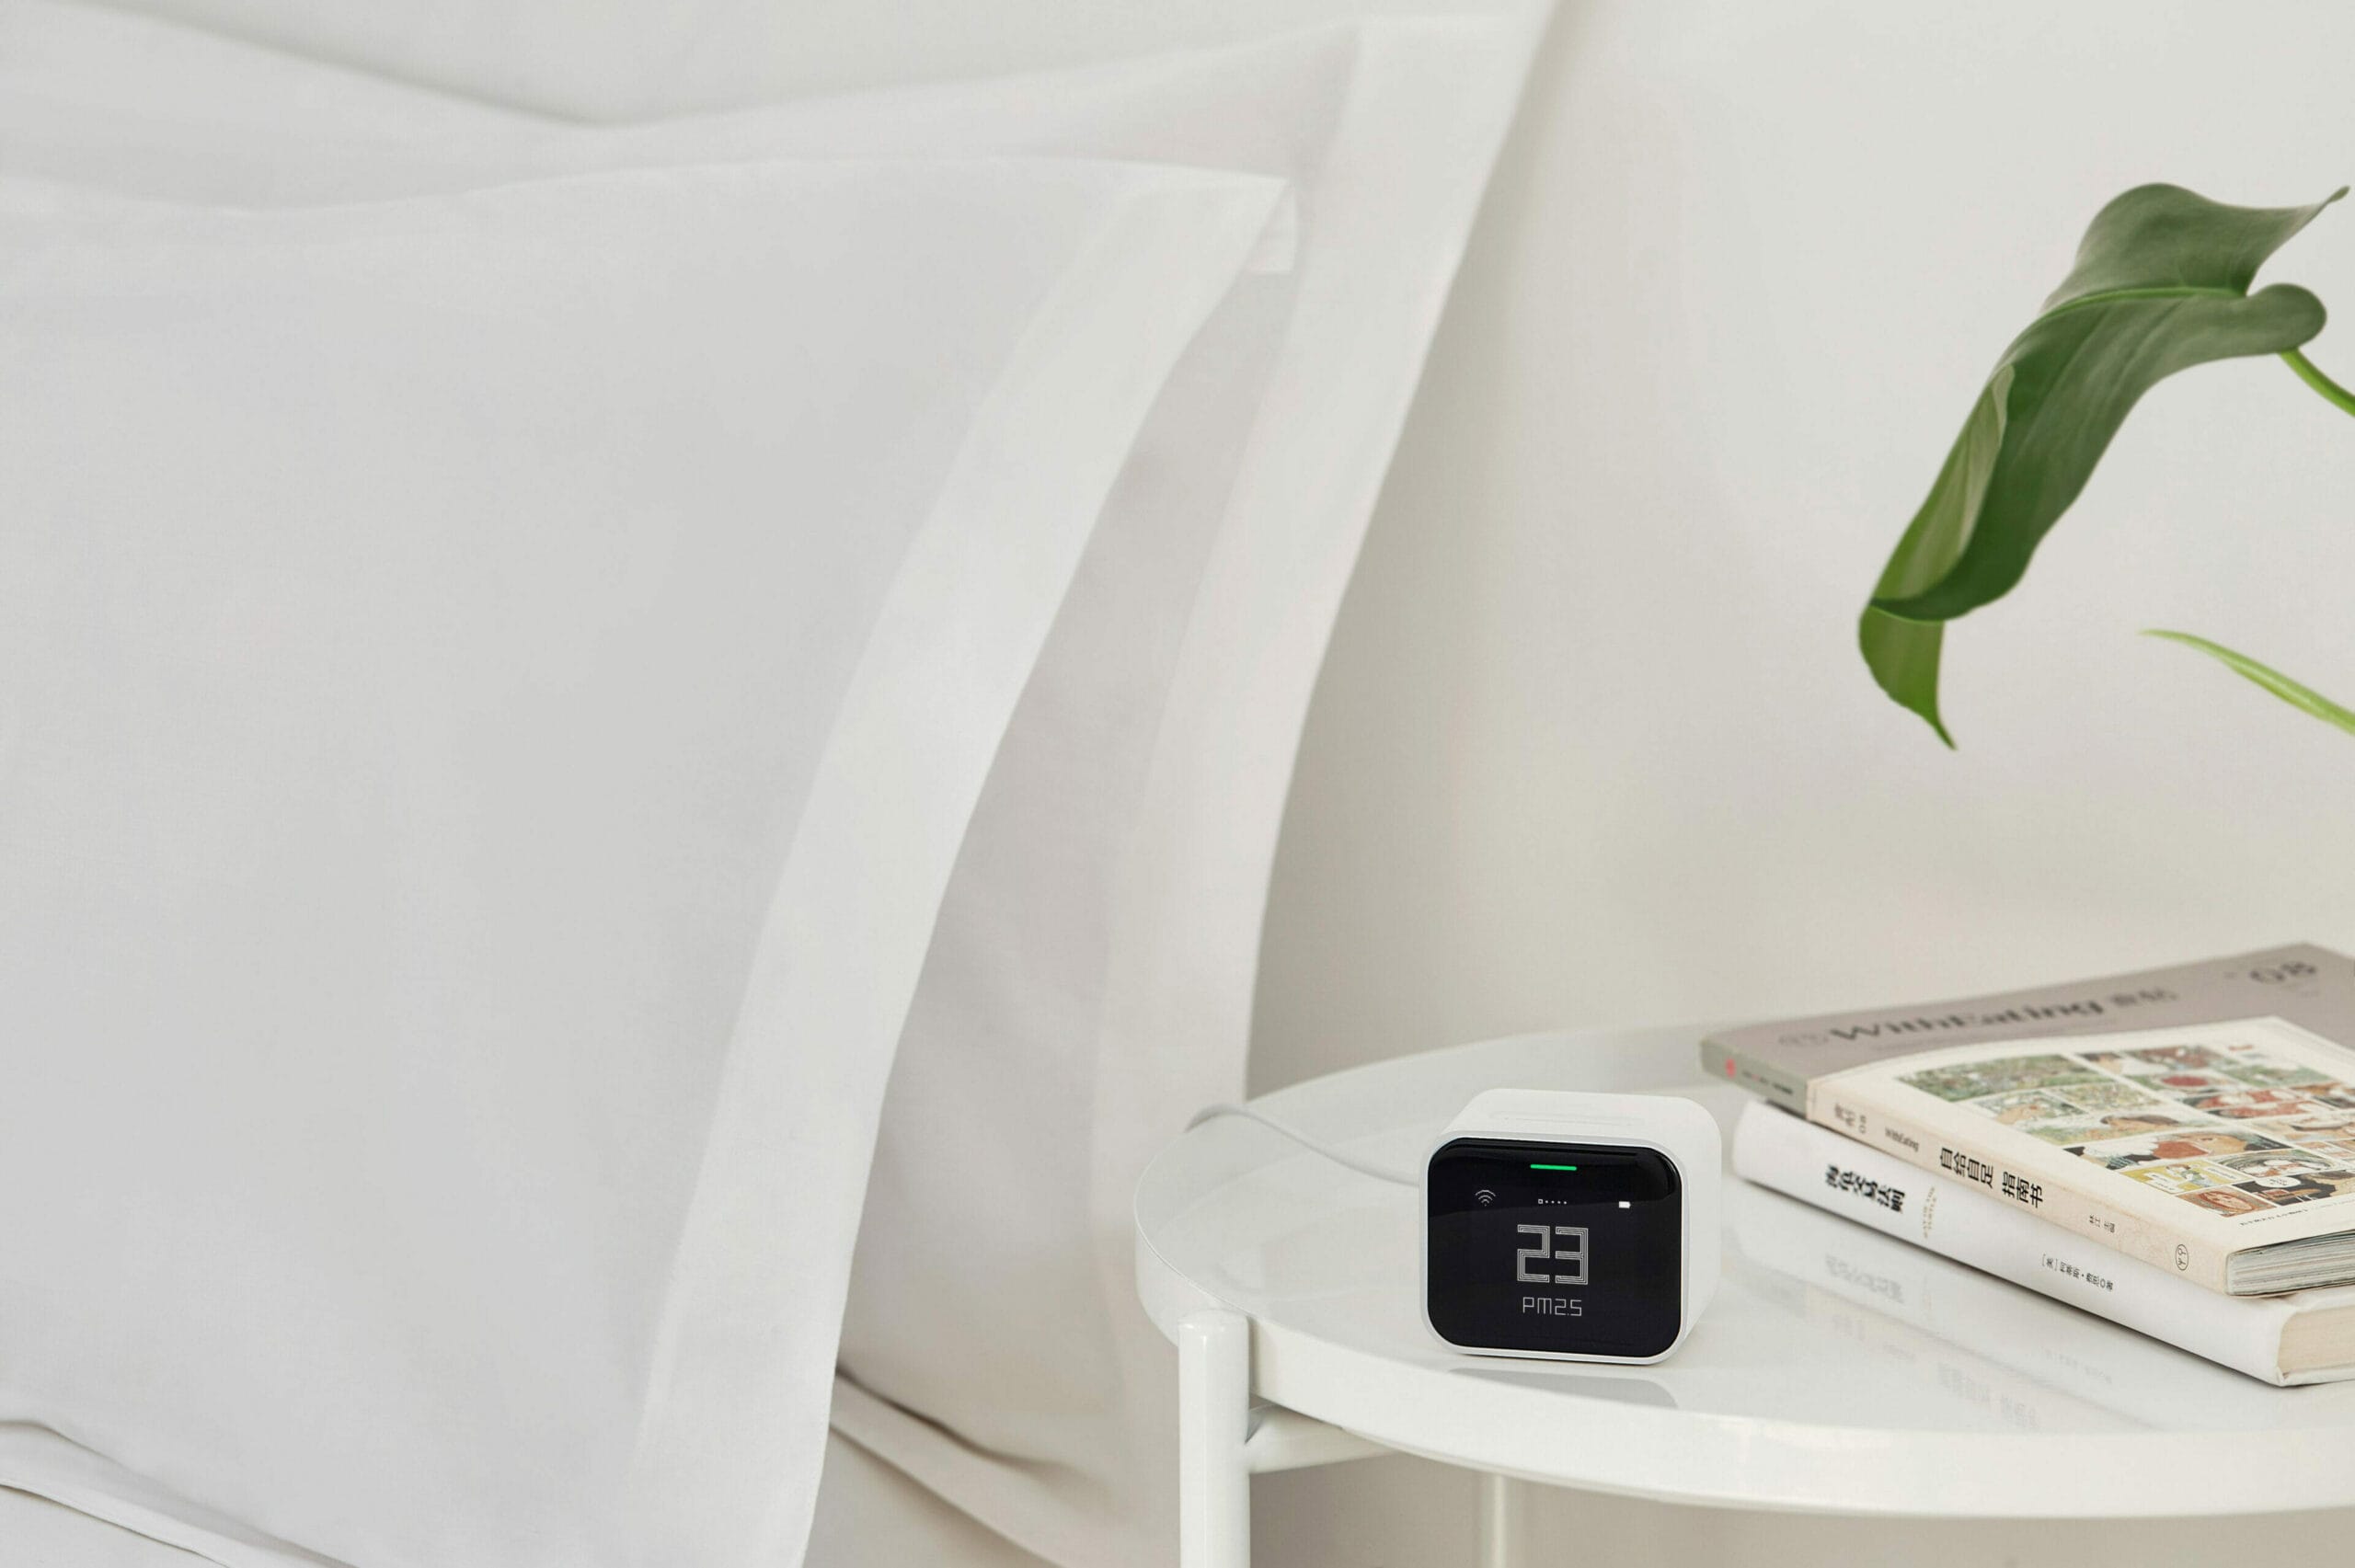
The Qingping Air Monitor Lite is another good low-cost option.
We may as well spoil this section by saying that price is the most appealing aspect of this device. It’s a low-cost air quality monitor at only $49.99 or your local equivalent. This is a highly compelling offer, and it’s one of the lowest-cost air quality monitors out there.
That said, there are a few other options with the same price or similar, and the IKEA Vindstyrka doesn’t exist in isolation. Therefore, I’ve compiled a list of a few other low-cost alternatives to see what options there are.
| Monitor | Measures | Price |
|---|---|---|
| IKEA Vindstyrka | PM2.5, tVOC, Temperature, RH | $49.99 |
| Amazon Smart Air Quality Monitor | PM2.5, tVOC, CO, Temperature, RH | $69.99 |
| Qingping Air Quality Monitor Lite | PM2.5, PM10, CO2, Temperature, RH | $79.99 |
| Temtop S1 | PM2.5, Temperature, RH | $39.99 |
In the above graph, I’ve chosen a few monitors that I’ve tried myself and the Amazon Smart Air Quality Monitor, which I have not yet tried but have heard good things about. As you can see, the Vindstryka stands against its competition well, at least regarding the sensors it offers. However, what makes it so appealing to me is the quality of the sensor – the SEN54 is a good sensor, and I would probably trust it the most out of the devices on this list.
At the second lowest price point and a significant upgrade above the Temtop monitor regarding accuracy, connectivity, and (in my opinion) design, I think the IKEA product is a great deal. For the price, it’s likely the best choice out there. However, if you can afford to spend more, the Qingping Air Quality Monitor Lite is a more well-rounded product with fantastic app support. On top of this, it also measures CO2, which is important for an indoor air quality monitor.
If you have a hard budget of $50 for an indoor air quality monitor, the IKEA Vindstyrka is the air quality monitor you should check out. I believe the very low price is due to the number of components IKEA can purchase. Considering the sensor alone would cost a smaller company around $30, there’s almost no way a low-cost air quality monitor from another, smaller company could compete. However, with the volume of products IKEA can sell, it makes sense that they can get a lower price on the Sensirion sensor simply by purchasing in large quantities. I’m not complaining either – this makes an excellent product for us consumers!
Now, if you have more to spend, I recommend also checking out the Qingping Air Quality Monitor Lite. It’s a fantastic device with many advantages over the IKEA product. While it doesn’t measure tVOCs (nor does the Vindstyrka, really), it measures CO2 and has a better application, display, and internal battery. It costs about $30 more, though, so it’s really up to you whether you want the extra benefits.
Purchase IKEA Vindstyrka Air Quality Monitor
Conclusion
The Vindstyrka is not a perfect device – far from it. However, it’s an inexpensive air quality monitor that has shown us exactly how capable even a low-cost device can be. With a fantastic sensor from Sensirion, this device is an accurate air quality monitor that won’t break the bank. Even compared to currently existing ‘affordable’ options, this undercuts most of them significantly.
The most exciting part of this monitor for me isn’t so much the monitor itself but what it means. Seeing big stores such as IKEA get involved and release indoor air quality monitoring products is a great sign, as awareness of the dangers of such pollution is increasing. Even better, air quality monitoring is becoming more affordable than ever before.
But let’s discuss the product itself. Over my time with the device, I’ve used it only as a standalone monitor because I don’t have the extras required to use the IKEA smart home system. Despite this, I’ve found the device handy around the house and even standalone, it performs well. It’s also very accurate, which is a big bonus!
That said, I wish it had a Bluetooth-only app that could be used alongside smart home integration. I also wish the display showed VOC levels rather than the frustrating (and not very informative) arrows and that the PM2.5 colour-coded concentrations were changed to make them more realistic and in line with other guidelines.
However, there is no denying that the IKEA Vindstyrka is a great air quality monitor at its very low price of under $50. At this price, you’d be hard-pressed to find anything with accuracy even close to this monitor, and it certainly would have flaws of its own. Considering the price, I think this monitor is a great offer, and it lowers the barriers to keeping indoor air clean!
Have you tried the Vindstyrka? If so, I would love to hear your thoughts on the product. Please feel free to share your experiences below and let everyone know whether you’ve had a good time with the device. If you have any questions, please also feel free to ask, and I will do my best to reply!
Purchase IKEA Vindstyrka Air Quality Monitor
Vindstyrka FAQ
Where Can I Buy the Vindstyrka Air Quality Monitor?
You can purchase the Vindstyrka Air Quality Monitor from IKEA.
What Does the Vindstyrka Monitor?
This air quality monitor monitors PM2.5, VOCs, temperature and relative humidity.
What Sensor Does the Vindstyrka Use?
The Vindstyrka uses the Sensirion SEN54 sensor.
Does the Vindstyrka Have Connectivity?
Yes! The Vindstyrka can use Zigbee and DIRIGERA.
Does IKEA Sell Air Quality Monitors?
Yes, they sell two. The more expensive monitor is the Vindstyrka, and the cheaper monitor is called the Vindriktning.
What Alternatives Are There to the Vindstryka?
The Qingping Air Quality Monitor Lite and the Amazon Air Quality Monitor are the closest alternatives.
Does IKEA Sell Any Other Air Quality Monitors?
They only sell one other monitor, a cheaper version called the Vindriktning.
Is the Vindstyrka Indoor Air Quality Monitor Accurate?
Yes. The Vindstyrka uses the Sensirion SEN54 sensor, a surprisingly accurate sensor in a device this inexpensive.
Have Questions or Comments?
Join the discussion on the BreatheSafeAir Community Forum. Ask any questions you have about air quality or adjacent topics and get quick answers!
IKEA Vindstyrka
IKEA has recently launched two inpexensive air quality monitors, the Vindstyrka and Vindriktning. However, how do they hold up compared to other options?
Product Brand: IKEA
4
Pros
- Inexpensive
- Accurate sensor (Sensirion SEN54)
- Clean, minimalist design
- Available in any IKEA
- Easy to use
- Smart home integration
Cons
- No exact tVOC reading
- PM scale needs to be updated
- Requires other accessories for IKEA smart home integration
- No internal battery
Sadly this review didn’t answer my question about the product. How is this lengthy review doesn’t even mention it?
Does this monitor has battery built in or we need to plug it in???
One of the cons of the device in the list at the bottom of the post is ‘No internal battery’. However, you are right that I should make this more obvious. Thank you for pointing that out.
It may not display the exact tvoc index on the display but it does transmit it over ZigBee. I connected this to Home Assistant and I see the tvoc index reading.
Hi Dimitris,
Yes, you are correct. However, it’s important to keep in mind that the tVOC index reading is not absolute – only relative. This is something I learnt only after this review. That’s why IKEA chose the arrow system as even the ‘values’ from the sensor are only relative and use an index developed by the sensor manufacturer.
Isn’t it kind of useless then? How is this useful?
It will show relative trends so you can identify when VOCs are climbing, decreasing, or stable. I agree, it’s not as useful as an absolute value, but at this price range you won’t find any VOC sensors that show absolute values.
if you press and hold the big button you can set the display brightness and if it stays on permanently, you can also change to celsius this way
I wasn’t aware of this. Thank you for letting me know!