With more indoor air quality monitors becoming available every day, it’s becoming more and more difficult for monitors to differentiate themselves from one another and offer competitive advantages. In fact, while I’m happy to see so many choices now on the market, I often feel like there isn’t that much of a choice at all.
This is down to the fact that most indoor air quality monitors offer a similar set of features and have few differentiating factors. This issue is only compounded by the fact that nearly all monitors on the market use sensors from the same companies, making their performance often identical.
After reviewing so many devices on this website, it’s now rare that I review an indoor air quality monitor that makes me say, ‘Wow, this is different!’. However, today, I get to introduce a monitor that made me think exactly that. While it still relies on the same sensors you will find in many other monitors on the market, the AirGradient ONE is an indoor air quality monitor that stands out for a few key reasons.
This device can be bought in one of two configurations – as a DIY kit or fully assembled. Depending on which kit you buy, you will get different benefits. The DIY kit (which is easy to assemble) is around 50% cheaper than the assembled kit and, therefore, is a very good option for anyone on a budget. On the other hand, the fully assembled monitor costs more, but it comes with a warranty and is certified CE, FCC, RoHS, REACH and RESET Air.
On top of this unique choice, the AirGradient ONE is open-source (software and hardware) and has user-replaceable components. If, for whatever reason, one of your sensors is faulty or breaks, you won’t need to replace the whole monitor. Instead, you can purchase the individual parts from AirGradient or a third-party store, saving you significant money over replacing the whole monitor.
Furthermore, the AirGradient ONE is entirely open-source, meaning that if you are comfortable programming the device yourself, it’s incredibly customisable, and you can do almost anything you want. Do you want to change the thresholds for the LEDs on the device? You can do this. Want to integrate it with your preferred smart-home solution? You can likely do this too!
These benefits are unique to the AirGradient ONE indoor air quality monitor and make me particularly excited to present my review of the device. As of the time of writing this article, I’ve been using my AirGradient ONE for around six weeks, and I feel like I have a good understanding of how the device performs and its strengths and weaknesses. With that out of the way, let’s dive into the review!
Subscribe to BreatheSafeAir
We spend 90% of our time indoors. Make sure the air you breathe indoors is healthy.
This post contains affiliate links. For more information, please refer to my affiliate disclaimer. I was sent a product for review, but the article is not sponsored. All opinions expressed in this post are my honest thoughts. I only recommend products that I genuinely believe in.
Information on this blog is for informational purposes only. Readers are encouraged to confirm the information herein with other sources. Furthermore, this information is not intended to replace medical advice from professionals. This website assumes no responsibility for the accuracy of the information, and information is subject to change without notice. Devices mentioned on this website are not medical devices and do not guarantee protection.
DIY or Fully Assembled?
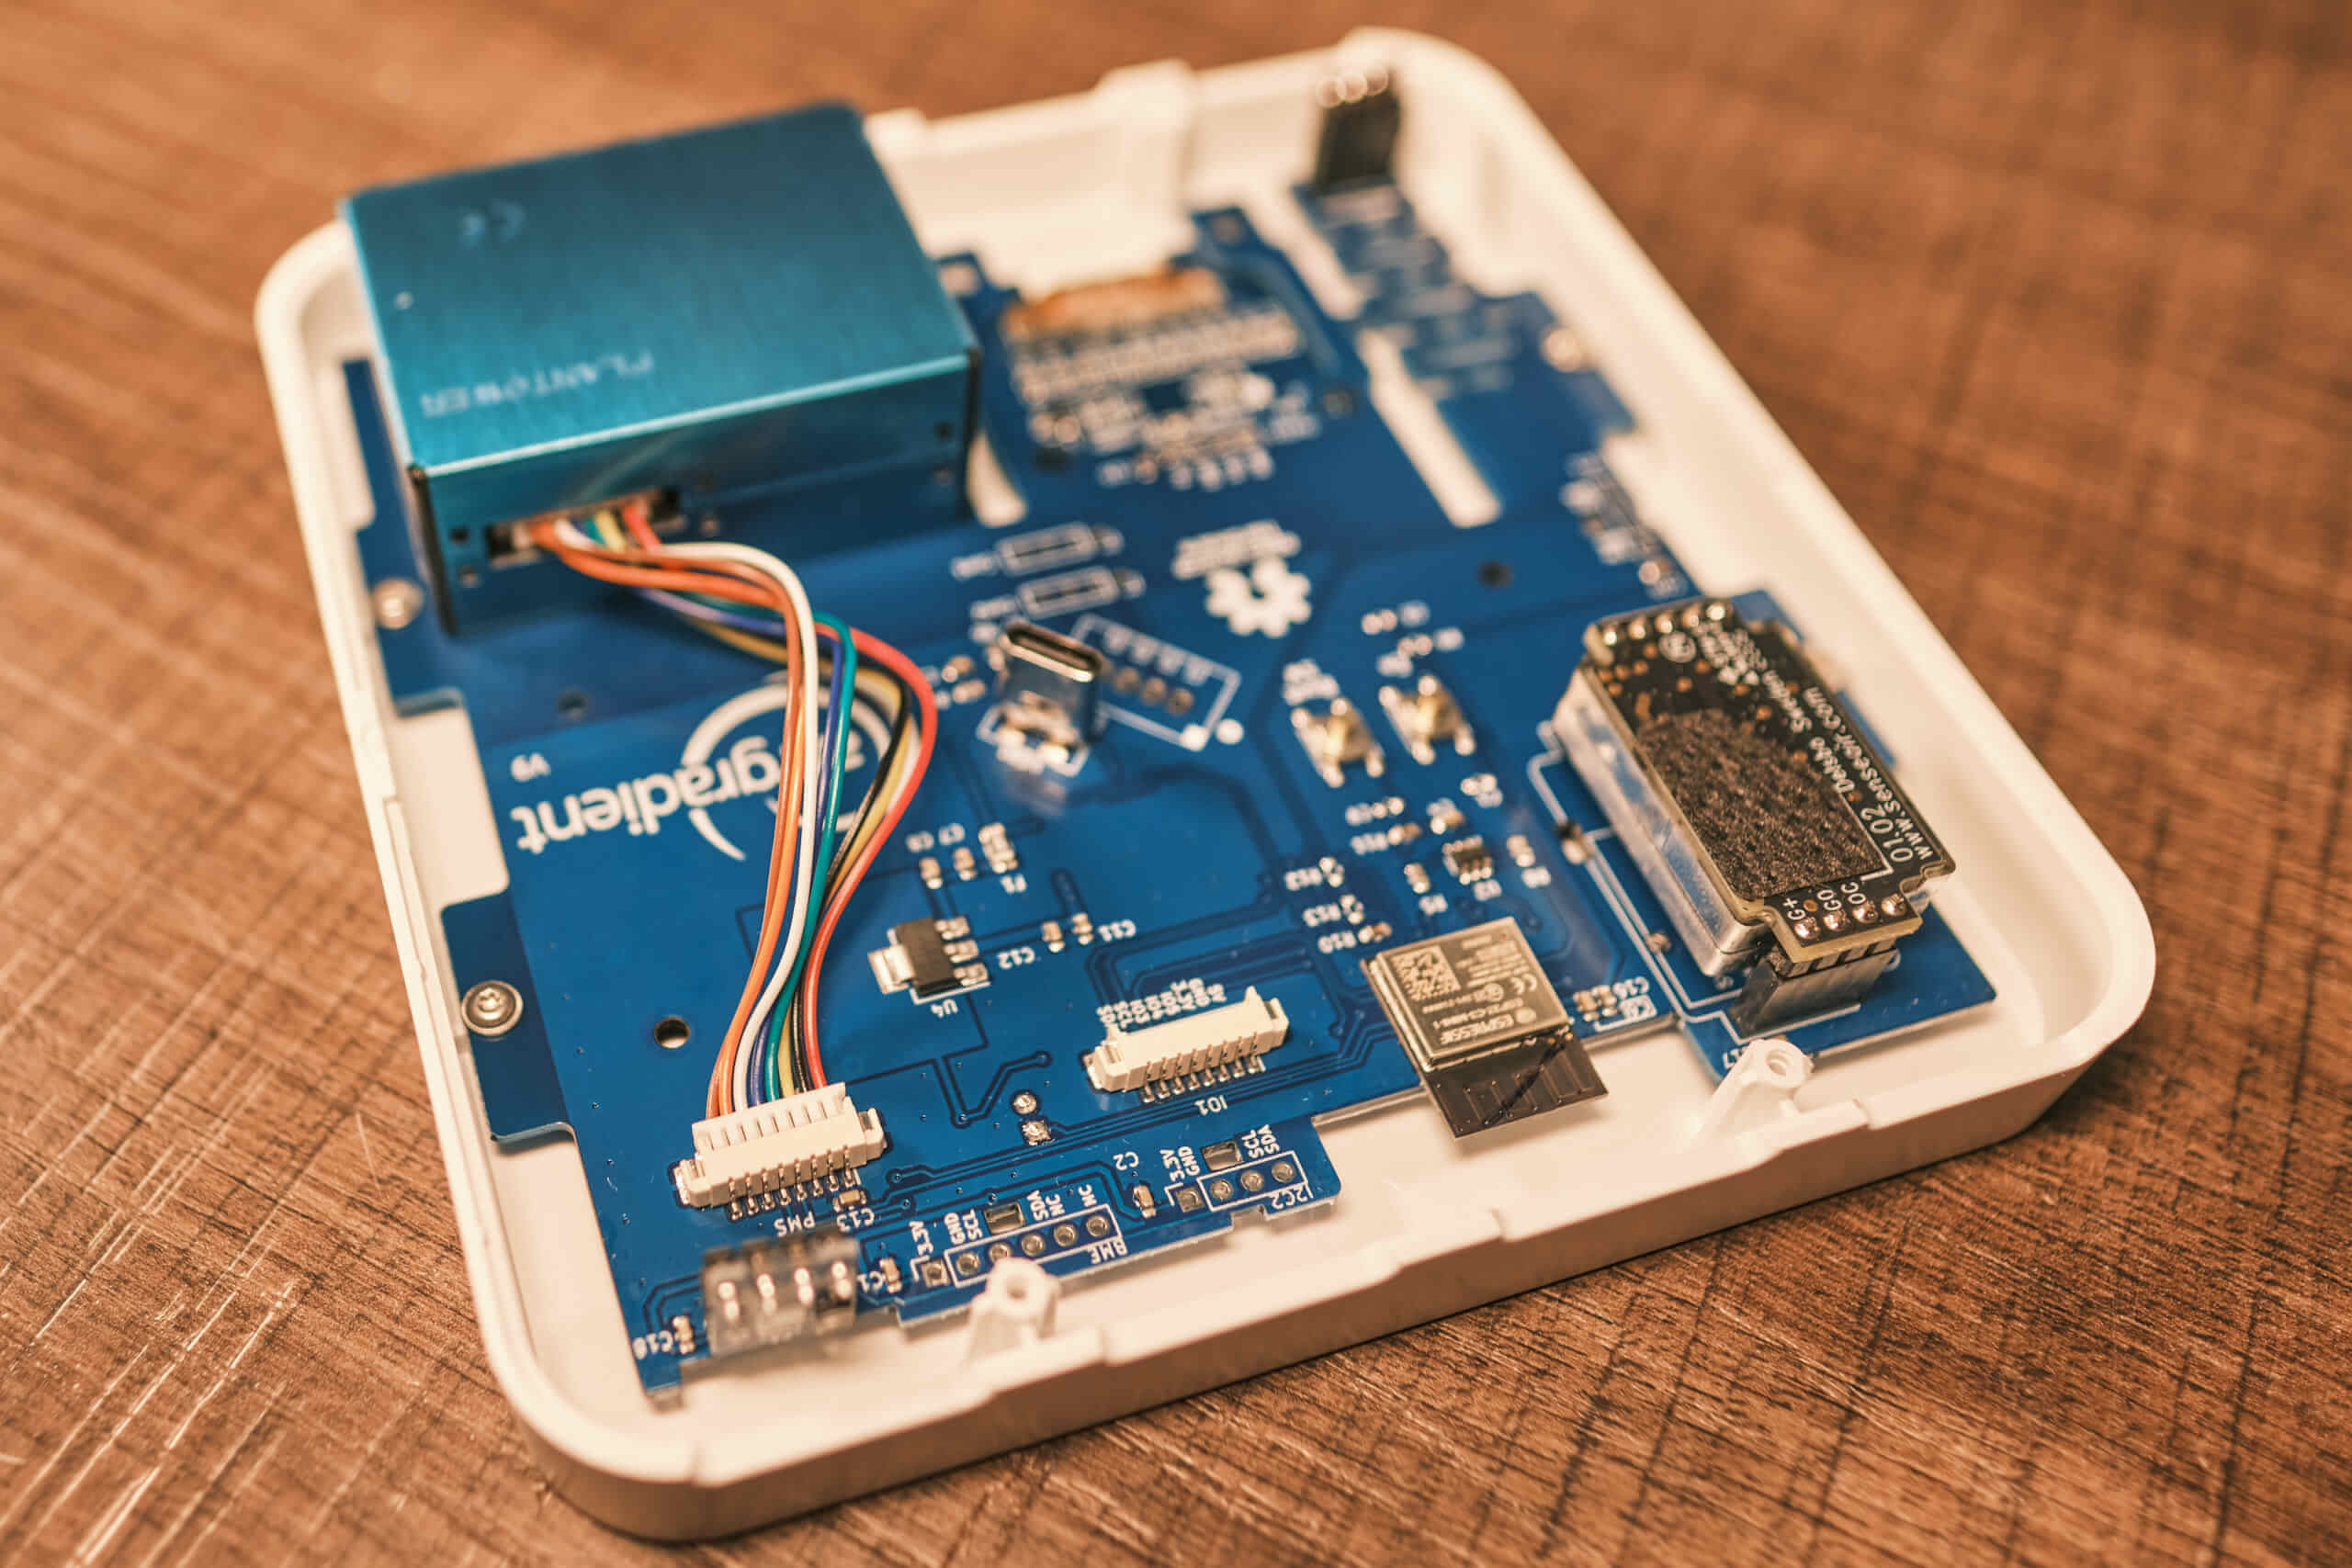
The first question you need to ask yourself, and the one you’re probably wondering about right now, is whether or not to opt for the DIY kit or go for the fully assembled kit. This is a surprisingly tough choice, so let’s look at the benefits of each option:
| Monitor | Advantages |
|---|---|
| AirGradient One DIY Kit | – Cheaper ($138 vs $195) – Assembly gives you an understanding of how the device works. |
| AirGradient One Fully-Assembled | – Certified CE, FCC, RoHS, REACH, RESET Air – Comes with a 12-month warranty – Tested in-house for accuracy, and a test report is provided |
Despite this seemingly tough decision, it only comes down to your answer to one question: Would you prefer to save around $60, or are the warranty and certifications enough to justify this price increase? Since I am receiving the same monitor at the end of the day, I opted for the DIY kit and am happy with my choice.
That leads to the biggest question people have asked me about the AirGradient One – is it hard to assemble? Absolutely not! In fact, it’s both very easy and quick, and I believe it took me around 10 minutes to put my monitor together. Even better, everything you need to put the device together is included in the kit. Since no soldering is required, the included screwdriver is the only tool needed.
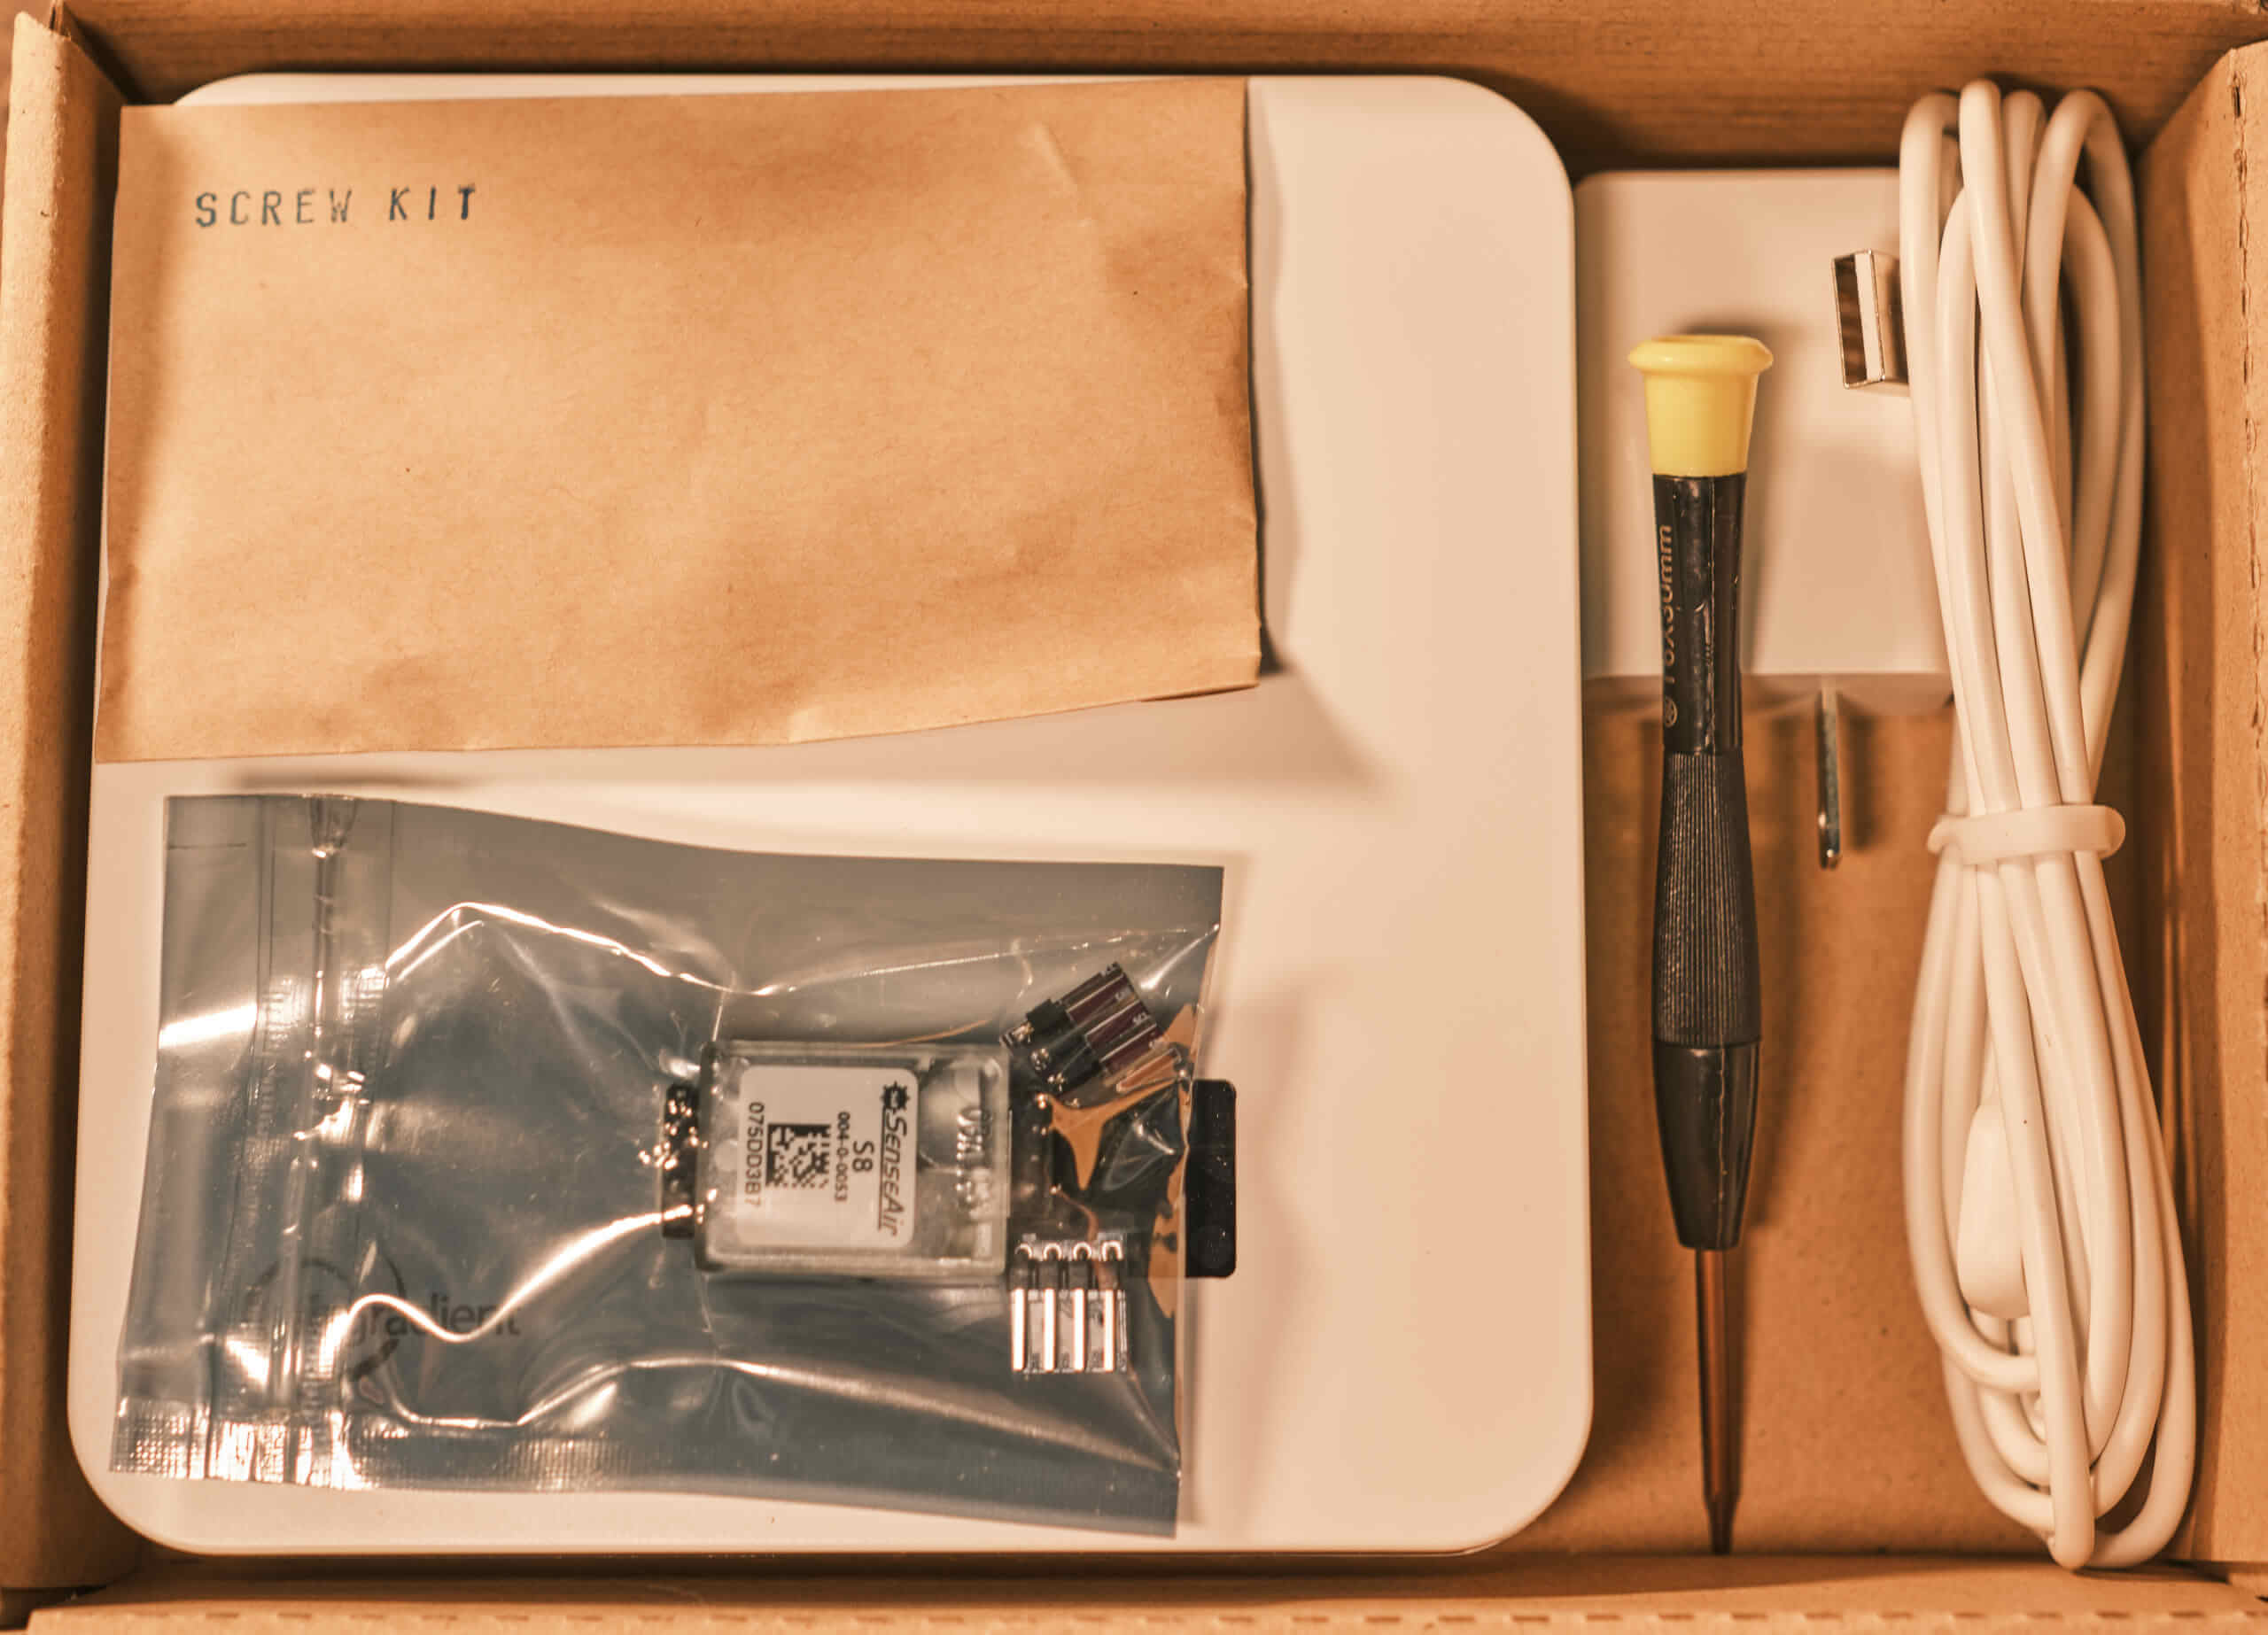
Inside the box, you will find the device’s case, a bag of screws (in which you will also find the stands for the device), as well as a bag of sensors (a total of three), a screwdriver, and a USB cable and adapter. This is everything you need to assemble the device and get it operational. The mainboard/motherboard is also included, but that comes already placed in the case.
Attaching the three sensors is extremely straightforward; all you need to do is align their pins with their respective ports on the mainboard. You will have instructions, don’t worry, which are viewable on the AirGradient website via a QR code included in the box.
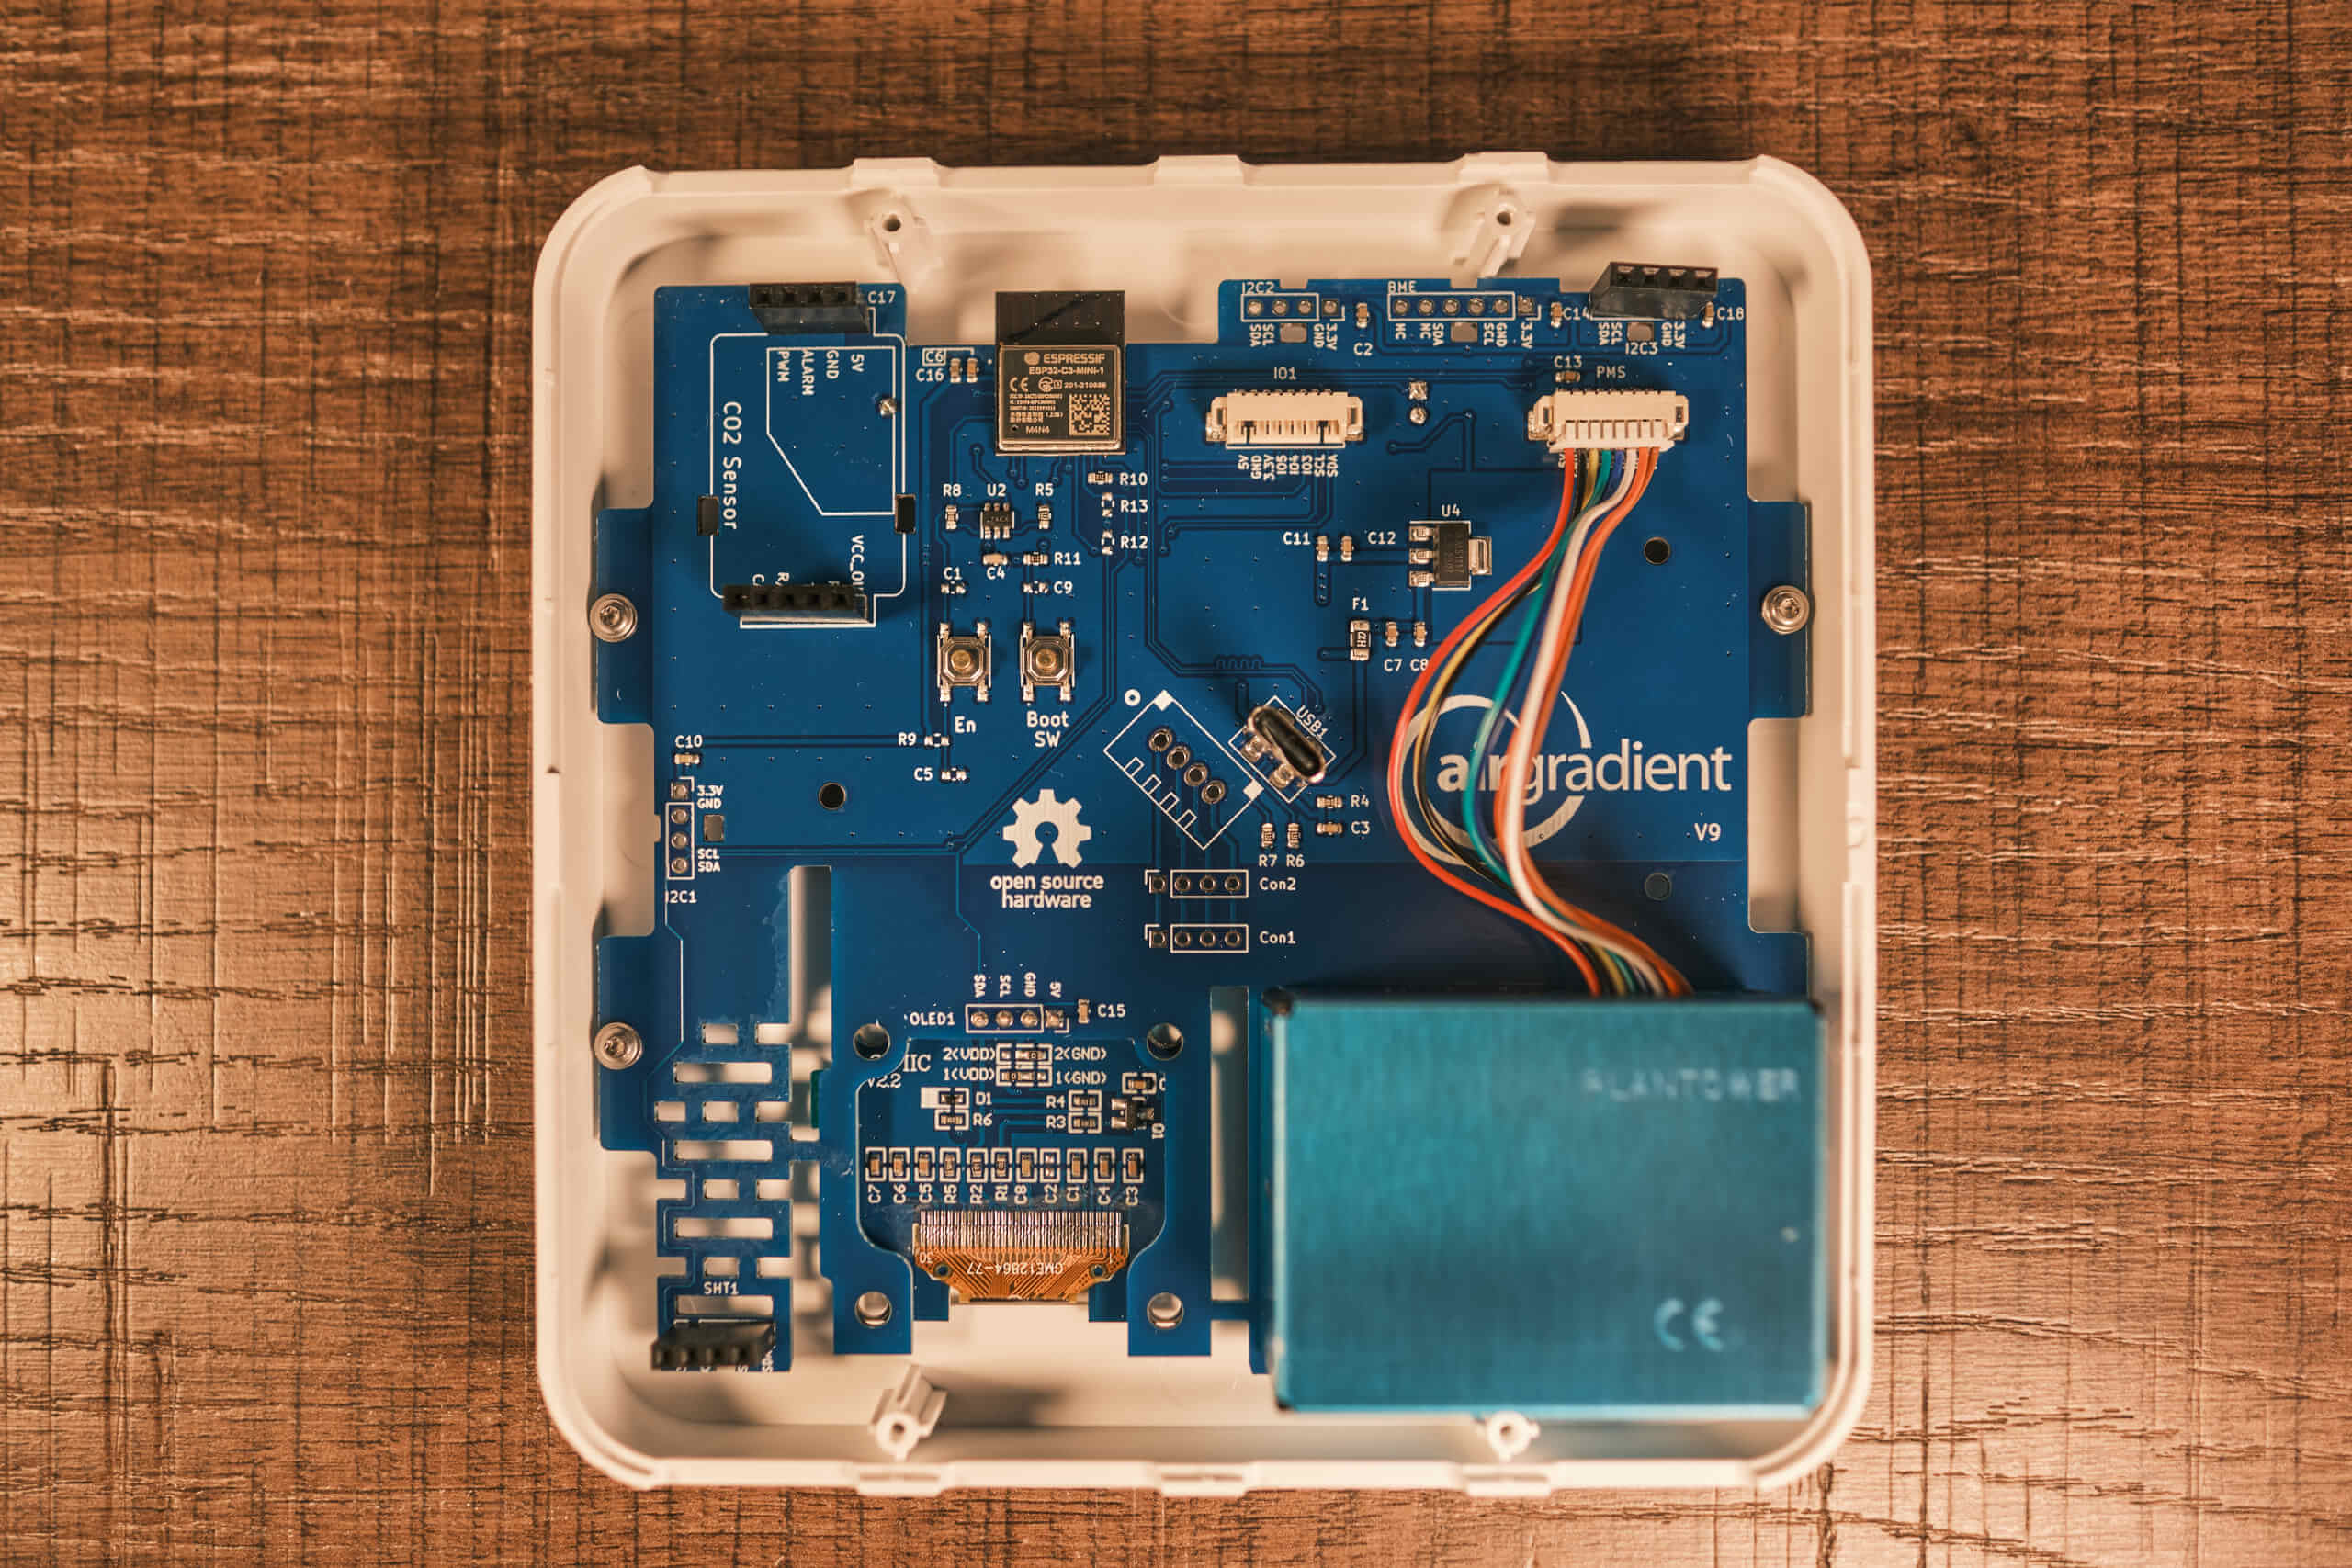
You are good to go once you have placed each of the three sensors in their respective positions! It is a simple process. With the straightforward process, I was initially worried I missed a step. However, after screwing the back panel into the case and plugging the device in, it booted up quickly, and my fears were quickly allayed.
The best news here is that regardless of which device you purchase (the DIY kit or the full-assembled variant), it’s equally as easy to replace the sensors if needed. Since the individual components cost only $10 – $40, you can save a lot of money if an individual component ever needs replacing.
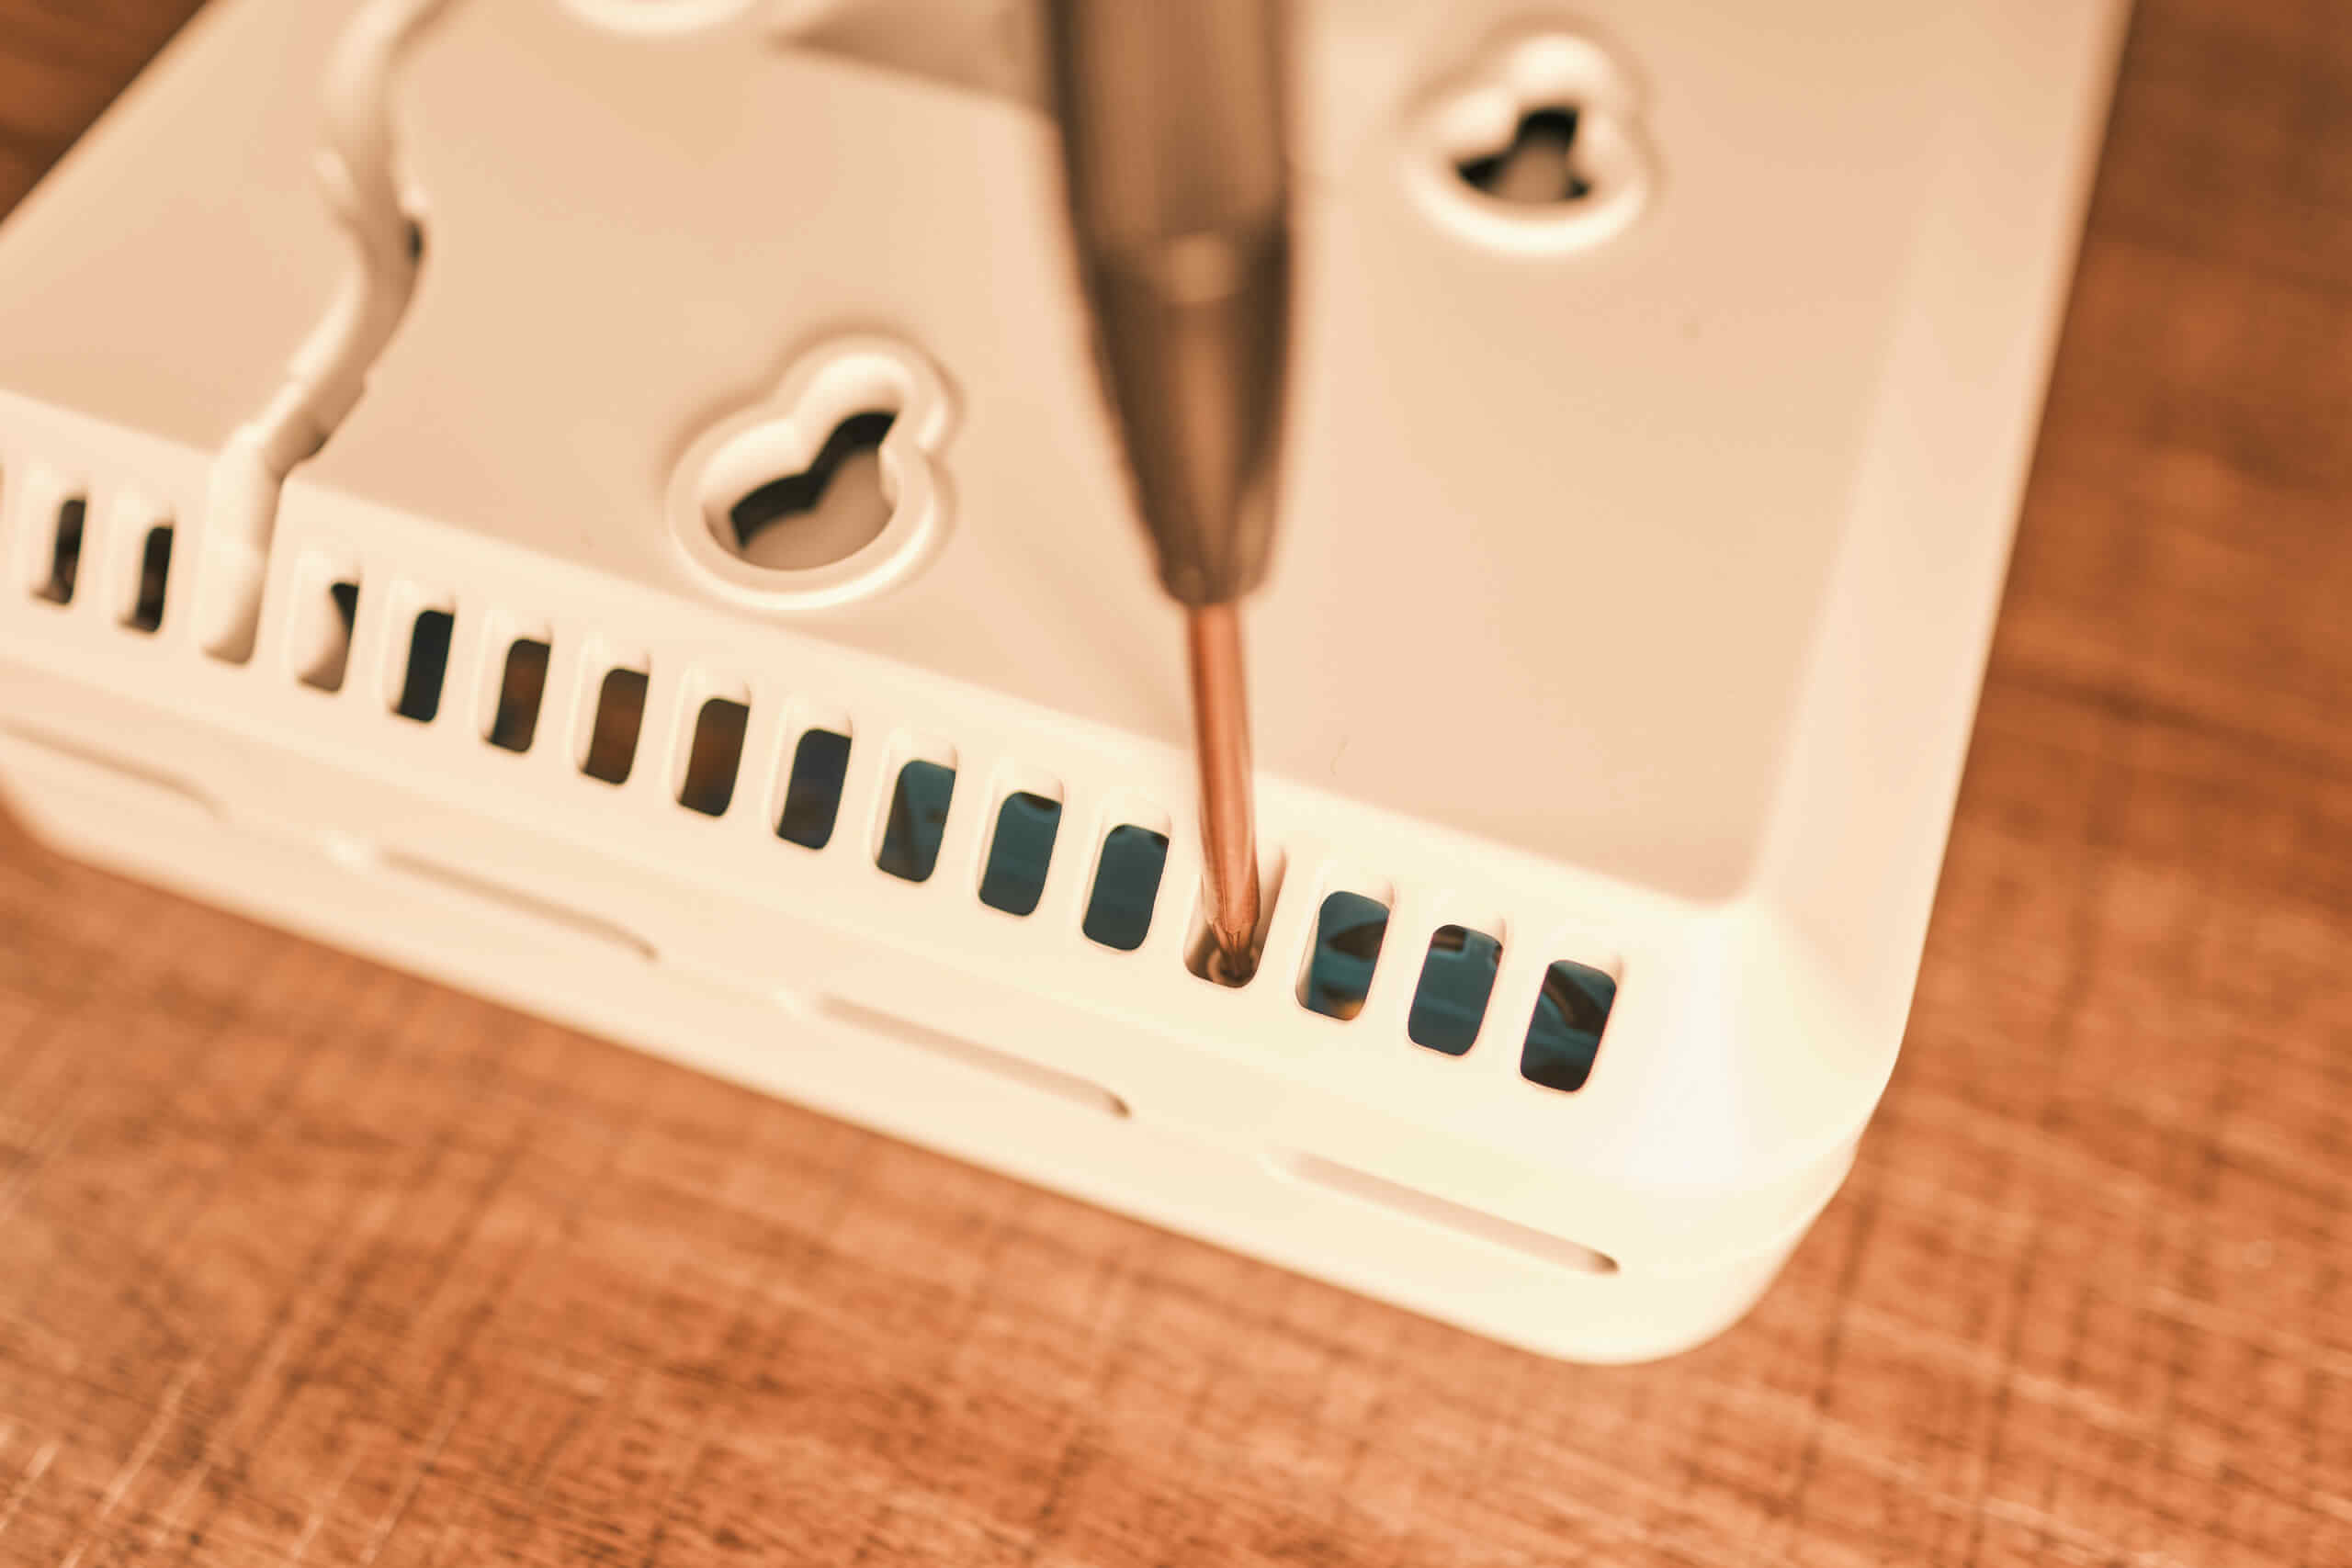
At this point, you’ve completed assembly, and you can plug the device in. This is best done with the included USB cable as it has a 90-degree head and is lengthy, making it the perfect pairing for the AirGradient ONE. However, there is still one decision you will need to make.
Would you prefer to have the monitor mounted to a wall or sitting on a desk? If you want to mount the monitor to the wall, you can route the USB cable out the top or bottom of the device (whichever works best) and mount it via one of the four mounting holes on the back. If, on the other hand, you want to sit the device somewhere, you will need to slide in the included plastic feet.
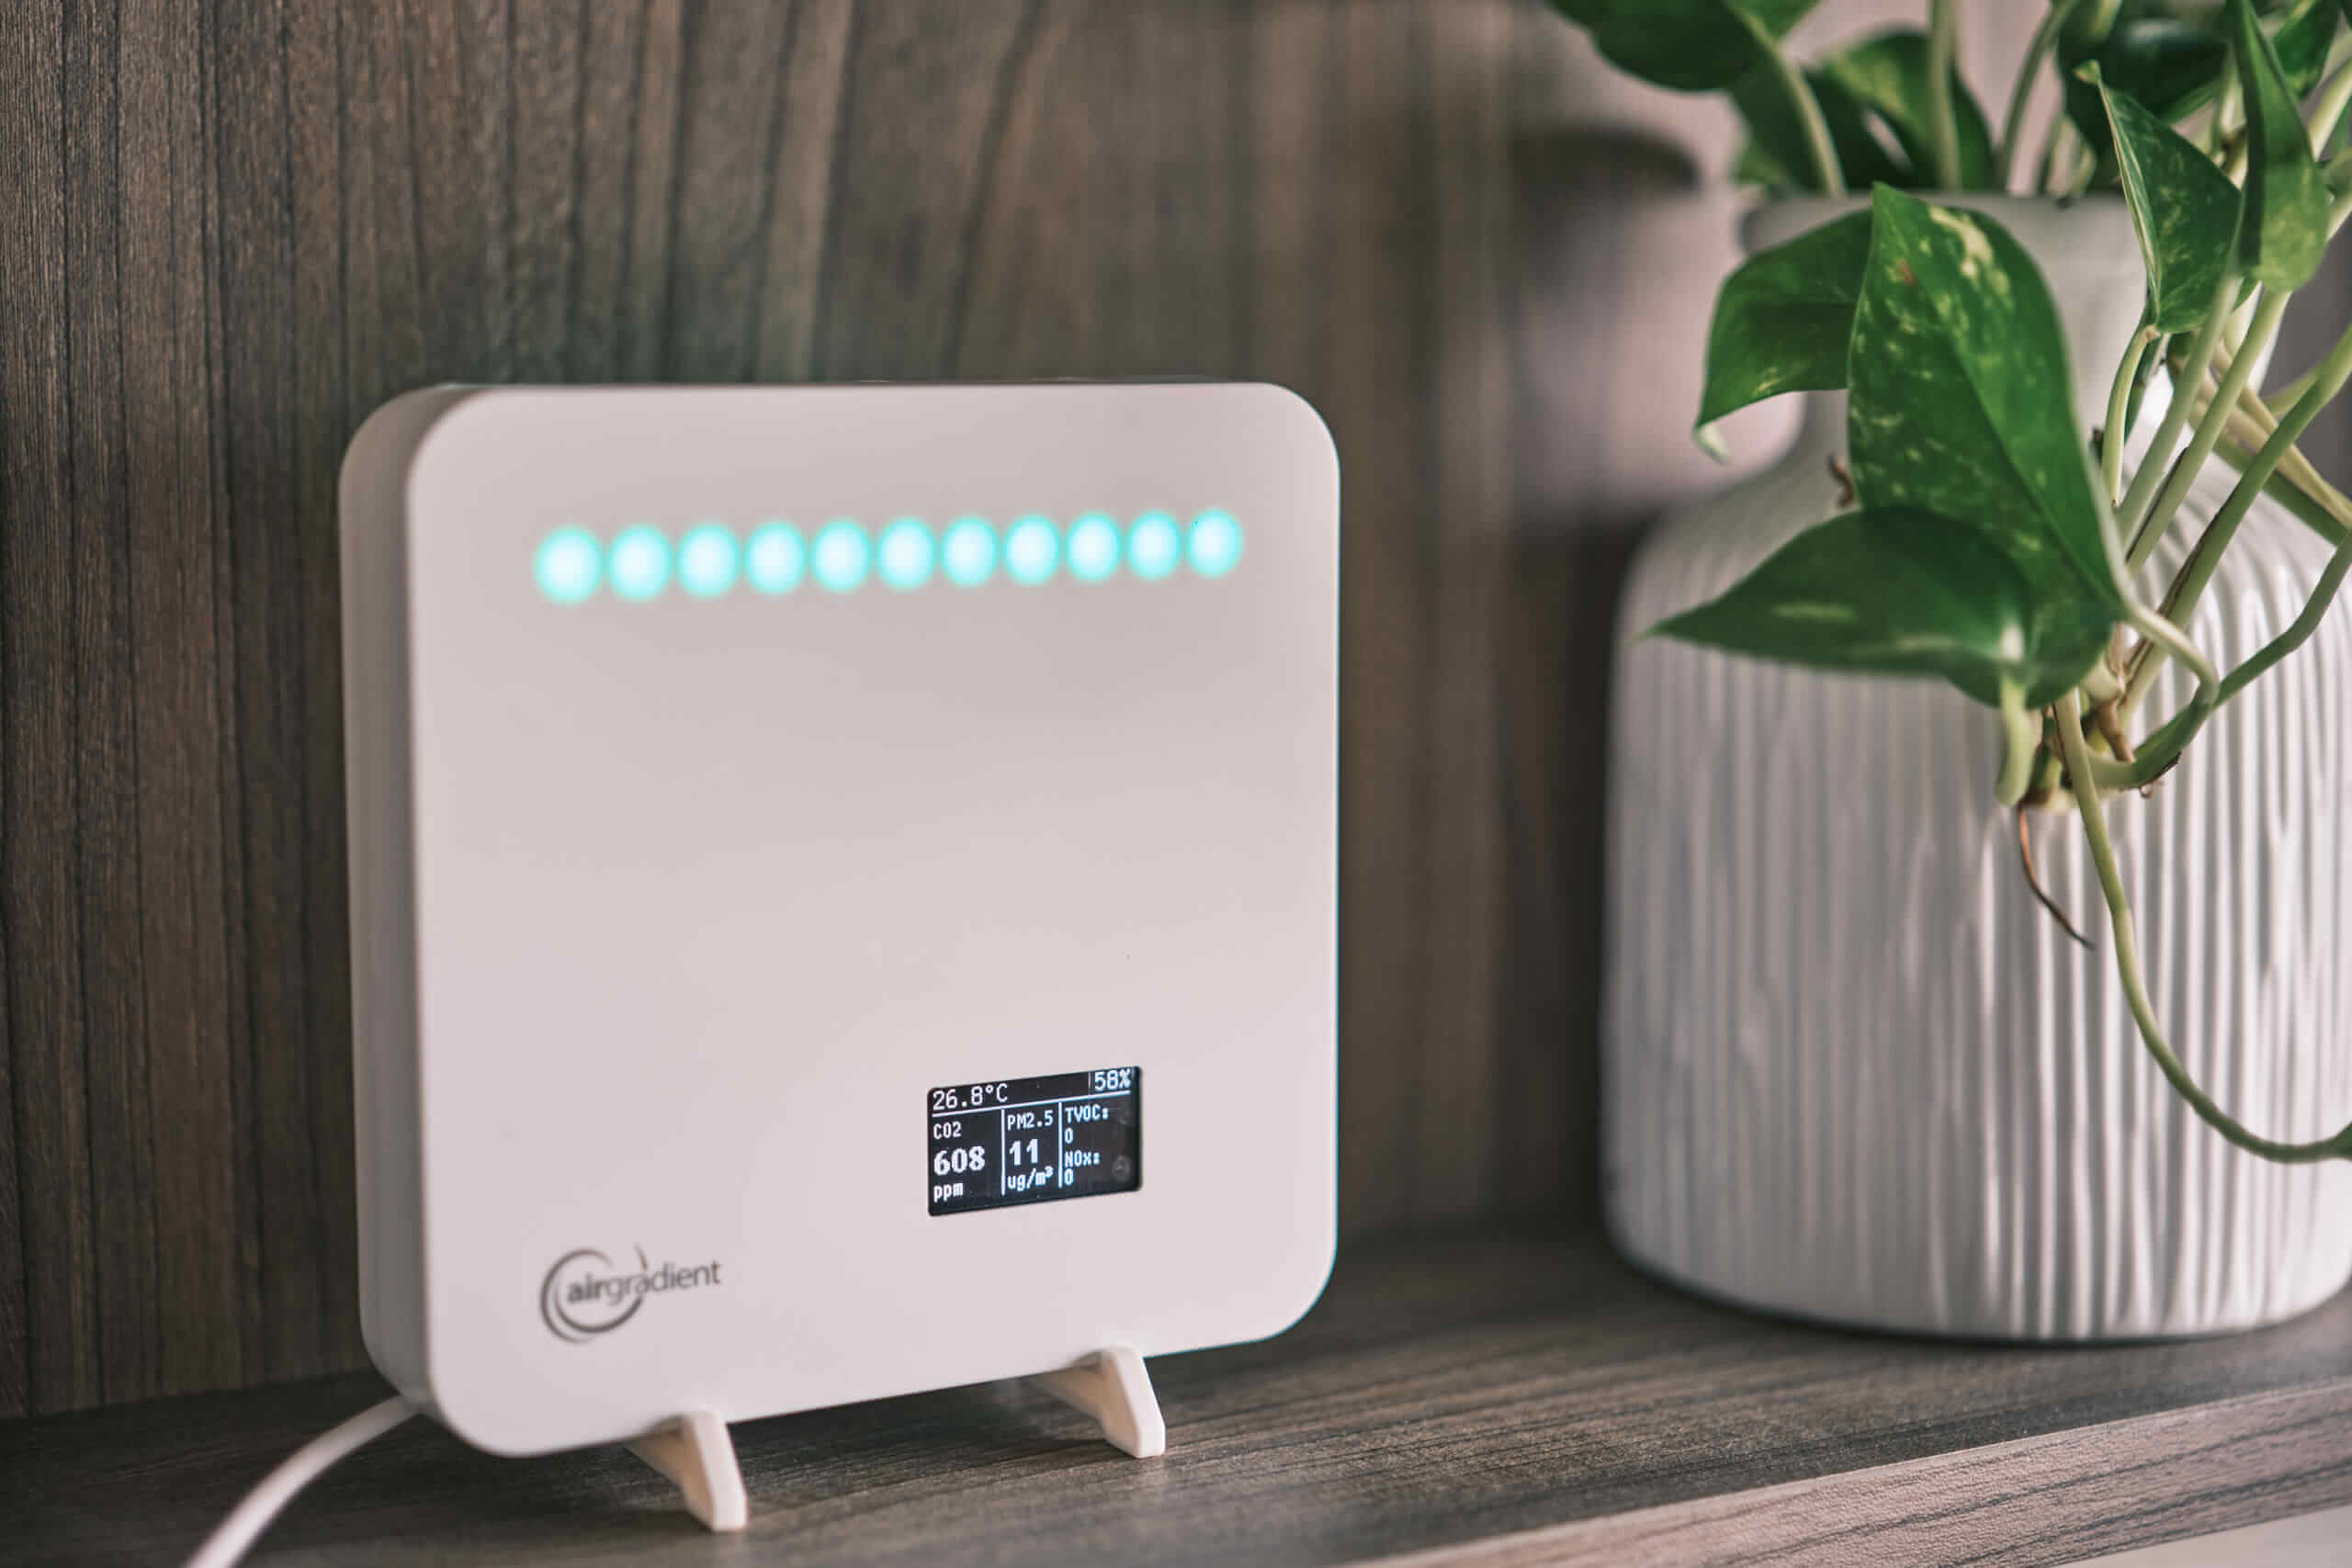
As with building the monitor itself, inserting the feet is easy, and you can’t go wrong. Considering the most challenging part of the DIY process was probably putting the feet on the device (which was also straightforward), I can safely say that this is an exceptionally easy DIY process. I can easily recommend the DIY kit to anyone wanting to save money.
While the pre-built kit does come with peace of mind due to the accuracy testing and warranty, no one should be afraid of the DIY kit. Therefore, you shouldn’t let the fear of building the monitor put you off the DIY kit. Instead, choose what is more important to you – warranties and certifications or saving a significant chunk of money.
Accuracy & Sensors
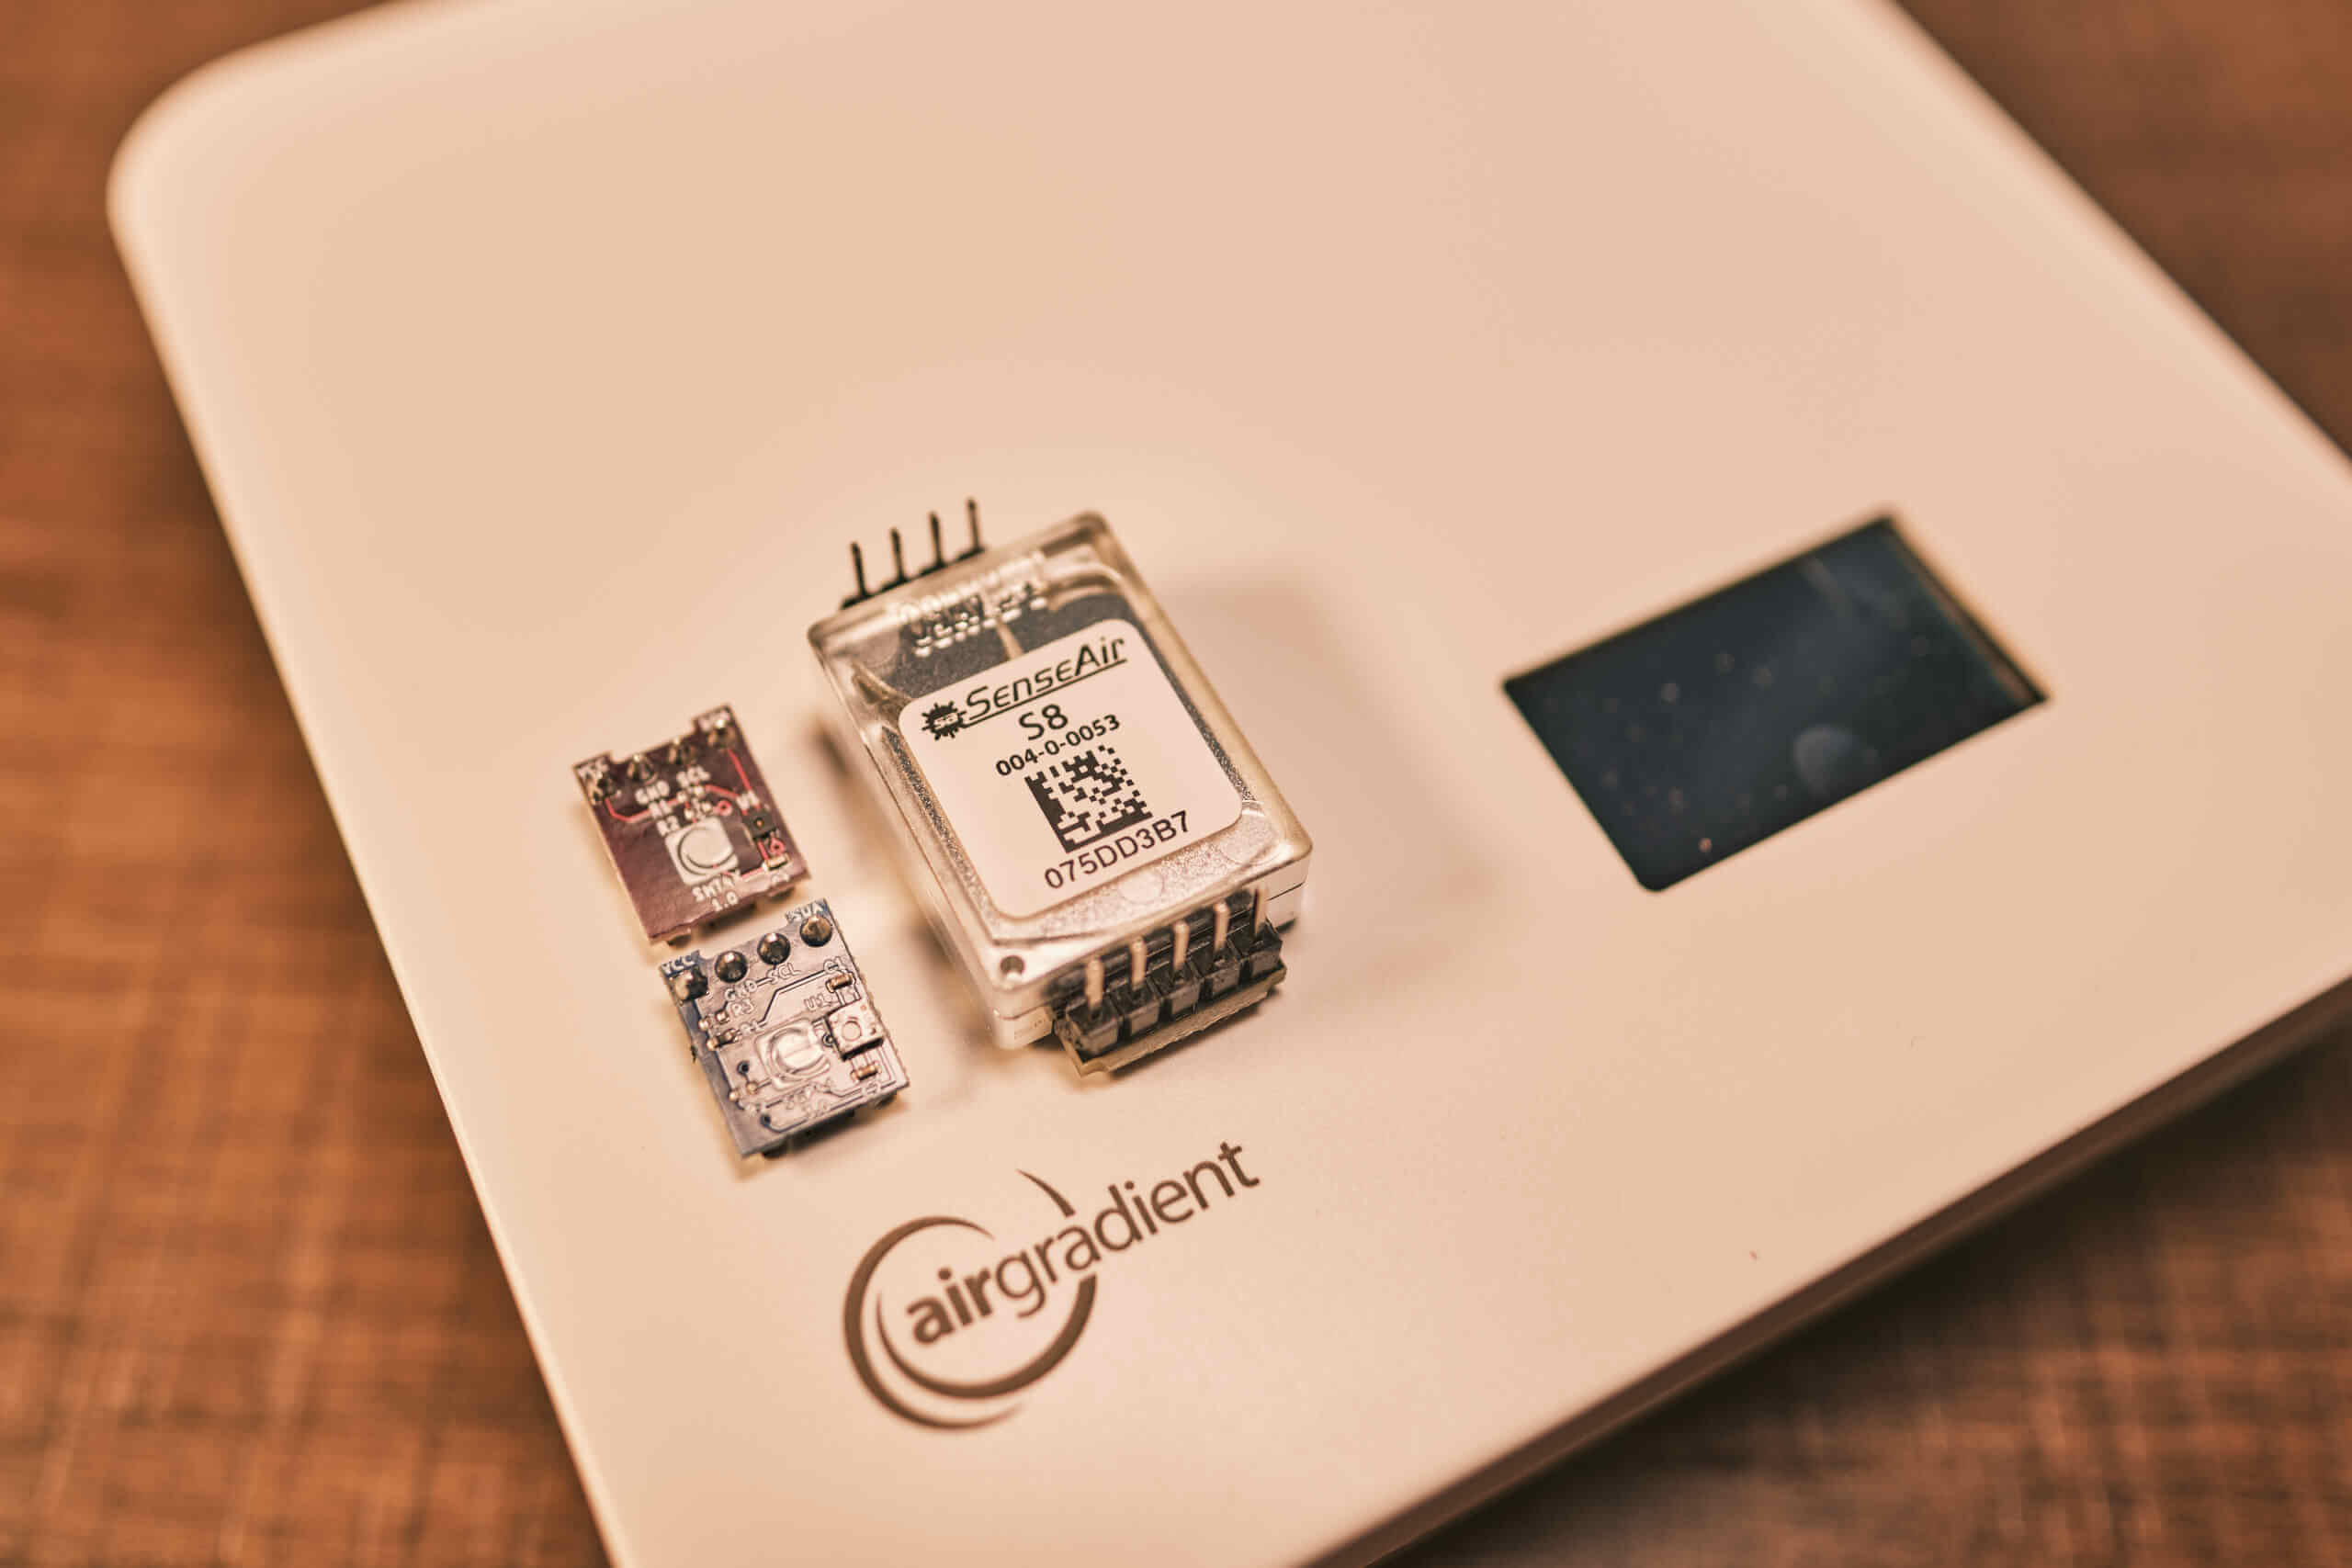
As always, accuracy is the most important aspect of any air quality monitor. This, of course, comes down to the components used within the monitor because the company that creates the monitors is very rarely the same one supplying the components.
Another element I love about the AirGradient ONE (and their other products, for that matter) is how transparent they are about the components they chose to use. Of course, it’s hard to hide this information with a DIY kit, but I still appreciate how openly they list each component used. I often have to chase companies to ask for this information because it isn’t always something they want to share.
However, to know the accuracy and performance of an air quality monitor, it’s essential to know the components inside. For this reason, I was particularly interested in why AirGradient uses the components they do. When I asked, I was told they used three criteria to pick the best-suited sensors:
- There must be available studies and third-party tests that show accuracy and reliability.
- Longevity was a key concern to ensure each component has a long lifespan.
- Manufacturer reputation was also considered to ensure that each has a proven track record.
Interestingly, when I asked, I was told that price didn’t factor into this equation. More affordable components are on the market, but the team behind AirGradient opted for sensors that fulfilled these three criteria. So, what sensors did this methodology lead them to?
PM1, PM2.5 and PM10: Plantower PMS5003
CO2: SenseAir S8 CO2
TVOC and NOx: Sensirion SGP41
Temperature and humidity: Sensirion SHT40
If you aren’t aware of these sensors and how they perform, don’t worry; we will discuss that soon. However, anyone familiar with these companies and specific sensors will know this is a well-tested and trustworthy lineup. Furthermore, it’s difficult to find another monitor with the same quality of sensors at this price range.
When discussing accuracy, we need to examine two different factors – overall accuracy (compared to a reference grade monitor) and inter-device accuracy. This means comparing identical sensors to ensure they all provide similar readings and are accurate across the board before comparing them to a known accurate sensor.
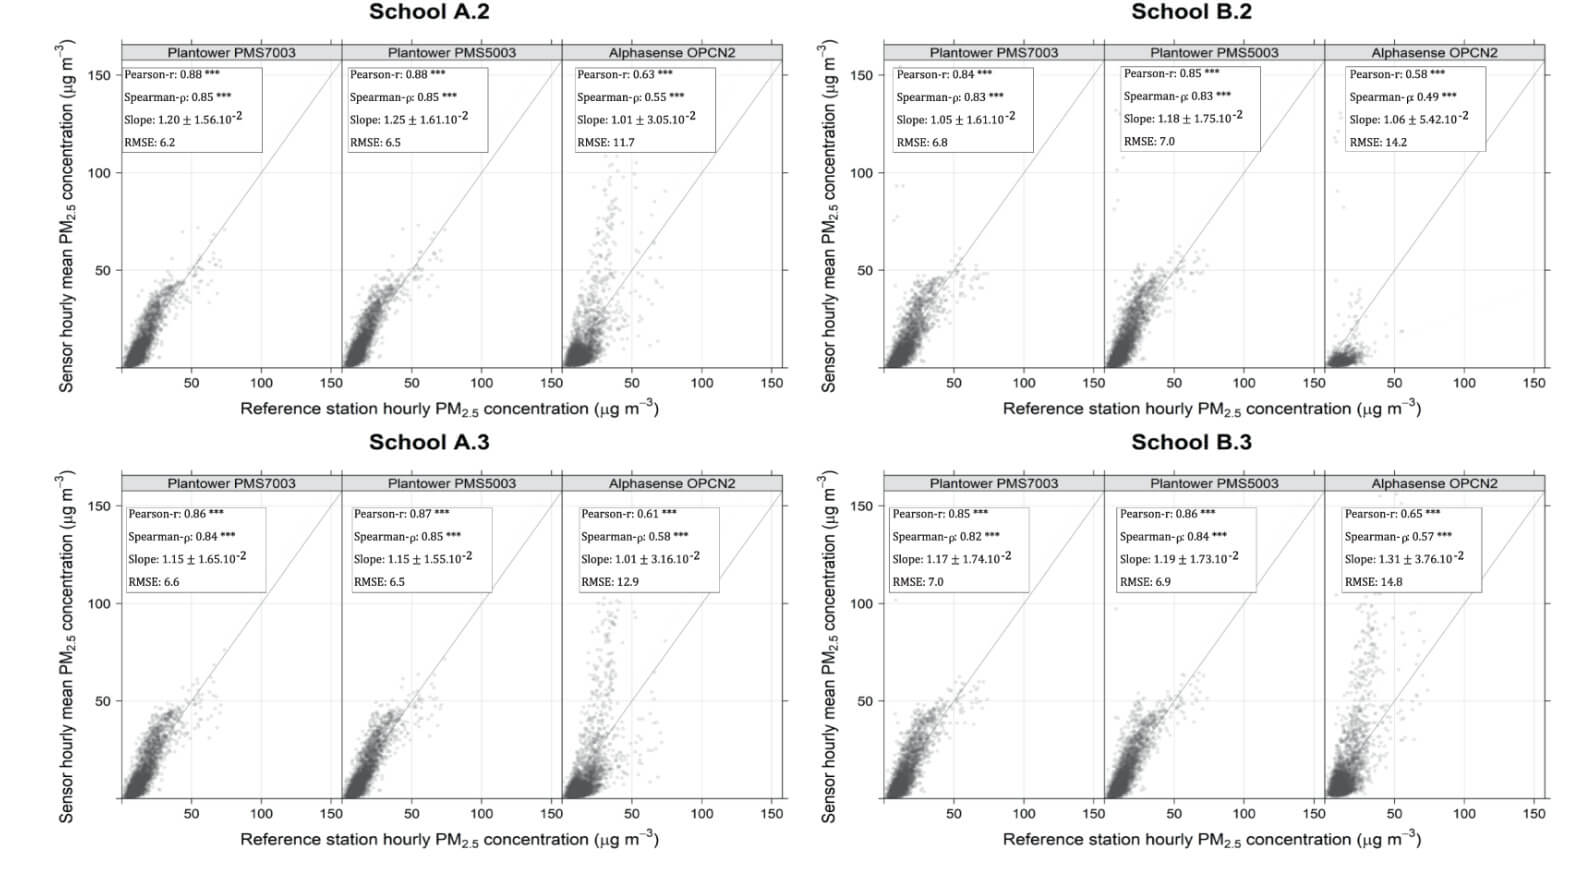
PMS5003 (centre) accuracy vs reference monitor. Study link.
Luckily, the PMS5003 has undergone extensive testing and a range of studies point to the sensor’s accuracy. One study compared six PMS5003 sensors and found they had ‘very high correlations’, showing that between PMS5003 sensors, there is a consistency in readings.
Compared to a reference monitor, the same study shows that the PMS5003 has a good correlation, although it does lean towards overreporting at higher PM2.5 concentrations. It’s also subject to humidity influences, which can increase or decrease accuracy. At higher humidity levels (76-98%), the PMS5003 presented a better correlation to the reference monitor. However, these humidity levels shouldn’t be found inside and, therefore, aren’t relevant to this air quality monitor in particular.
Another study found that inter-device accuracy for the PMS5003 was high, with a relatively small deviation between sensors at PM1.0, a moderate deviation at PM2.5, and a larger deviation at PM10. Furthermore, as particulate concentrations climb, the precision of the sensor decreases. Luckily, this indoor sensor shouldn’t often be exposed to high PM2.5 concentrations (200µg/m3 or higher).
The study also concludes that the PMS5003 data fitted the reference device (except for at high dust levels, as mentioned previously). Again, this is very promising for a relatively low-cost sensor such as the PMS5003.
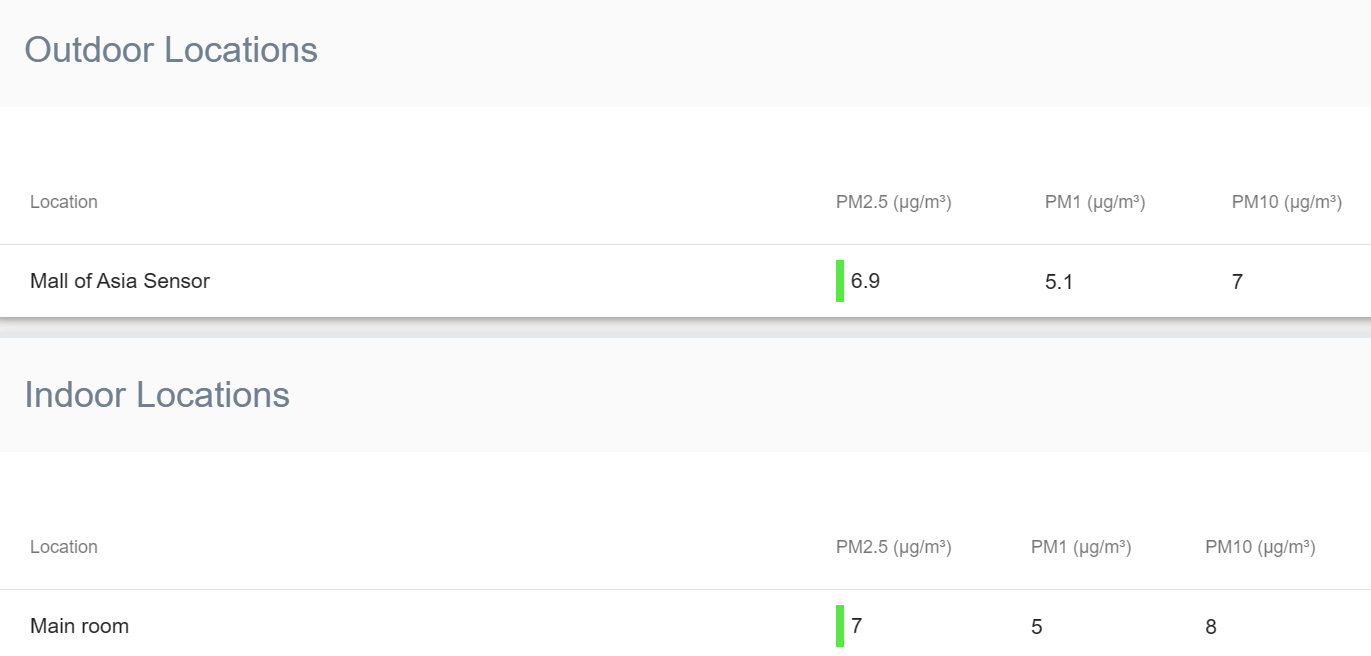
While it’s not scientific, I’ve found that my AirGradient ONE and AirGradient Open Air almost always report identical or similar PM1.0, PM2.5 and PM10 concentrations. The Open Air is equipped with two PMS5003T sensors, and when placed together, the devices report very similarly, which we can expect from the studies showing good inter-device performance.
While the PMS5003 is generally accurate, it is more accurate at reporting PM1.0 and PM2.5 than PM10 – both inter-device and compared to a reference monitor. However, as most users primarily want to monitor the more harmful, smaller particles, I see this as an acceptable tradeoff. Furthermore, PM10 readings are still accurate enough to make informed decisions based on your indoor air quality.
Moving on to carbon dioxide, let’s look at the Senseair S8 CO2 sensor. Regarding carbon dioxide sensors, two companies dominate the field regarding offerings and reputation – Sensirion and Senseair. Products such as the Aranet4 Home (considered the most accurate consumer-grade CO2 monitor) use sensors from Senseair, whereas most other monitors use Sensirion offerings.
The S8 has a stated accuracy of ±30ppm ±3% of reading, which is among the most accurate CO2 monitors (which generally vary from ±30ppm ±3% of reading to ±50ppm ±5% of reading). While I couldn’t find any studies comparing the Senseair S8 to reference monitors, AirGradient has done a comparison with the Sensirion SCD40, which has been proven time and again, and the S8 compared very favourably showing a very high correlation with the SCD40.
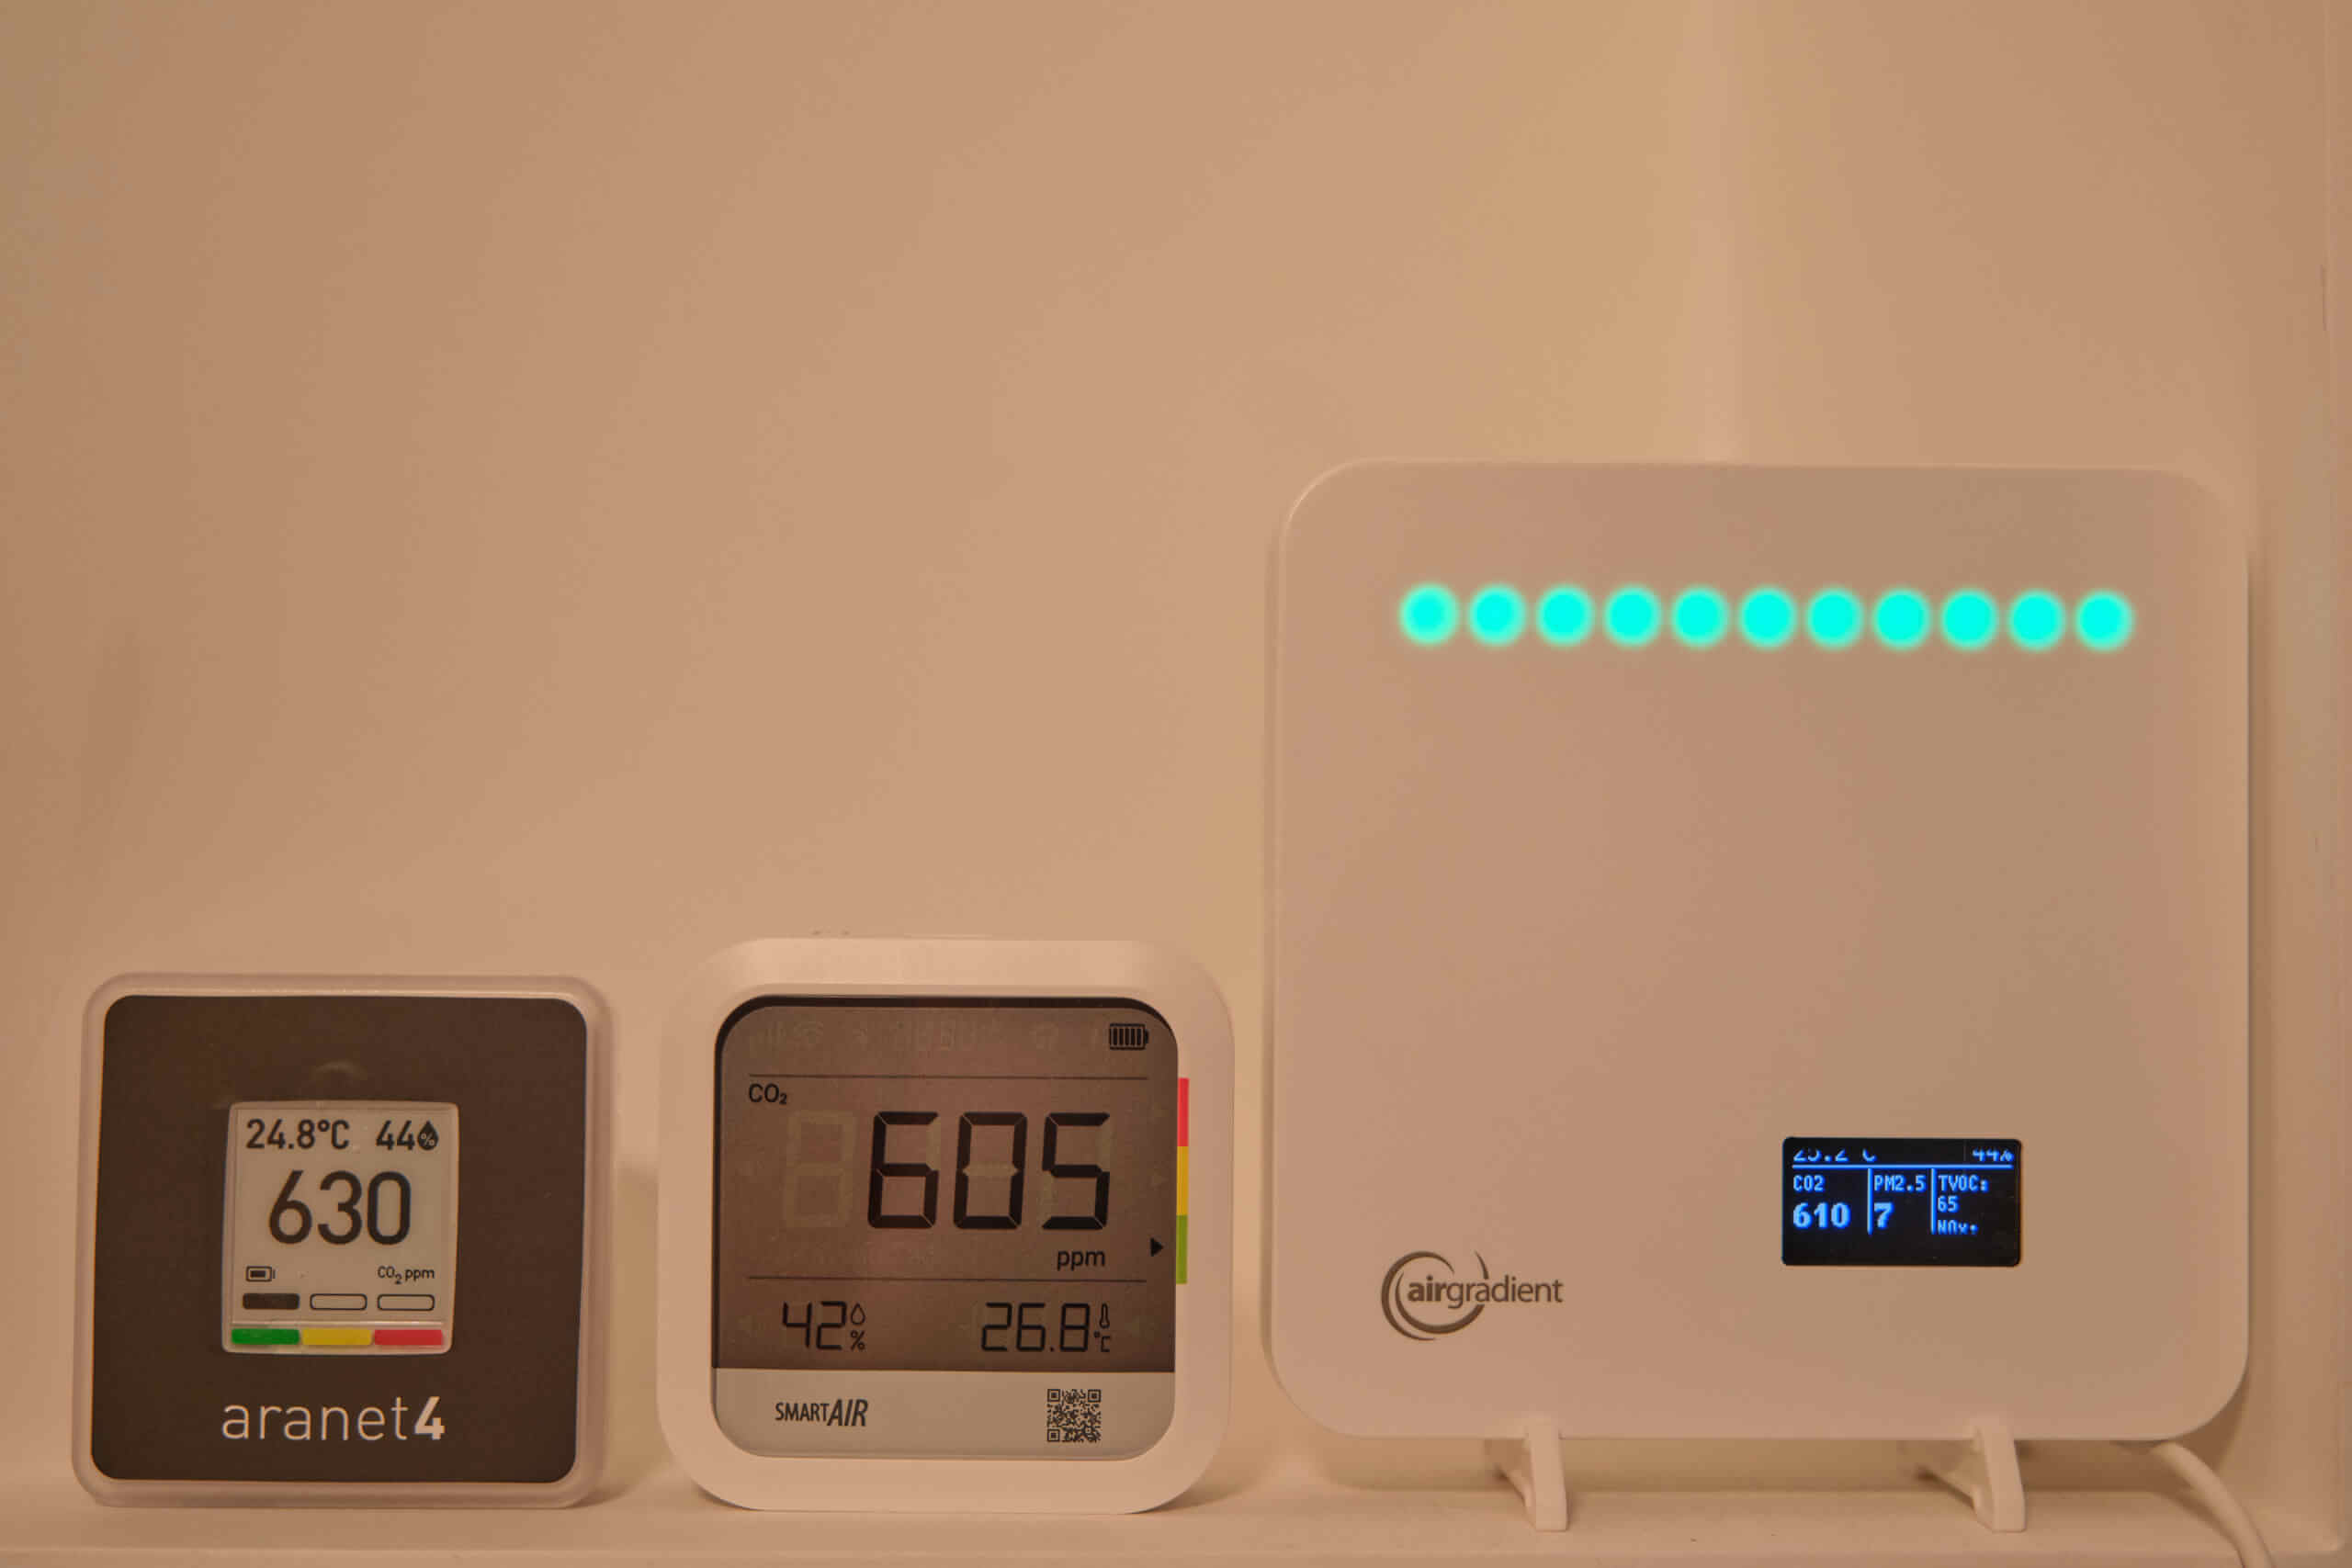
In my own experience, I have found the Airgradient ONE to produce readings similar or identical to my other carbon dioxide monitors constantly. My two Aranet4 Homes, INKBIRD IAM-T1 and SmartAir CO2 Monitor, often report within 30 ppm of each other, regardless of the CO2 concentration. The image above is a great example, and the minor differences in concentration are likely due to the different sensor readout times and small variations in calibration.
One thing to note here, however, is that the S8 CO2 sensor inside the AirGradient ONE will auto-calibrate every week. This is a ‘feature’ of the sensor, but as I’ve discussed in my Vitalight Mini CO2 Detector review, autocalibration can be a blessing and a curse. Essentially, the Airgradient ONE will set a new zero or baseline value every week, which will be considered 400 ppm. In other words, it identifies the lowest CO2 concentration it’s been exposed to that week and sets it as 400 ppm.
This is fine if the monitor is in a room that is often empty (and therefore reaches ambient CO2 concentrations). Still, it can cause the device to set a higher value, such as 600ppm, as its baseline if that’s the lowest CO2 concentration it sees all week. This can quickly lead to inaccuracy; auto-calibration is a double-edged sword.
Luckily, you can also manually recalibrate the device via the online dashboard. If you leave the house for a while, you can wait for the air to return to ambient CO2 levels and request a recalibration. However, this process is less convenient than portable, battery-powered monitors that can be left outside for five or ten minutes while recalibrating.
In short, the CO2 sensor within the AirGradient ONE is accurate – provided it’s calibrated correctly. When I first got the monitor, it recorded significantly different concentrations to my Aranet4 Home. However, it now provides very similar and sometimes identical readings after calibration. Just remember that the device will auto-calibrate, so if you get some unusual readings, it might be time for a manual calibration.
This leads us to the two final sensors in the AirGradient ONE – the SGP41 for VOCs and NOx and the SHT40 (although previous models may have an SHT3x) for temperature and relative humidity. It’s harder to find third-party studies for both of these sensors, but we can look at the official documentation from Sensirion.
Regarding VOCs and NOx, the AirGradient ONE is accurate within ±15%. While this might seem like a large range, it is quite common for VOC sensors, and it’s not uncommon to see sensors with stated accuracies in the 20-30% range. Therefore, a range of ± 15% for the SGP41 is very acceptable, and I would consider it accurate.
Finally, we have the temperature and relative humidity sensor. Again, based on Sensirion’s documentation, this range of sensors has, at worst, an accuracy of ± 1.8% RH or ± 0.2°C. These sensors are more than accurate enough to allow you to make informed decisions.
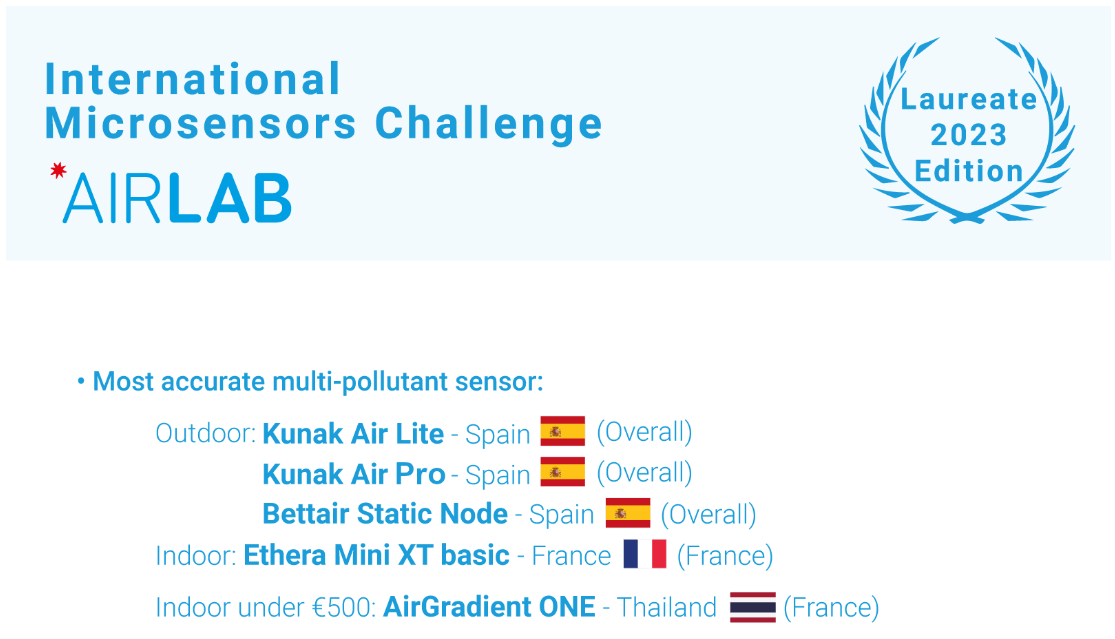
One final point worth noting is that the AirGradient ONE recently received an award for being the most accurate multi-pollutant sensor for indoors under €500 by Airparif (the independent regional air quality observatory for the greater Paris region) and AIRLAB (its open innovation laboratory) in their 4th AIRLAB Microsensor Challenge. This is an outstanding performance and further proves the accuracy of the AirGradient ONE.
Overall, the AirGradient ONE has a strong collection of sensors with high accuracy. In this price range, and even compared to more expensive monitors, you will be hard-pressed to find a monitor with more accuracy. Really, the only reading I am somewhat cautious about (but still trust) is the PM10 reading, as other PM sensors, such as the SPS30 from Sensirion, are more accurate for these larger particles. However, it is all a balancing act, and all of these sensors struggle more with PM10 readings.
Design
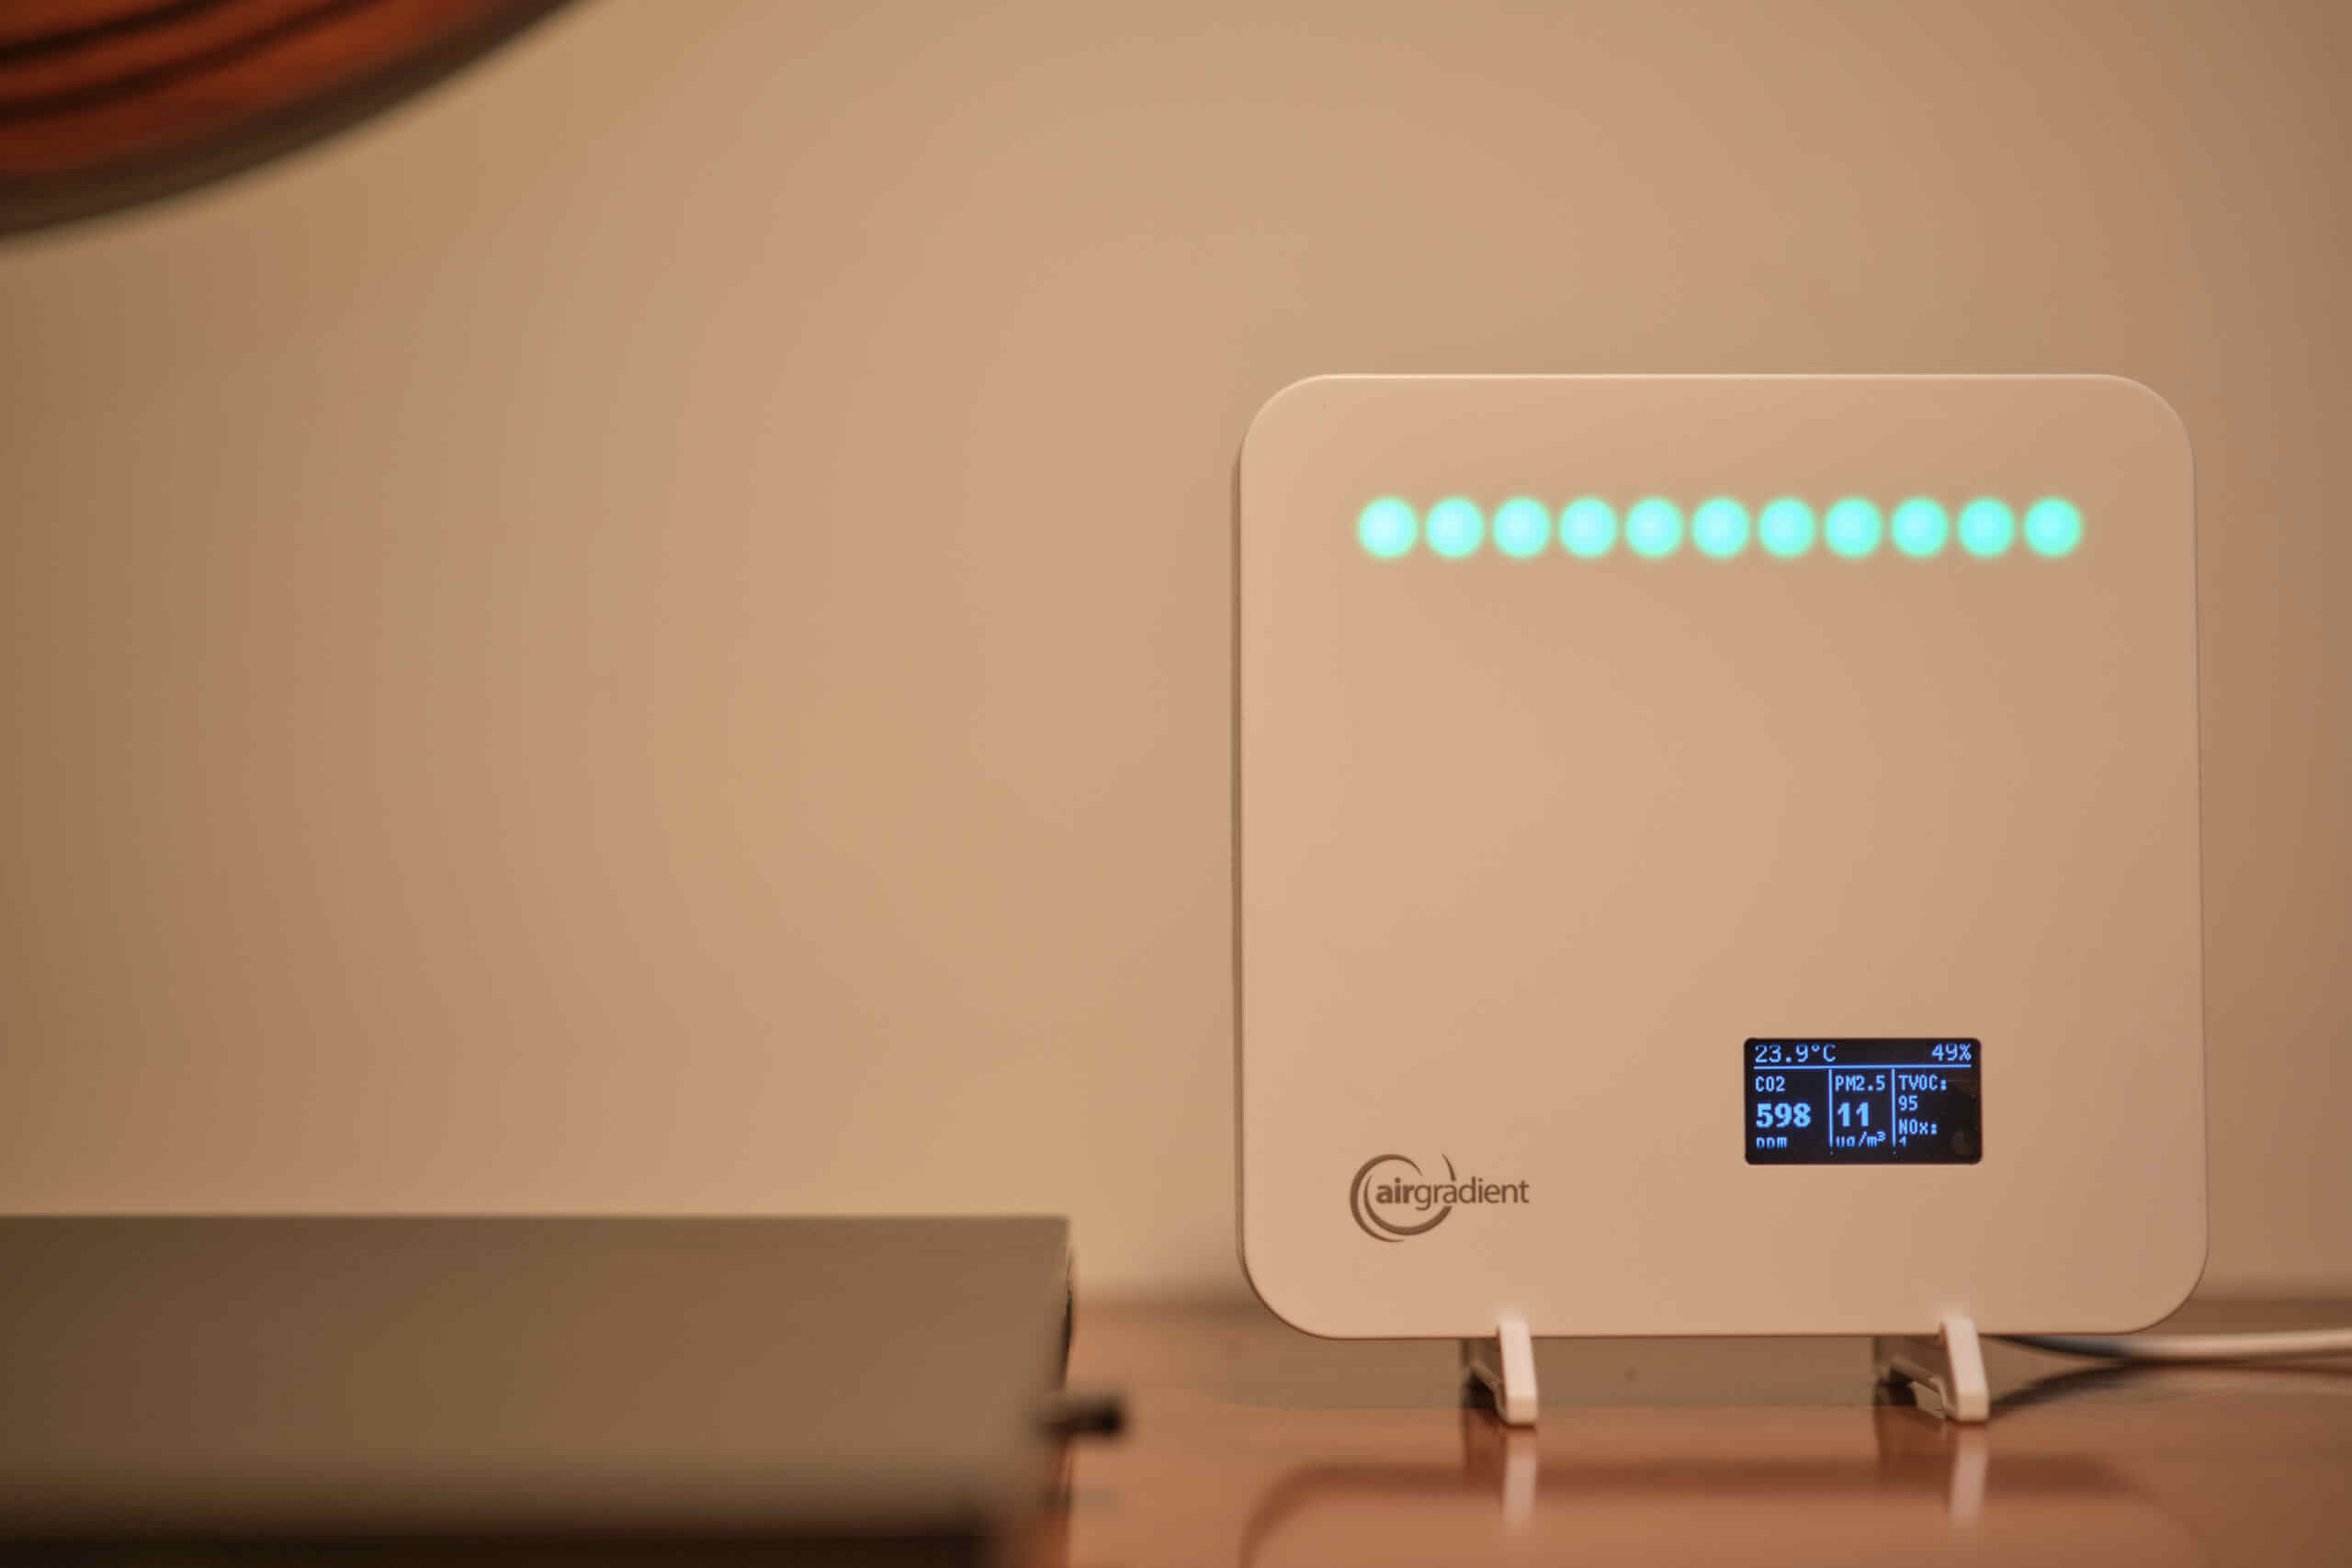
Once completed (or upon opening, if you purchased the fully-assembled monitor), the AirGradient ONE is a simple and minimalistic device that prioritises function over form – but not to the detriment of its look. A white cuboid with rounded corners, the AirGradient ONE is unassuming but easily fits into almost any room or setting.
The AirGradient ONE is meant to be used in one of two configurations – either mounted to the wall or sitting on a desk, table, or shelf. The device comes with two detachable feet in the box to account for these two different uses. Personally, the whole time I’ve used this device, I’ve had these feet attached and the device on a desk or shelf. However, if you want to mount the device on the wall, the feet are quickly and easily removable.
If you do decide that you would prefer to mount your air quality monitor to the wall, you have a lot of flexibility, as turning the device around will unveil four standard mounting holes. While I am unsure when you would need to use any hole other than the topmost one, having this choice means the AirGradient ONE excels in flexibility regarding placement.
My favourite aspect of the device’s design, however, is not this flexibility but rather another feature on the back of the device. When turned around, you will notice that the device’s backplate also has two inlaid cable slots, allowing the user to route a USB cable out the top or bottom of the device. Not only is this handy for cable management, but it allows the device to sit flush with the wall (or anything else) despite the USB cable inserted into the back of the device.
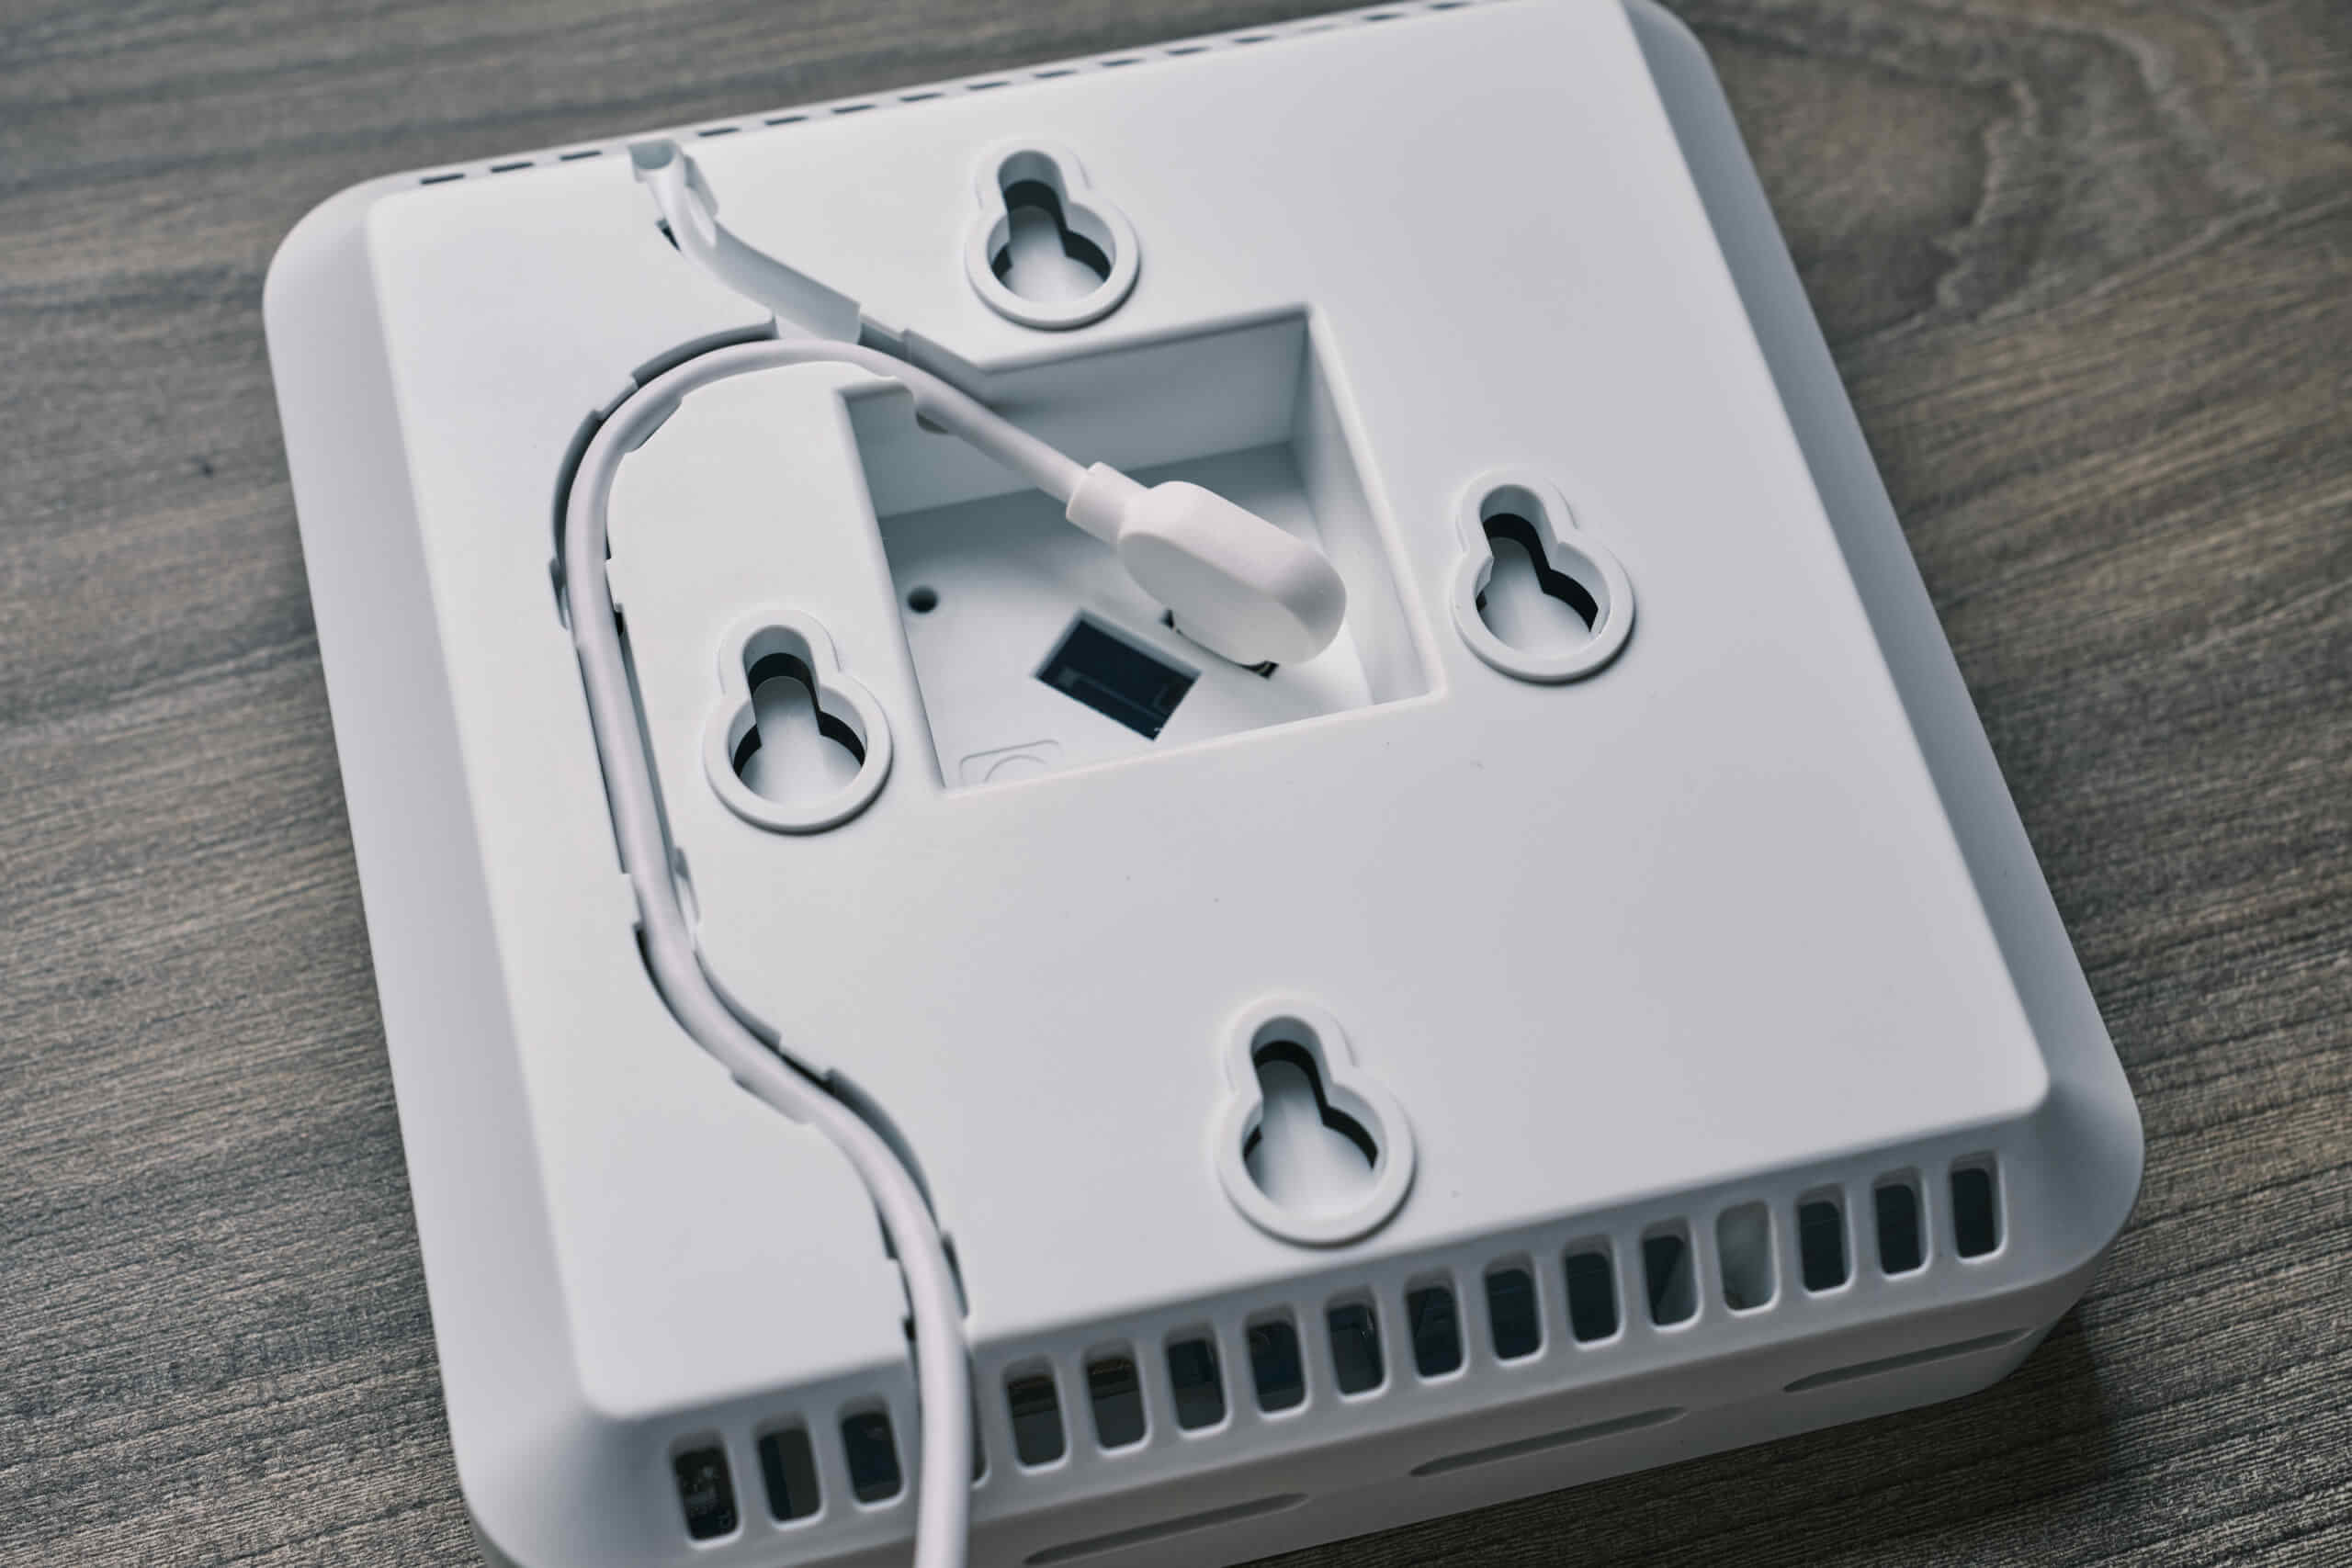
This might seem like a small detail – and perhaps it is – but I appreciate this feature. Many air quality monitors are designed to either be desk-mounted or wall-mounted and are either incapable of the other or clearly not intended for the other. Having this flexibility, however, allows the user to decide where they want the monitor to be located and rest assured that you won’t need to make any ‘hacks’ to get the device used in your ideal setting.
There is one caveat to this, though. You must use the included USB Type C to USB Type A cable with the AirGradient ONE. This cable is unique because it has a 90-degree head on both ends, meaning it can sit flush with the back of the device. While other cables can be used if the monitor is sat somewhere, they won’t work when the device is mounted to a wall as they will protrude from the back and prevent the device from sitting flush.
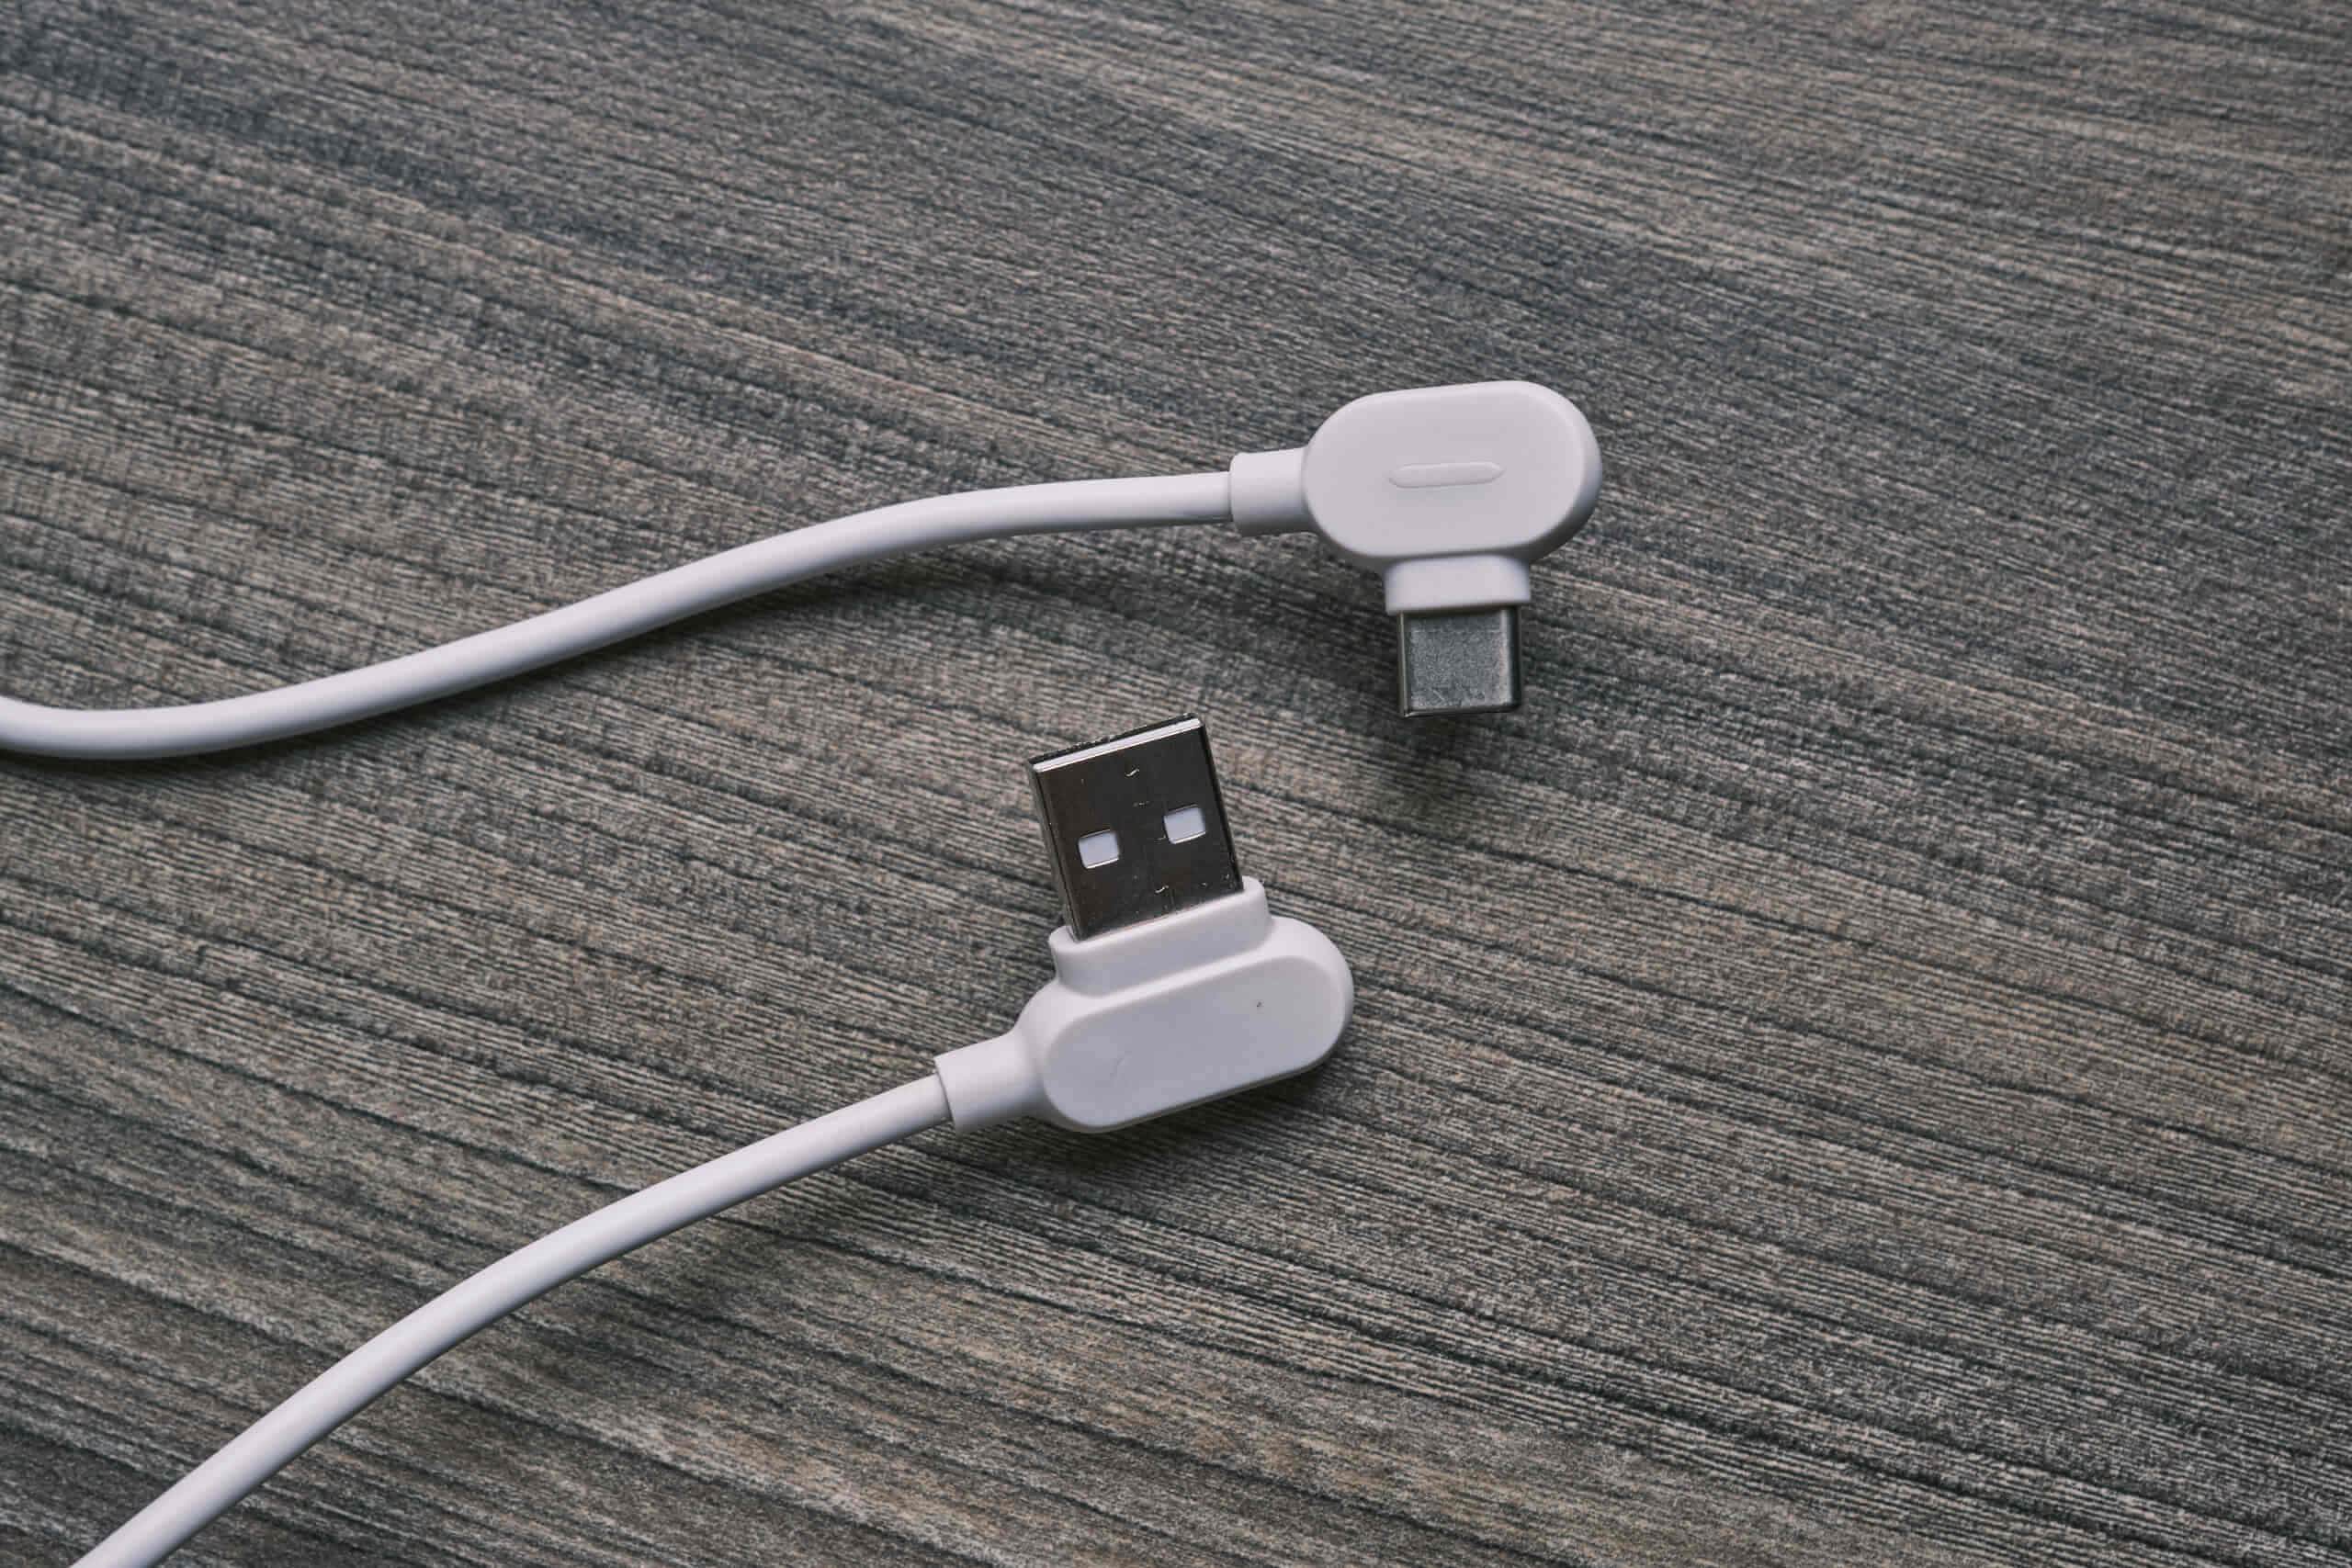
Since this cable is included, however, and is quite long, I don’t see this as an issue. Furthermore, if you ever need a replacement (or want to change to a Type C to Type C cable), it’s not difficult to purchase a cable with a 90-degree head from Amazon or your chosen e-commerce website.
Since we are already discussing the back of the device, we may as well finish there before turning it around! The only other features of note here are the large vents covering both the device’s top and bottom. Of course, this means the device isn’t waterproof or even the slightest bit water resistant; however, it also allows ambient air to enter the device and reach the sensors. While this is expected (all air quality monitors require vents), it means this monitor should only be used indoors.
Particularly interesting to me was how well-designed this venting is. If you purchase the DIY kit or look inside the vents, you will realise that each sensor sits directly behind a portion of them. This ensures that each sensor gets constant and direct access to ambient air rather than monitoring potentially recycled air inside the device. This also means that the temperature sensor can get an accurate reading instead of picking up on the heat generated by other components.
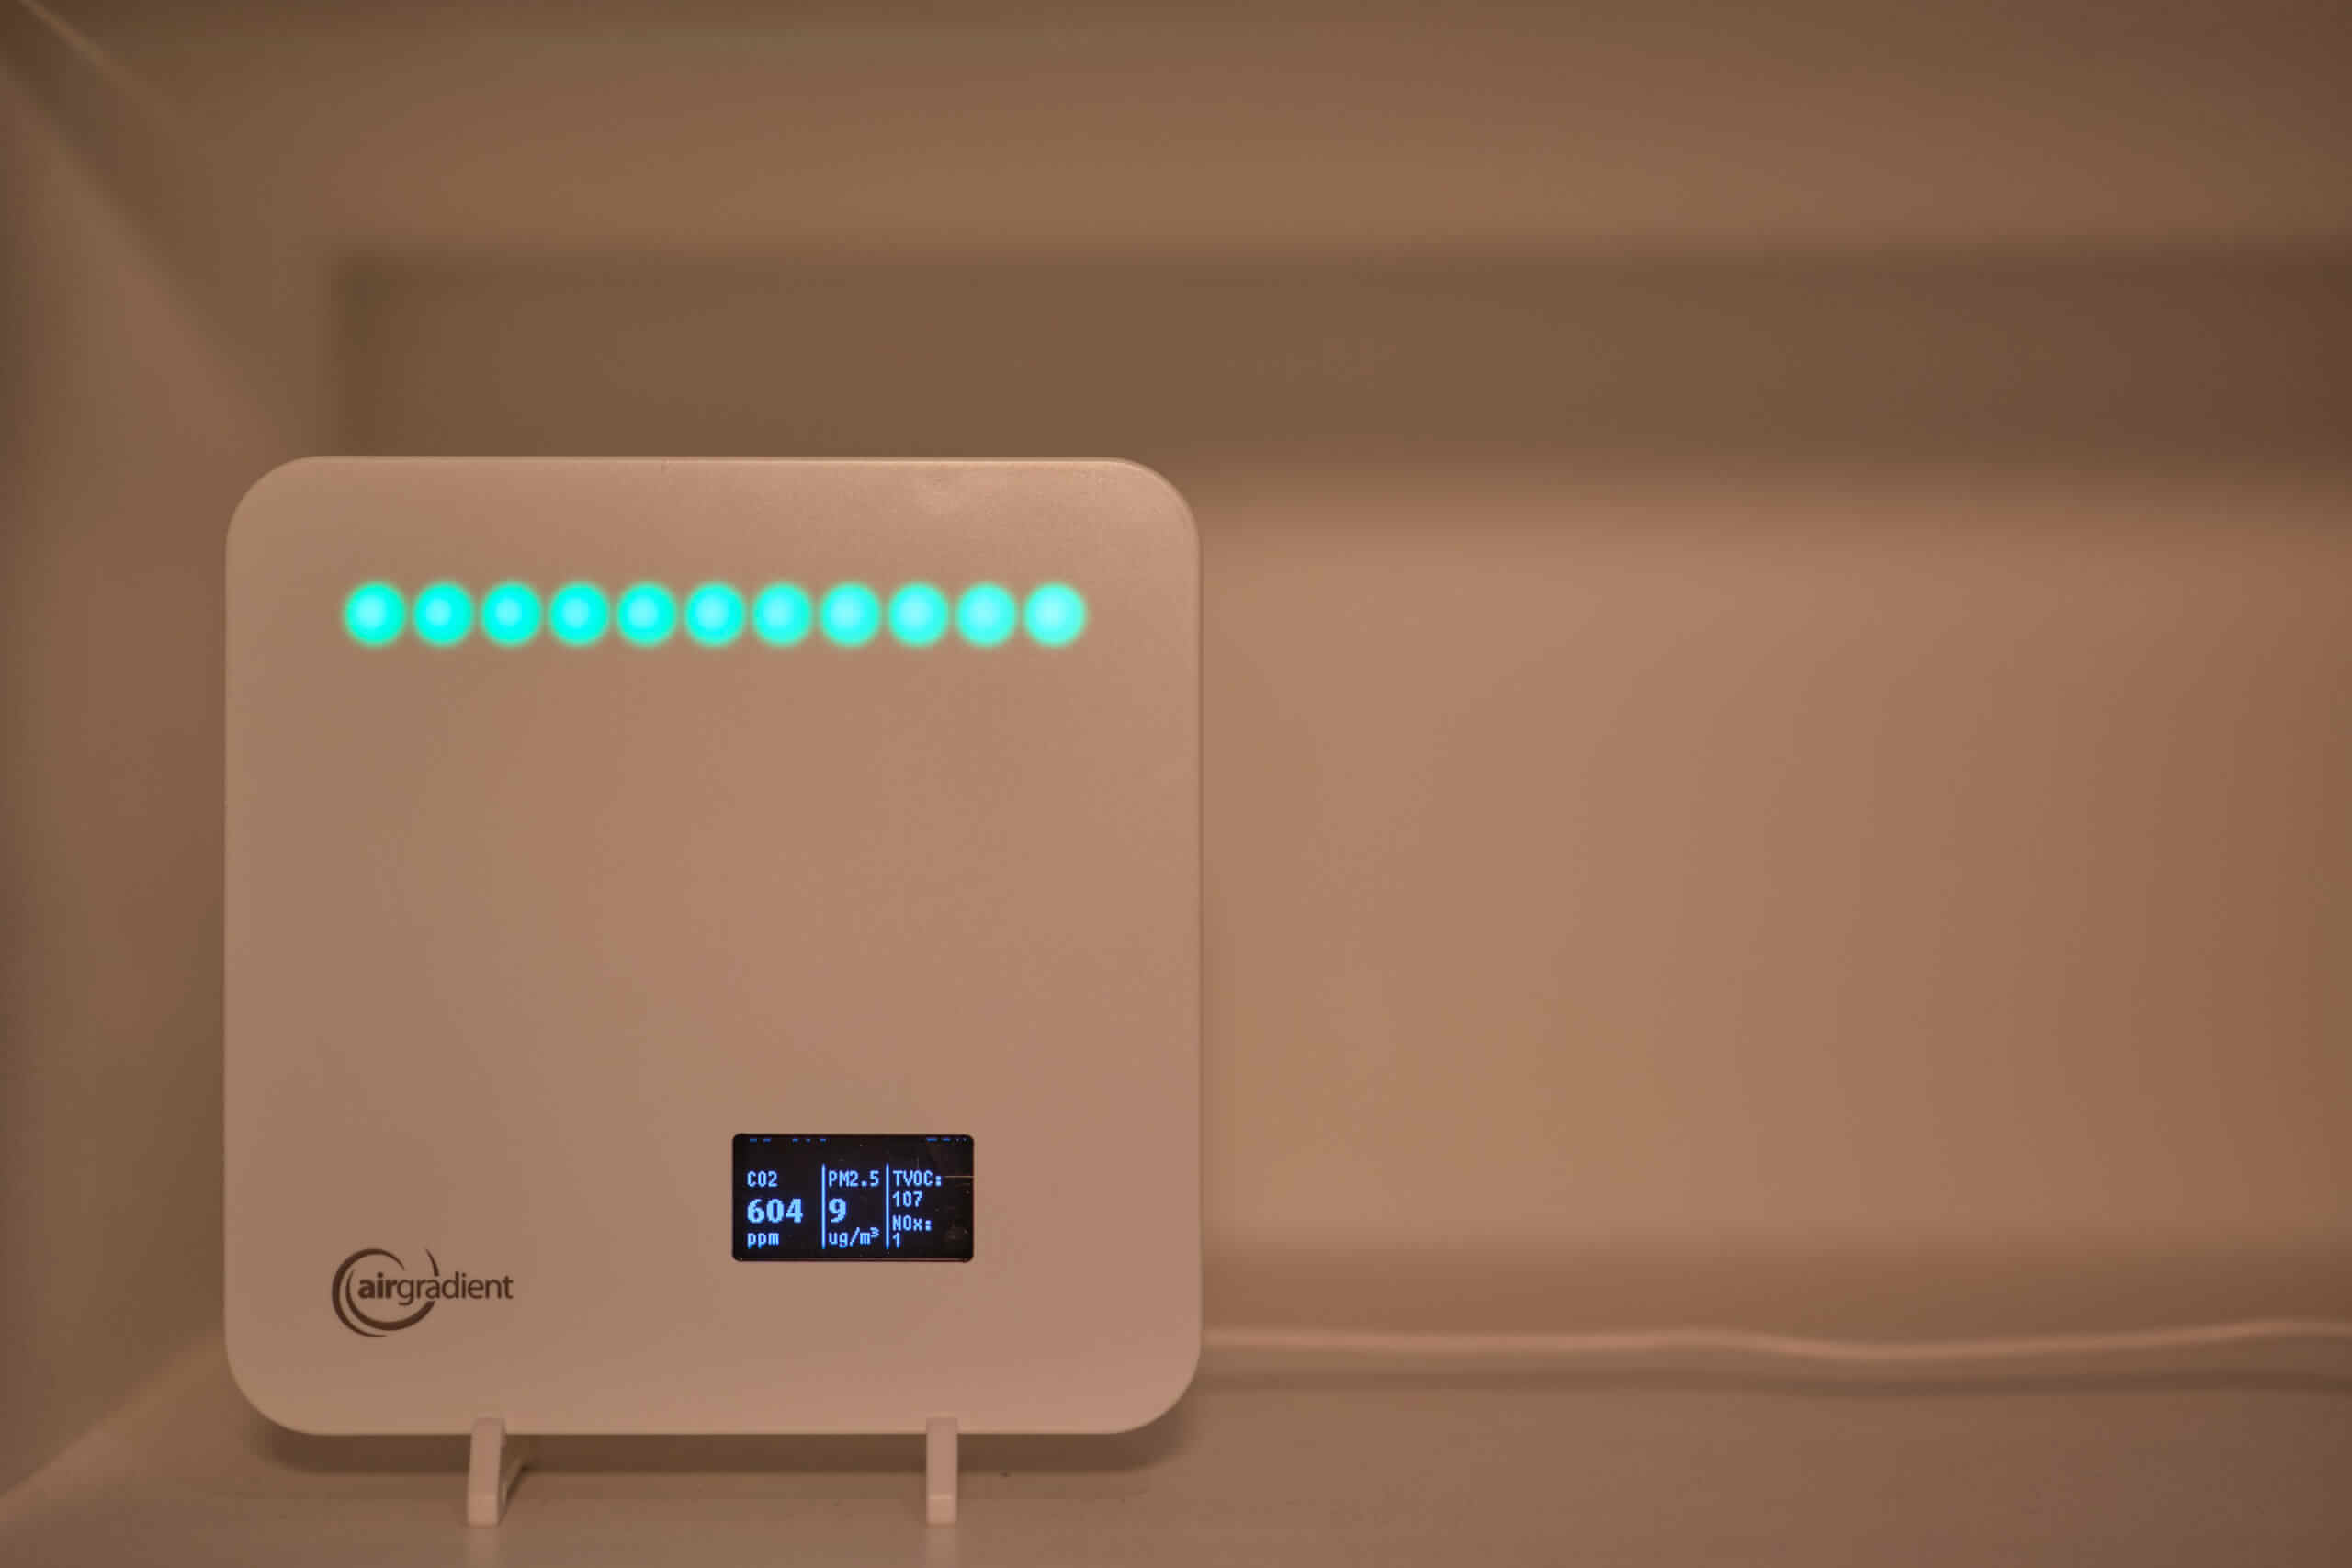
If you are interested in using the device’s included feet, these can be inserted into any of the vent slots (don’t worry, the device has many other holes through which air can enter). The feet are super easy to insert, and I have no issues with this approach. That said, one improvement I could see is having a slot in the back of the feet where the USB cable could be passed through. As it is, I route my USB cable through the bottom slot, but once it exits the bottom of the device, it has nowhere to go. If it could slot into the back of the feet, this would be an awesome quality-of-life change!
Now, let’s take a look at the front of the device. Again, the AirGradient ONE appears to be a very simple device, and the front is pure white with only two elements worth mentioning. Firstly, the AirGradient logo is located in the bottom-left corner of the front. Secondly, a small, 1.3-inch OLED display is in the bottom right.
If you’re unaware of what OLED means, it essentially means that black pixels on the screen are turned off, meaning they show a true black. Other screens, such as LCDs, instead turn on the pixels and have them display black. This means the black is never a true black and may appear more grey.
For the AirGradient ONE, this means that despite having a small screen, it has very high contrast, and the white text is always very readable on the black display. This screen is fantastic and far better than the LCDs that many air quality monitors use, as these often can’t be viewed in brighter rooms. In fact, the OLED on the AirGradient ONE feels similar to an E-ink screen regarding viewability (such as the one on the Aranet4 Home or INKBIRD IAM-T1).
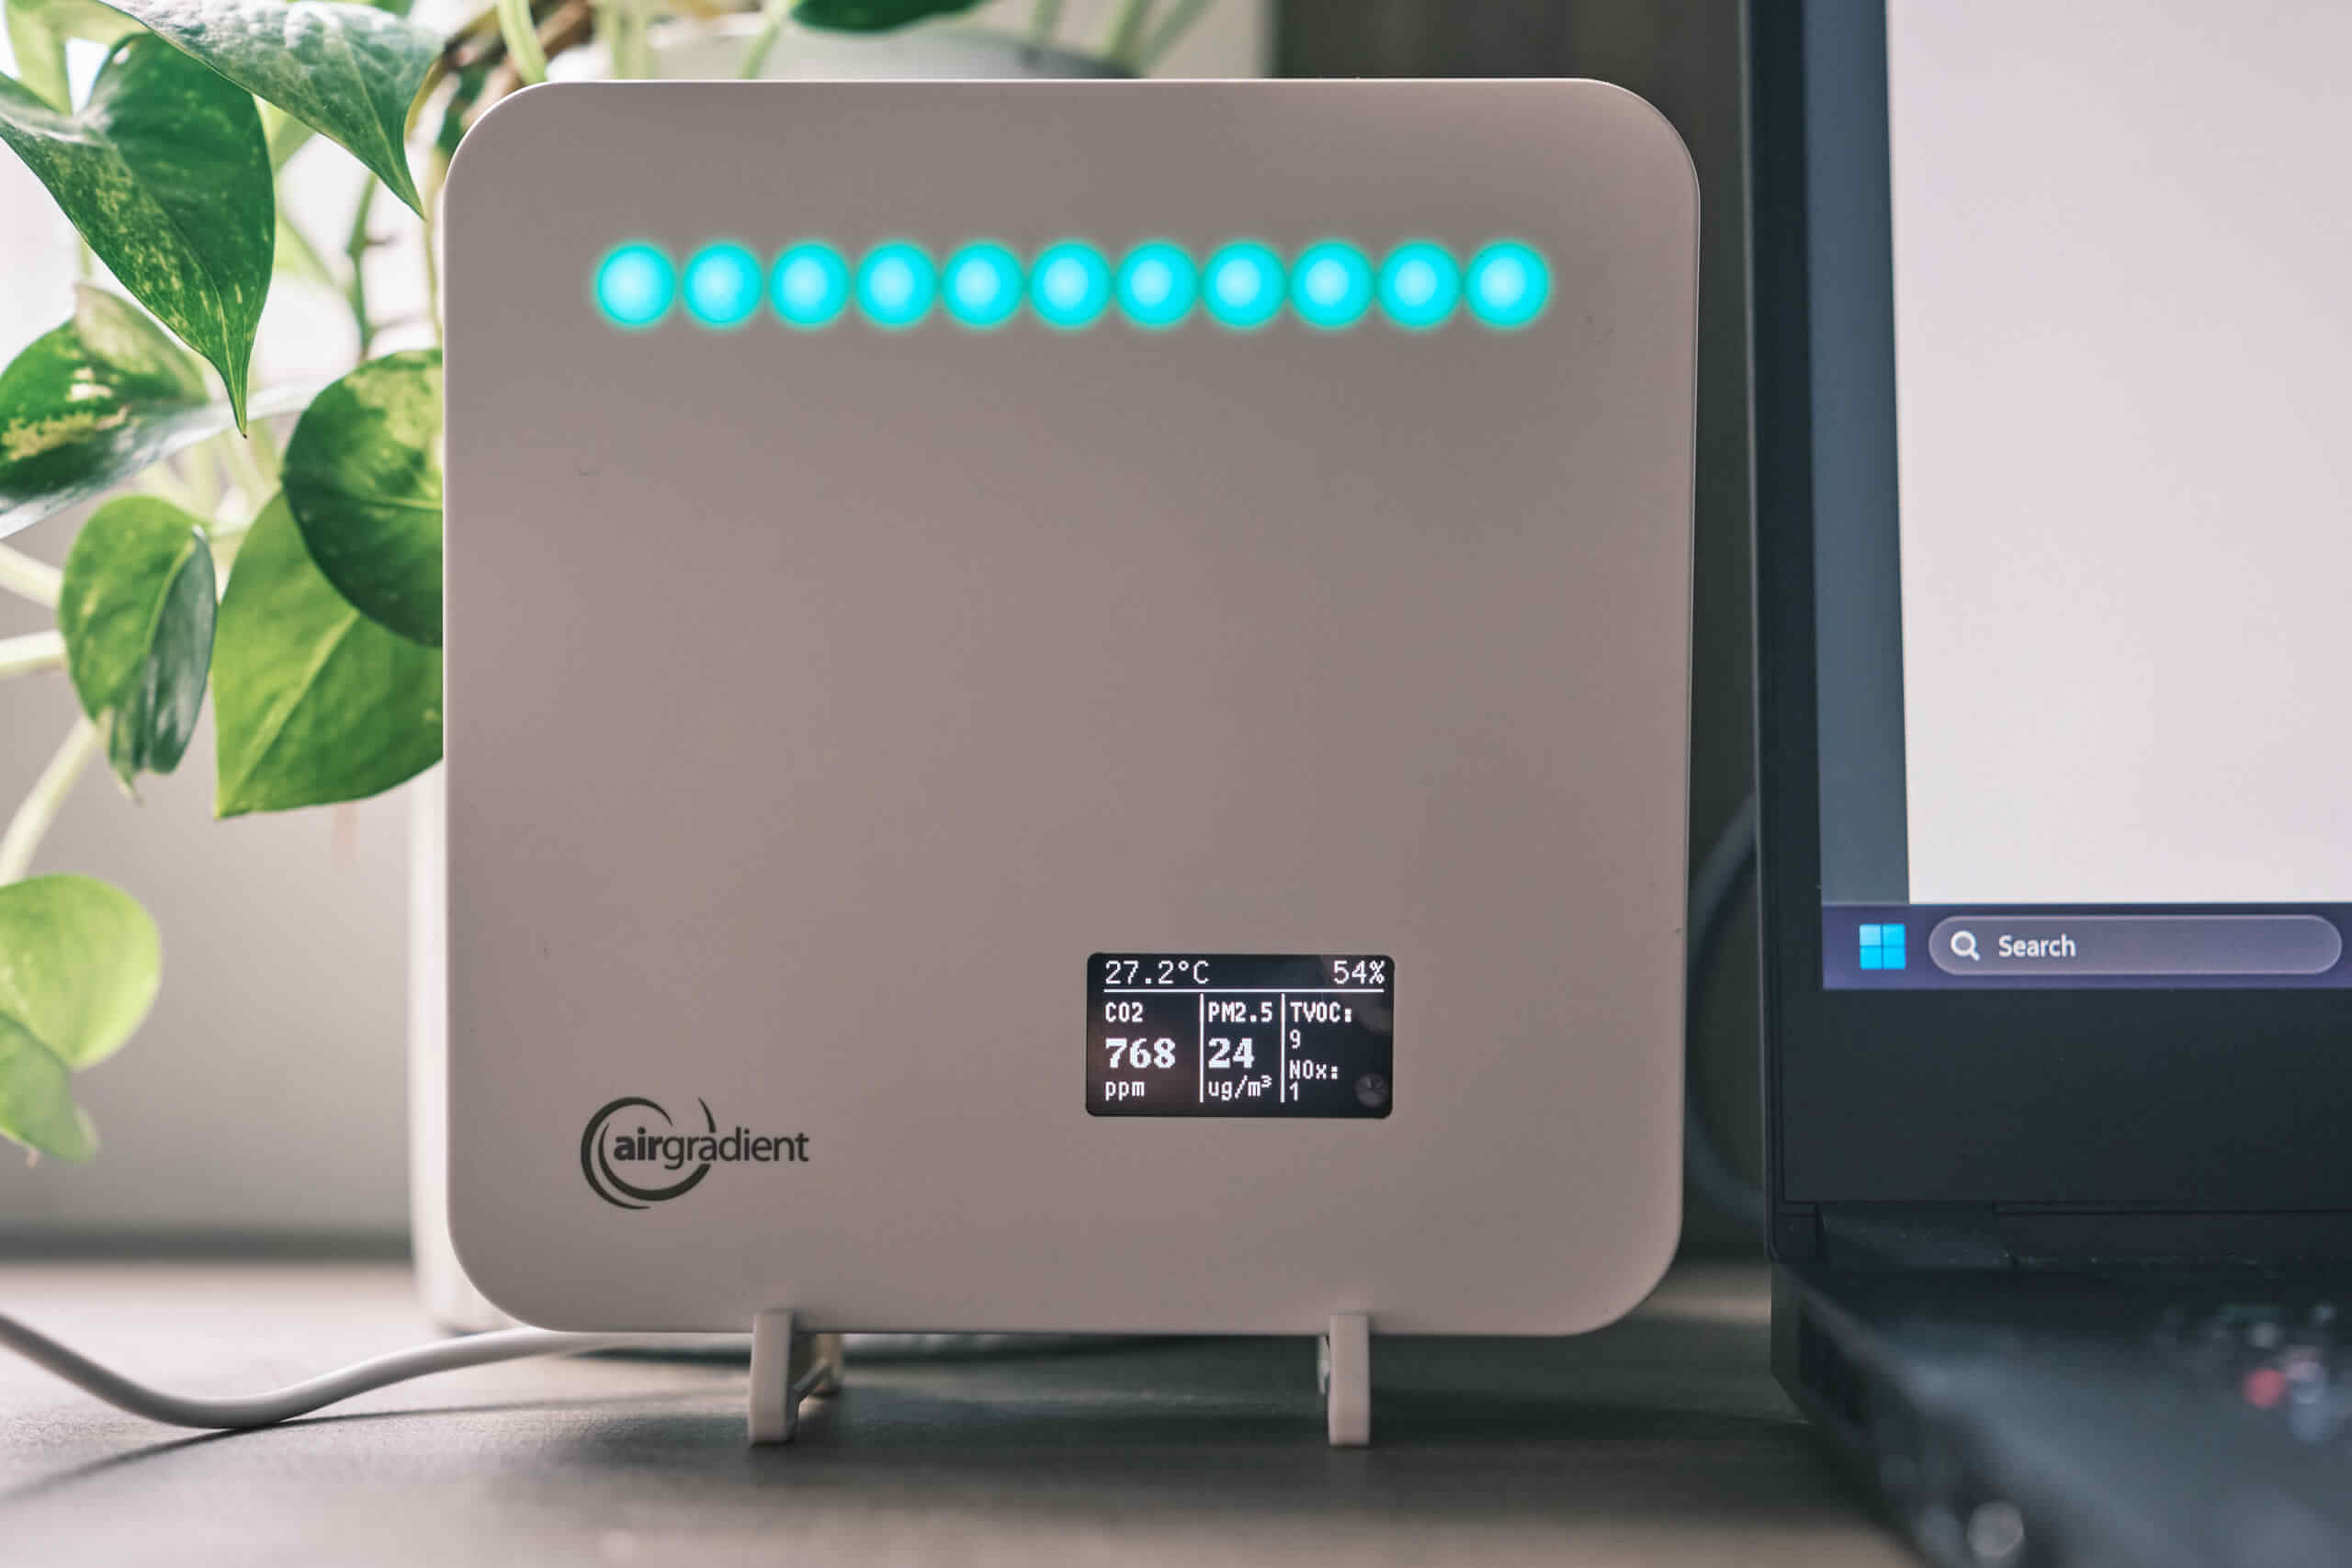
When you turn the device on, this screen will display all the air quality information from the sensors. Despite being small, CO2, PM2.5, TVOC, NOx, temperature, and relative humidity will be displayed here. While this sounds cluttered – how can this information fit a 1.3-inch screen? – I found the screen perfectly adequate, and perhaps even good due to the OLED technology. I also appreciate the screen’s layout, as CO2 and PM2.5 are given priority. Since these are the two pollutants I, and most users, most often check for, this design choice makes a lot of sense.
Finally, although you won’t notice it until you turn the device on, a row of LEDs is hidden inside near the top of the device’s front. These LEDs are RGB and change colour depending on your indoor air quality. I love this inclusion, as even when you’re too far away to read the screen, you can quickly glance at the device to see how your indoor air is. These LEDs are attached to your CO2 concentration by default, and you can set them to show PM2.5 levels instead if you prefer. Even better, the thresholds for each colour are customisable on the online dashboard.
Since the device is open source, you can change how the LEDs function along with every other aspect of the device. However, if you don’t want to delve into this side of the monitor, you will be limited to showing either CO2 or PM2.5 with these LEDs.
Overall, when it comes to the design of the AirGradient ONE, I have no complaints. The device is very functional and easily fits into almost any setting. Despite looking simple, a lot of thought has gone into the design of this air quality monitor, and it shows – even cable routing has been thought through. Whether you plan to use this device on a wall or desk, it will easily blend in and perform its job well!
Connectivity
The AirGradient ONE has connectivity through a cloud dashboard that can be accessed from anywhere – provided you have an internet connection. The monitor connects via WiFi, meaning you don’t need to worry about a finicky Bluetooth connection with your phone like you need to with so many other monitors.
Before diving in any deeper, it is worth mentioning that, in theory, the AirGradient ONE can work with many different smart home platforms. Since the device is open source and the API is provided, it is possible to integrate your AirGradient ONE into platforms such as HomeKit or Home Assistant. However, you will need technical knowledge to do that, and in this review, I want to focus on how the device functions out of the box.
When you go to the shop page for the AirGradient ONE, you will see that it comes with ’12 months data platform/dashboard and API access’, implying that the service isn’t free after those 12 months. However, when I reached out to AirGradient, I was told that while the platform is free for now, in the future, there may be a $2 fee (per monitor per month) for premium features such as alerts. However, basic data-viewing will always be free.
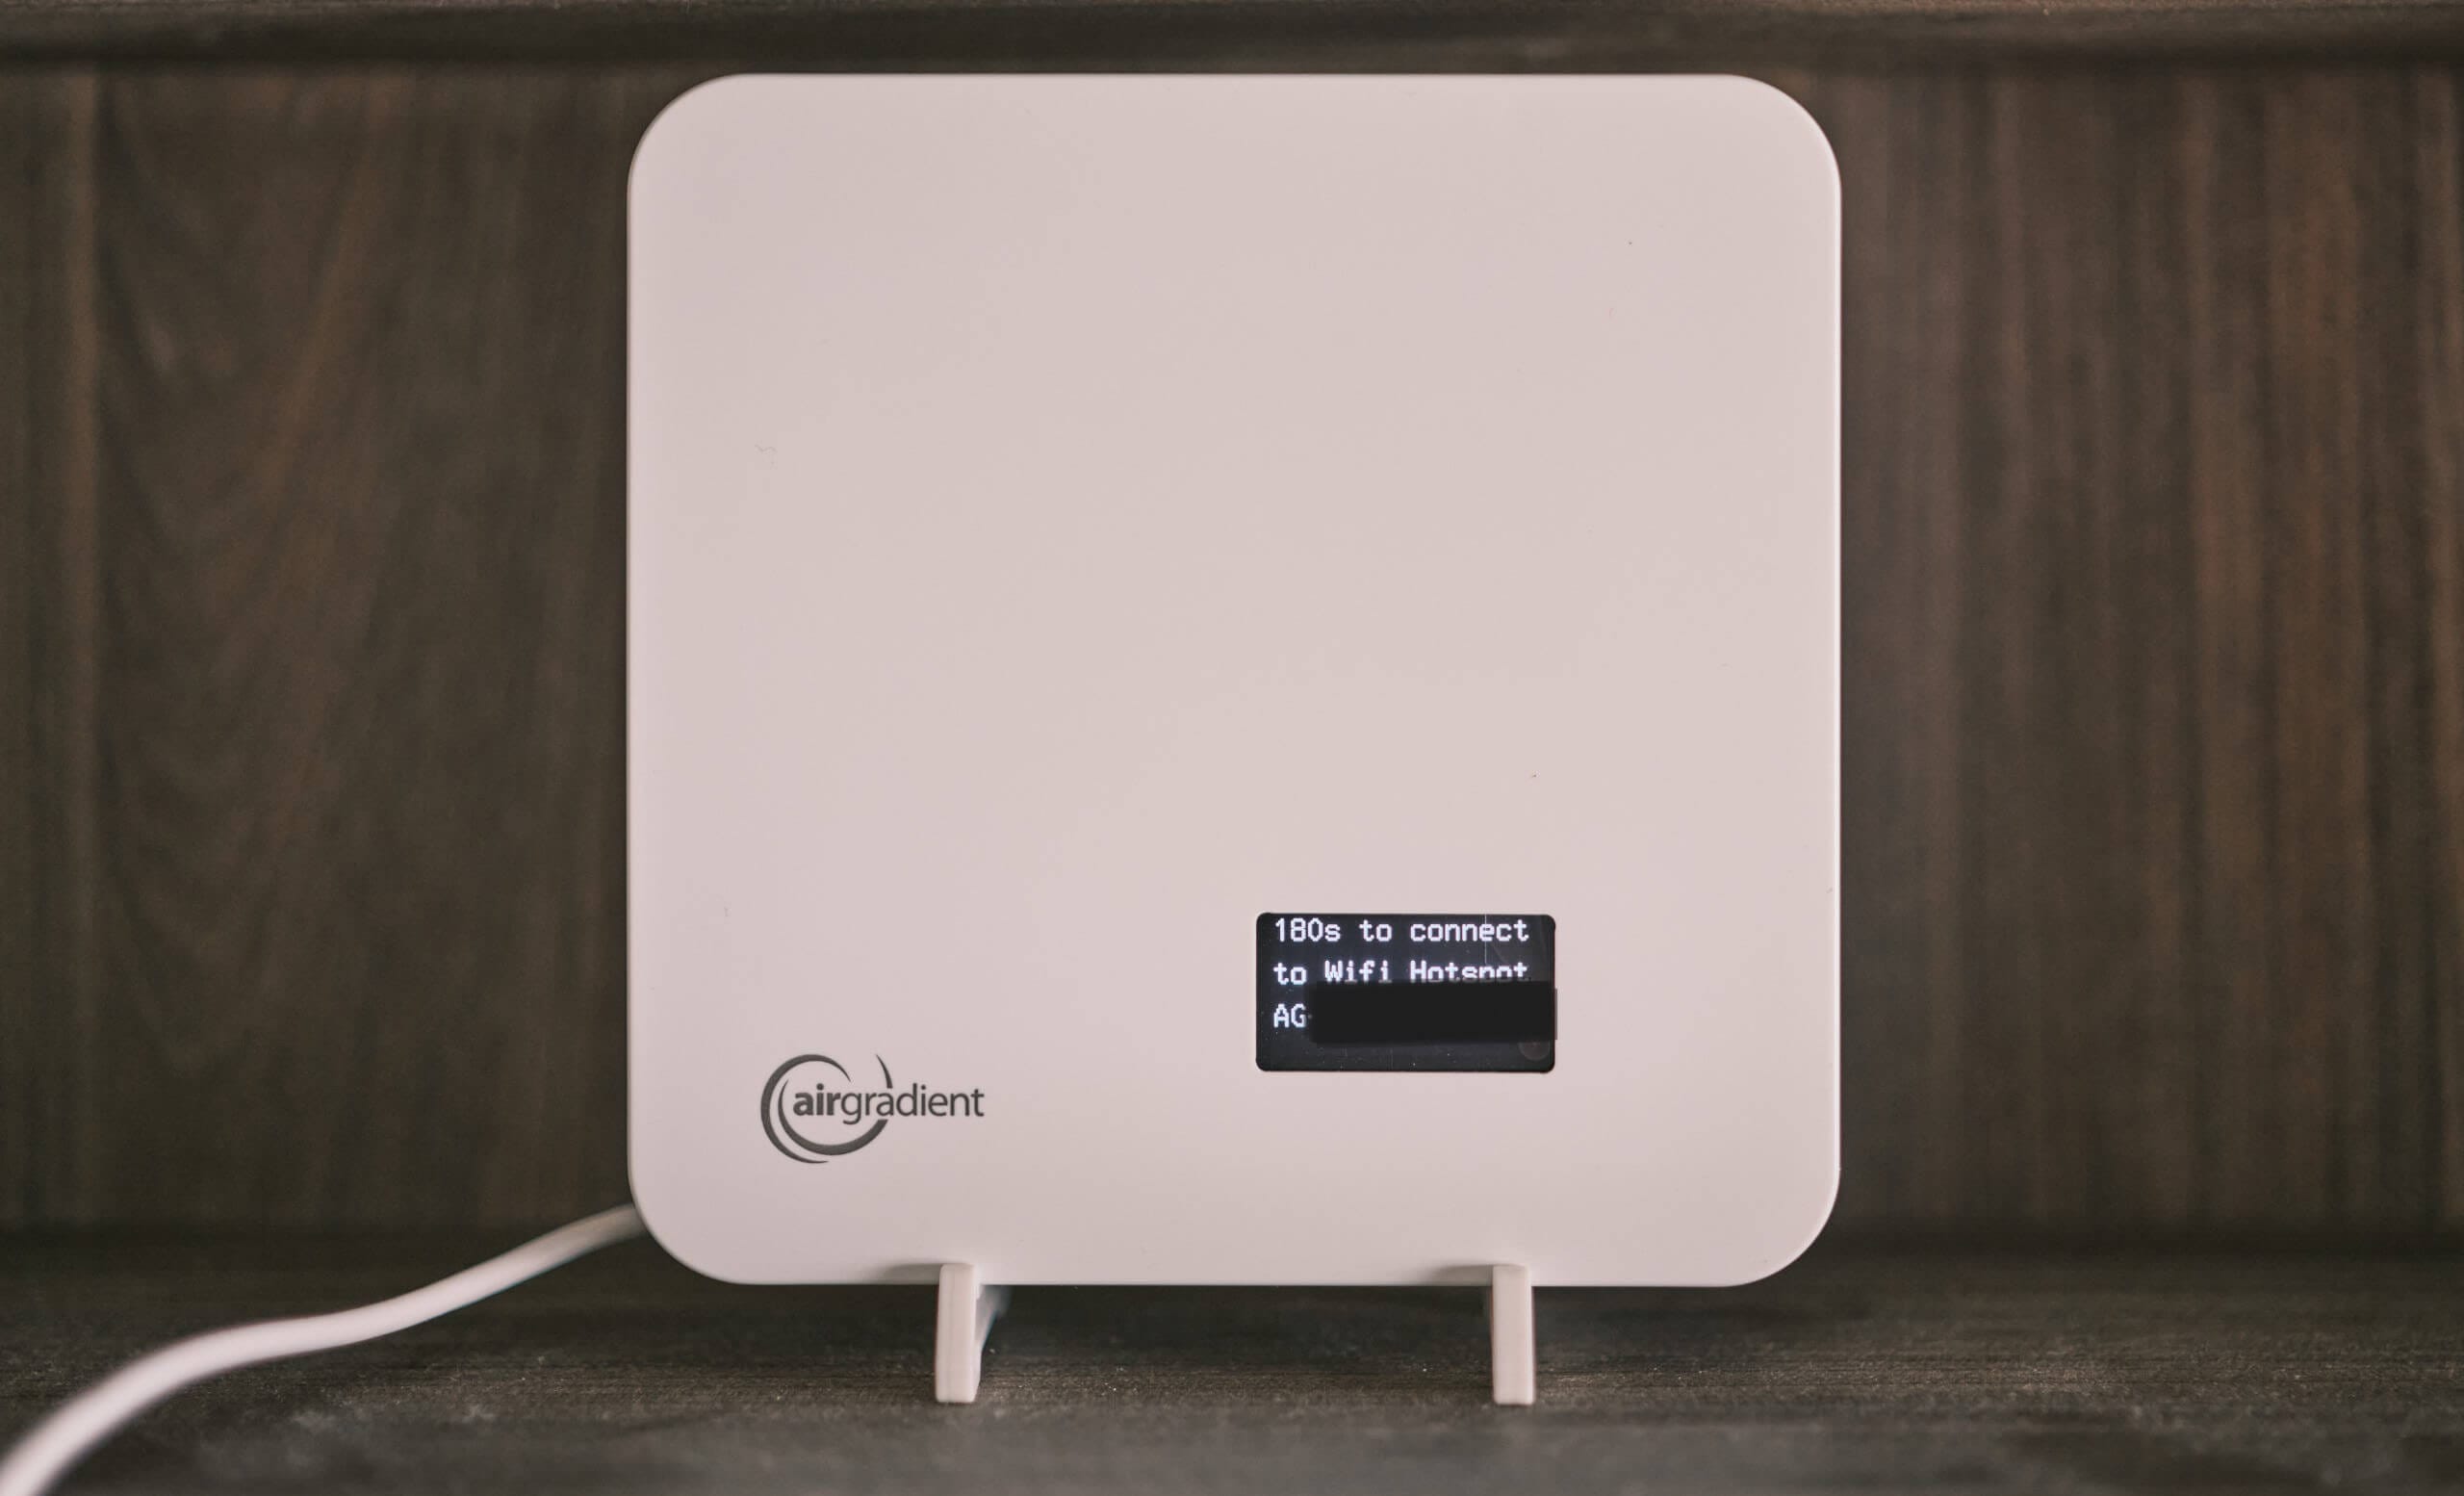
When you first power on the device, the screen will display a WiFi hotspot name that you should connect to on your phone or computer. Once connected, you will be led to a page allowing you to choose from nearby WiFi networks to connect your AirGradient ONE. From here, choose the WiFi network you want to connect to and enter the password. Rather abruptly (at least, if you are on a smartphone), the window will disappear – but rest assured, this means the device is now connected to WiFi.
Since the cloud dashboard is accessible from anywhere via a URL, there is no need to have the device on the same WiFi network as your other devices or AirGradient monitors you might have around your house. I love this feature, as sometimes I want to check my home air quality, even when out and about. Furthermore, cloud accessibility means you can remotely request a calibration of the CO2 sensor when the house is empty.
It is also worth noting that the dashboard used for the AirGradient ONE is the same dashboard used for other AirGradient devices, such as the Open Air (and outdoor air quality monitor), and you can even add some monitors from IQAir, AirThings, Atmo, and other brands here. While I haven’t experimented with this functionality, seeing such an inclusive dashboard is nice.
When you first log in, you will need to make an account as, once again, this dashboard is accessible online and isn’t just locally available. While I am usually against making accounts (I would prefer to keep my email secret), it makes perfect sense in this case, and the platform doesn’t ask for any further information.
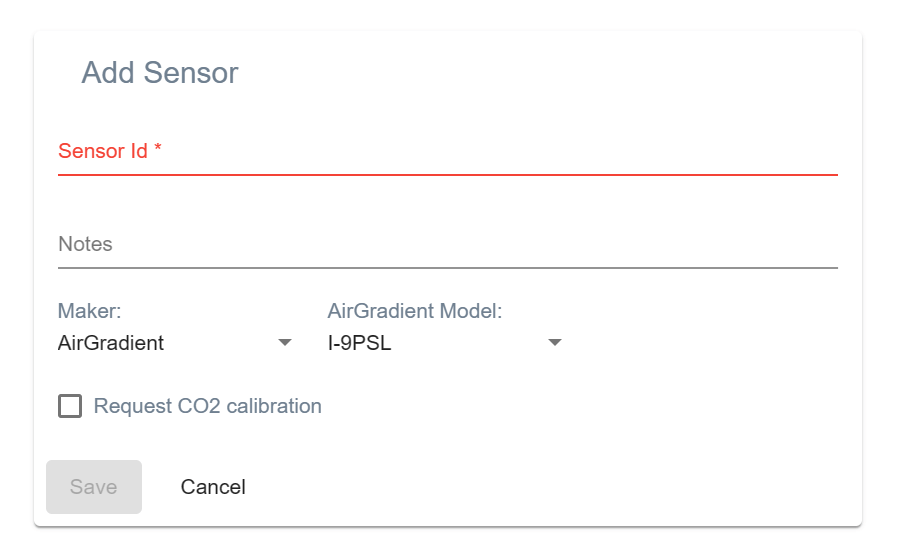
Once logged in, navigate to the hardware screen and click ‘Add New’. The above menu will open, and you’ll want to select ‘AirGradient’ and ‘I-9PSL’ and enter the sensor ID (this is the name of the hotspot minus ‘AG’). Once added, you should begin to see data. If you don’t, give the device some time, as I did notice on a few occasions that it would take a while to start recording and uploading data.
We can go to the main dashboard now that we’ve added our device. From here, you can view all data from the device, and there’s even a large level of customisation, meaning you can toggle which pollutants you see (or don’t). The level of customisation on this dashboard is fantastic, and if you need anything further, you can easily export the data to a CSV file.
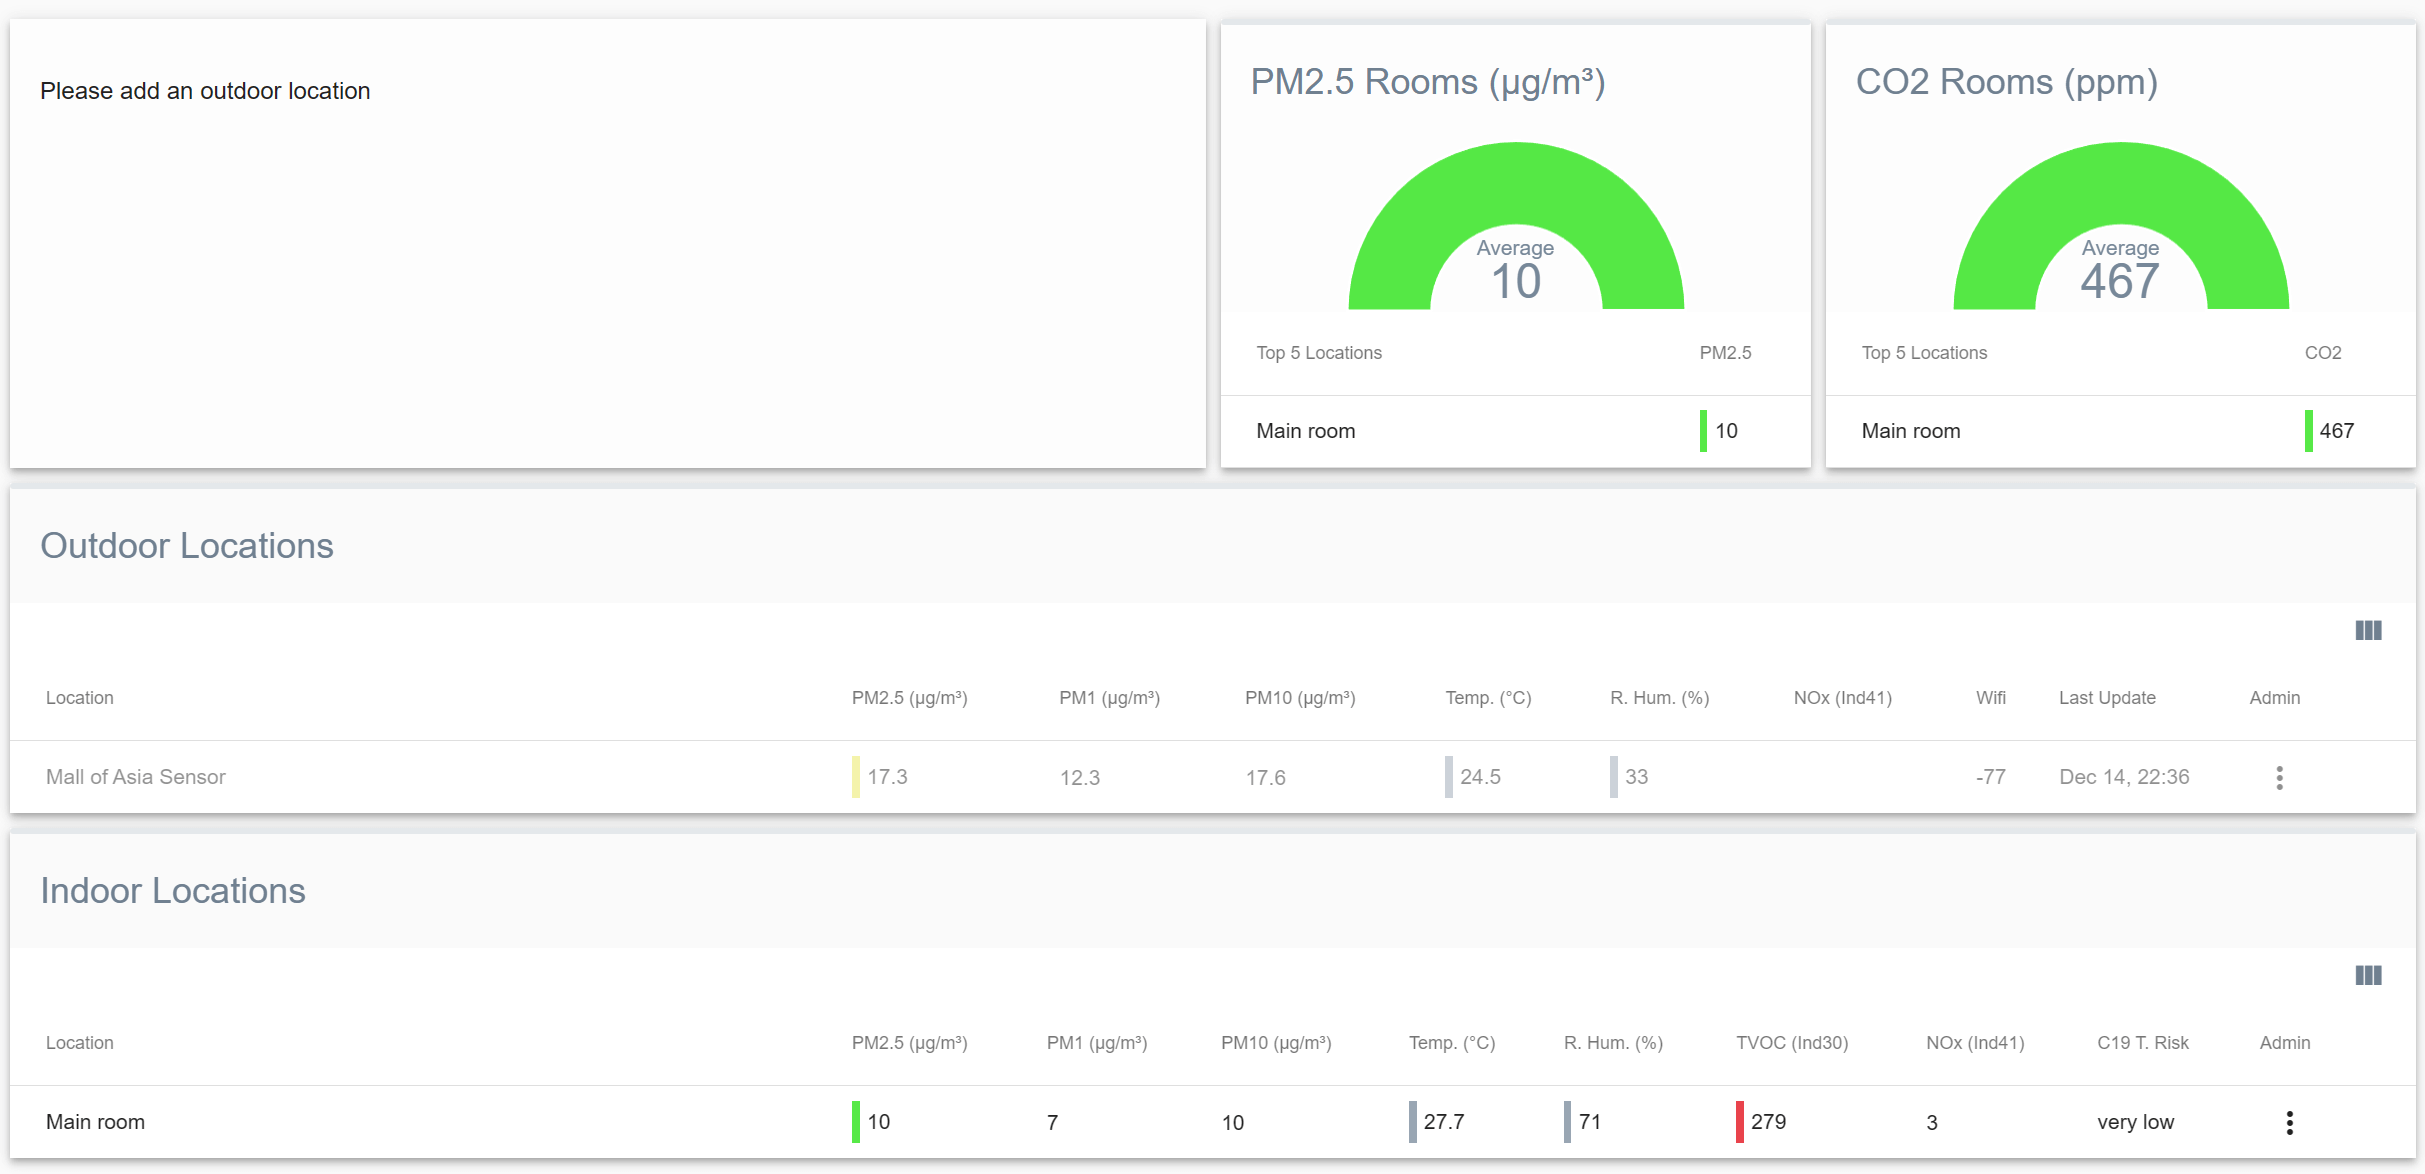
In the above image, I also have an outdoor sensor which wasn’t powered at the time of the screenshot. However, you can see how well this dashboard presents data if you have both an indoor and outdoor monitor connected.
The platform also has many more options that you can customise if you want. For example, if you have a monitor in a public space (for example, if you own a cafe and want users to see the air quality), you can connect a display through the dashboard to show current air quality levels. On top of this, you can even set business hours and more! There is a lot of potential here, and while this monitor excels in houses, it’s also an excellent choice for businesses and offices.
For home use, however, you will likely only find yourself changing the alarm and LED settings (which can be tied to either PM2.5 or CO2 and the thresholds can be customised for each). Overall, this dashboard has a lot to like, and if you’re comfortable getting into the nitty-gritty, you can even connect your AirGradient ONE to smart home platforms such as HomeKit.
Pricing & Lifespan
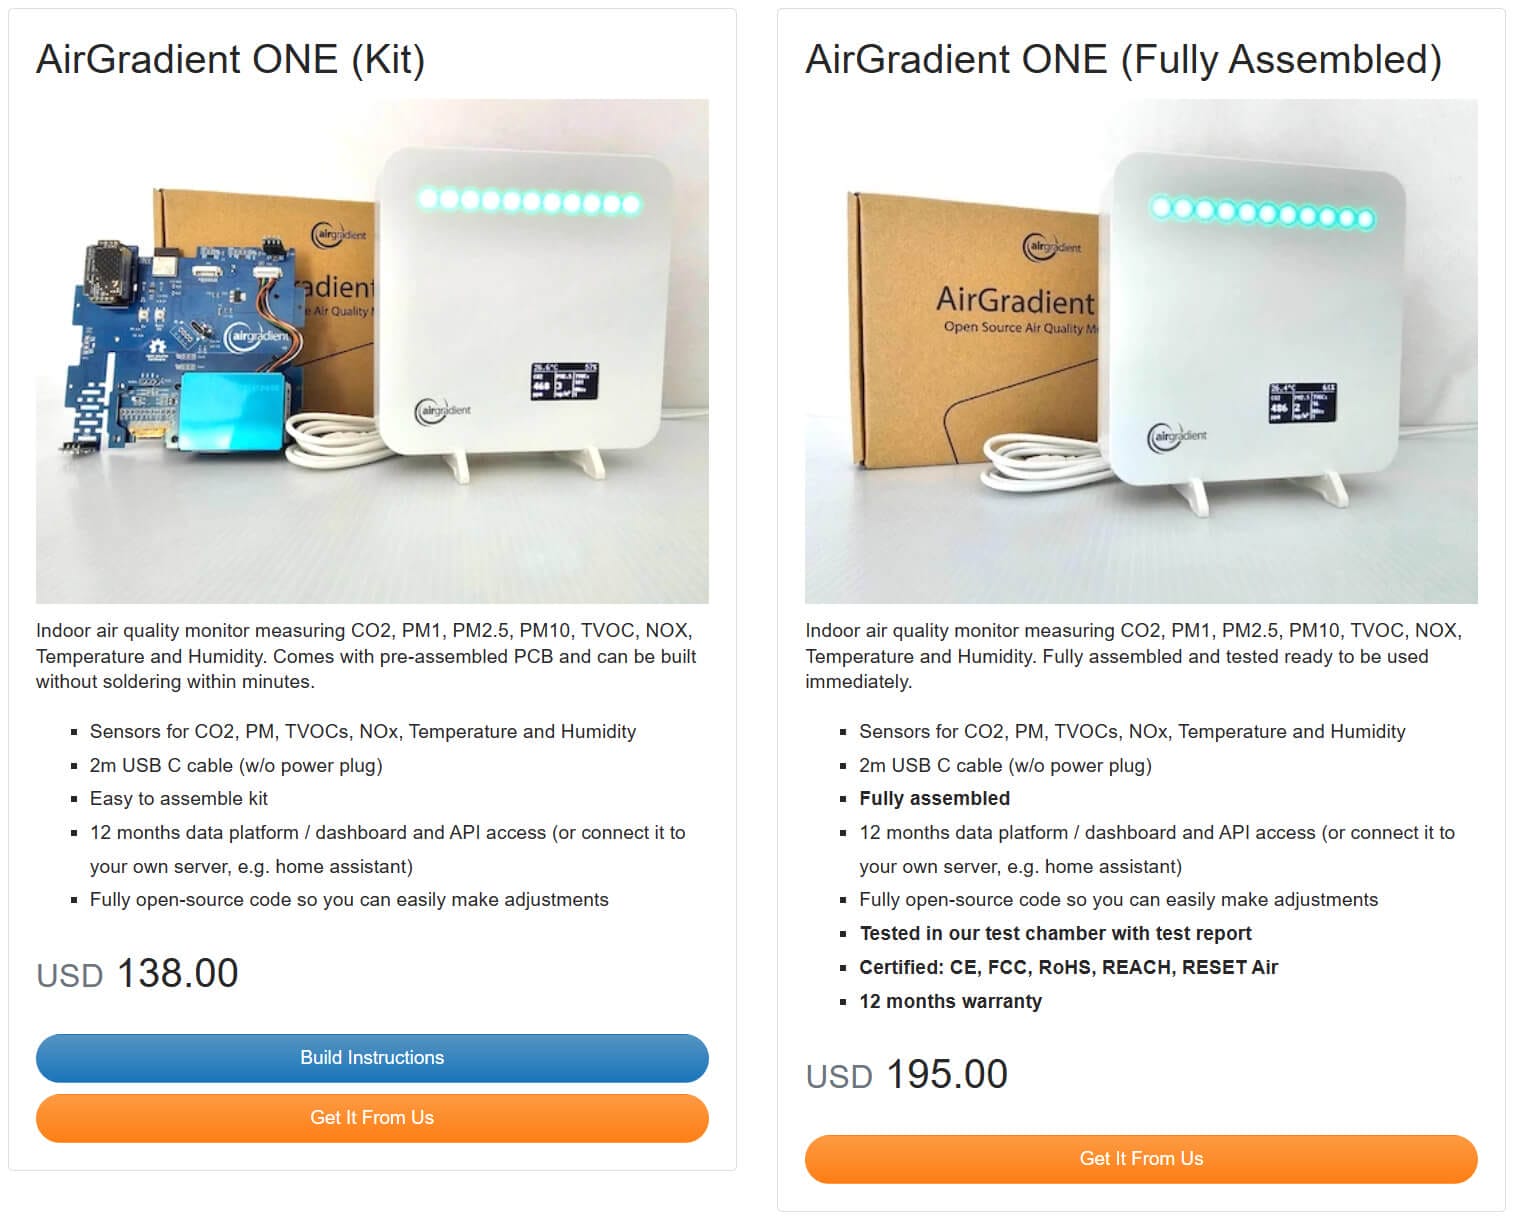
At the time of writing, the AirGradient ONE sells for either $138 or $195 (USD), depending on the kit you opt for. If you don’t mind assembling the device, you will save around $60 over buying the fully assembled kit. Since assembly is super easy and requires nothing more than the included screwdriver and 10 minutes of your time, I recommend going for the DIY kit if price is your top concern.
Of course, if you purchase the assembled kit, you will not only get a monitor that is ready to monitor your air, but you will also get a monitor with a range of certifications which the DIY monitor won’t have (at least, officially – at the end of the day, it’s the same monitor, but certifications can only be given to a full-assembled and final product). This monitor will also come with a 12-month warranty, but I question if this is worth $60. At the end of the day, since you can replace any component in the AirGradient ONE yourself, fixing any potential issues will likely be affordable anyway.
On that note, the AirGradient ONE also has an exceptional expected lifespan. Since components can be replaced when needed (and most of them are easy to source, whether from AirGradient or otherwise), and since many of the components have long lifespans anyway (such as the S8 CO2 sensor, which has an expected lifespan of 15 years), you should not need to replace your AirGradient ONE for a very long time to come.
But how does the pricing compare to the competition? Honestly, very favourably. While the assembled AirGradient ONE is more directly comparable to other indoor air quality monitors, I am going to compare the pricing of the DIY kit as I believe this is what most customers should purchase, and it’s a fantastic deal.
| Monitor Name | Pollutants Monitored | Price |
|---|---|---|
| AirGradient ONE | CO2, PM1.0, PM2.5, PM10, NOx, VOCs, RH and temperature | $138 |
| IQAir AirVisual Pro | CO2, PM2.5, RH and temperature | $369 |
| AWAIR Element | CO2, PM2.5, VOCs, RH and temperature | $209 |
| uHoo Air Quality Monitor | CO2, CO, PM2.5, NO2, Ozone, VOCs, RH, atmospheric pressure and temperature | $299 |
These are just a few comparisons of many I could’ve made. However, this pricing difference highlights just how affordable the AirGradient ONE is. Of course, some of these devices have advantages that might make you prefer them – for example, the AirVisual Pro has a large display, and all other monitors have accompanying apps. However, regarding the sensors housed within and their accuracy, the AirGradient ONE punches far above its price range suggests.
On top of that, it’s important to recognise that the AirGradient ONE also comes with its list of advantages. Looking to integrate a monitor into your smart home? The AirGradient ONE is the perfect choice. Want to be able to access data on your air quality monitor from anywhere, or want to use the same dashboard to view data from air quality monitors from different brands? The AirGradient ONE is the perfect choice.
At the end of the day, it’s up to you and what your priorities are. However, there’s no denying that the AirGradient ONE offers features and accuracy far beyond what you would expect at this price – even if you purchase the more expensive, certified and lab-tested assembled monitor.
Conclusion
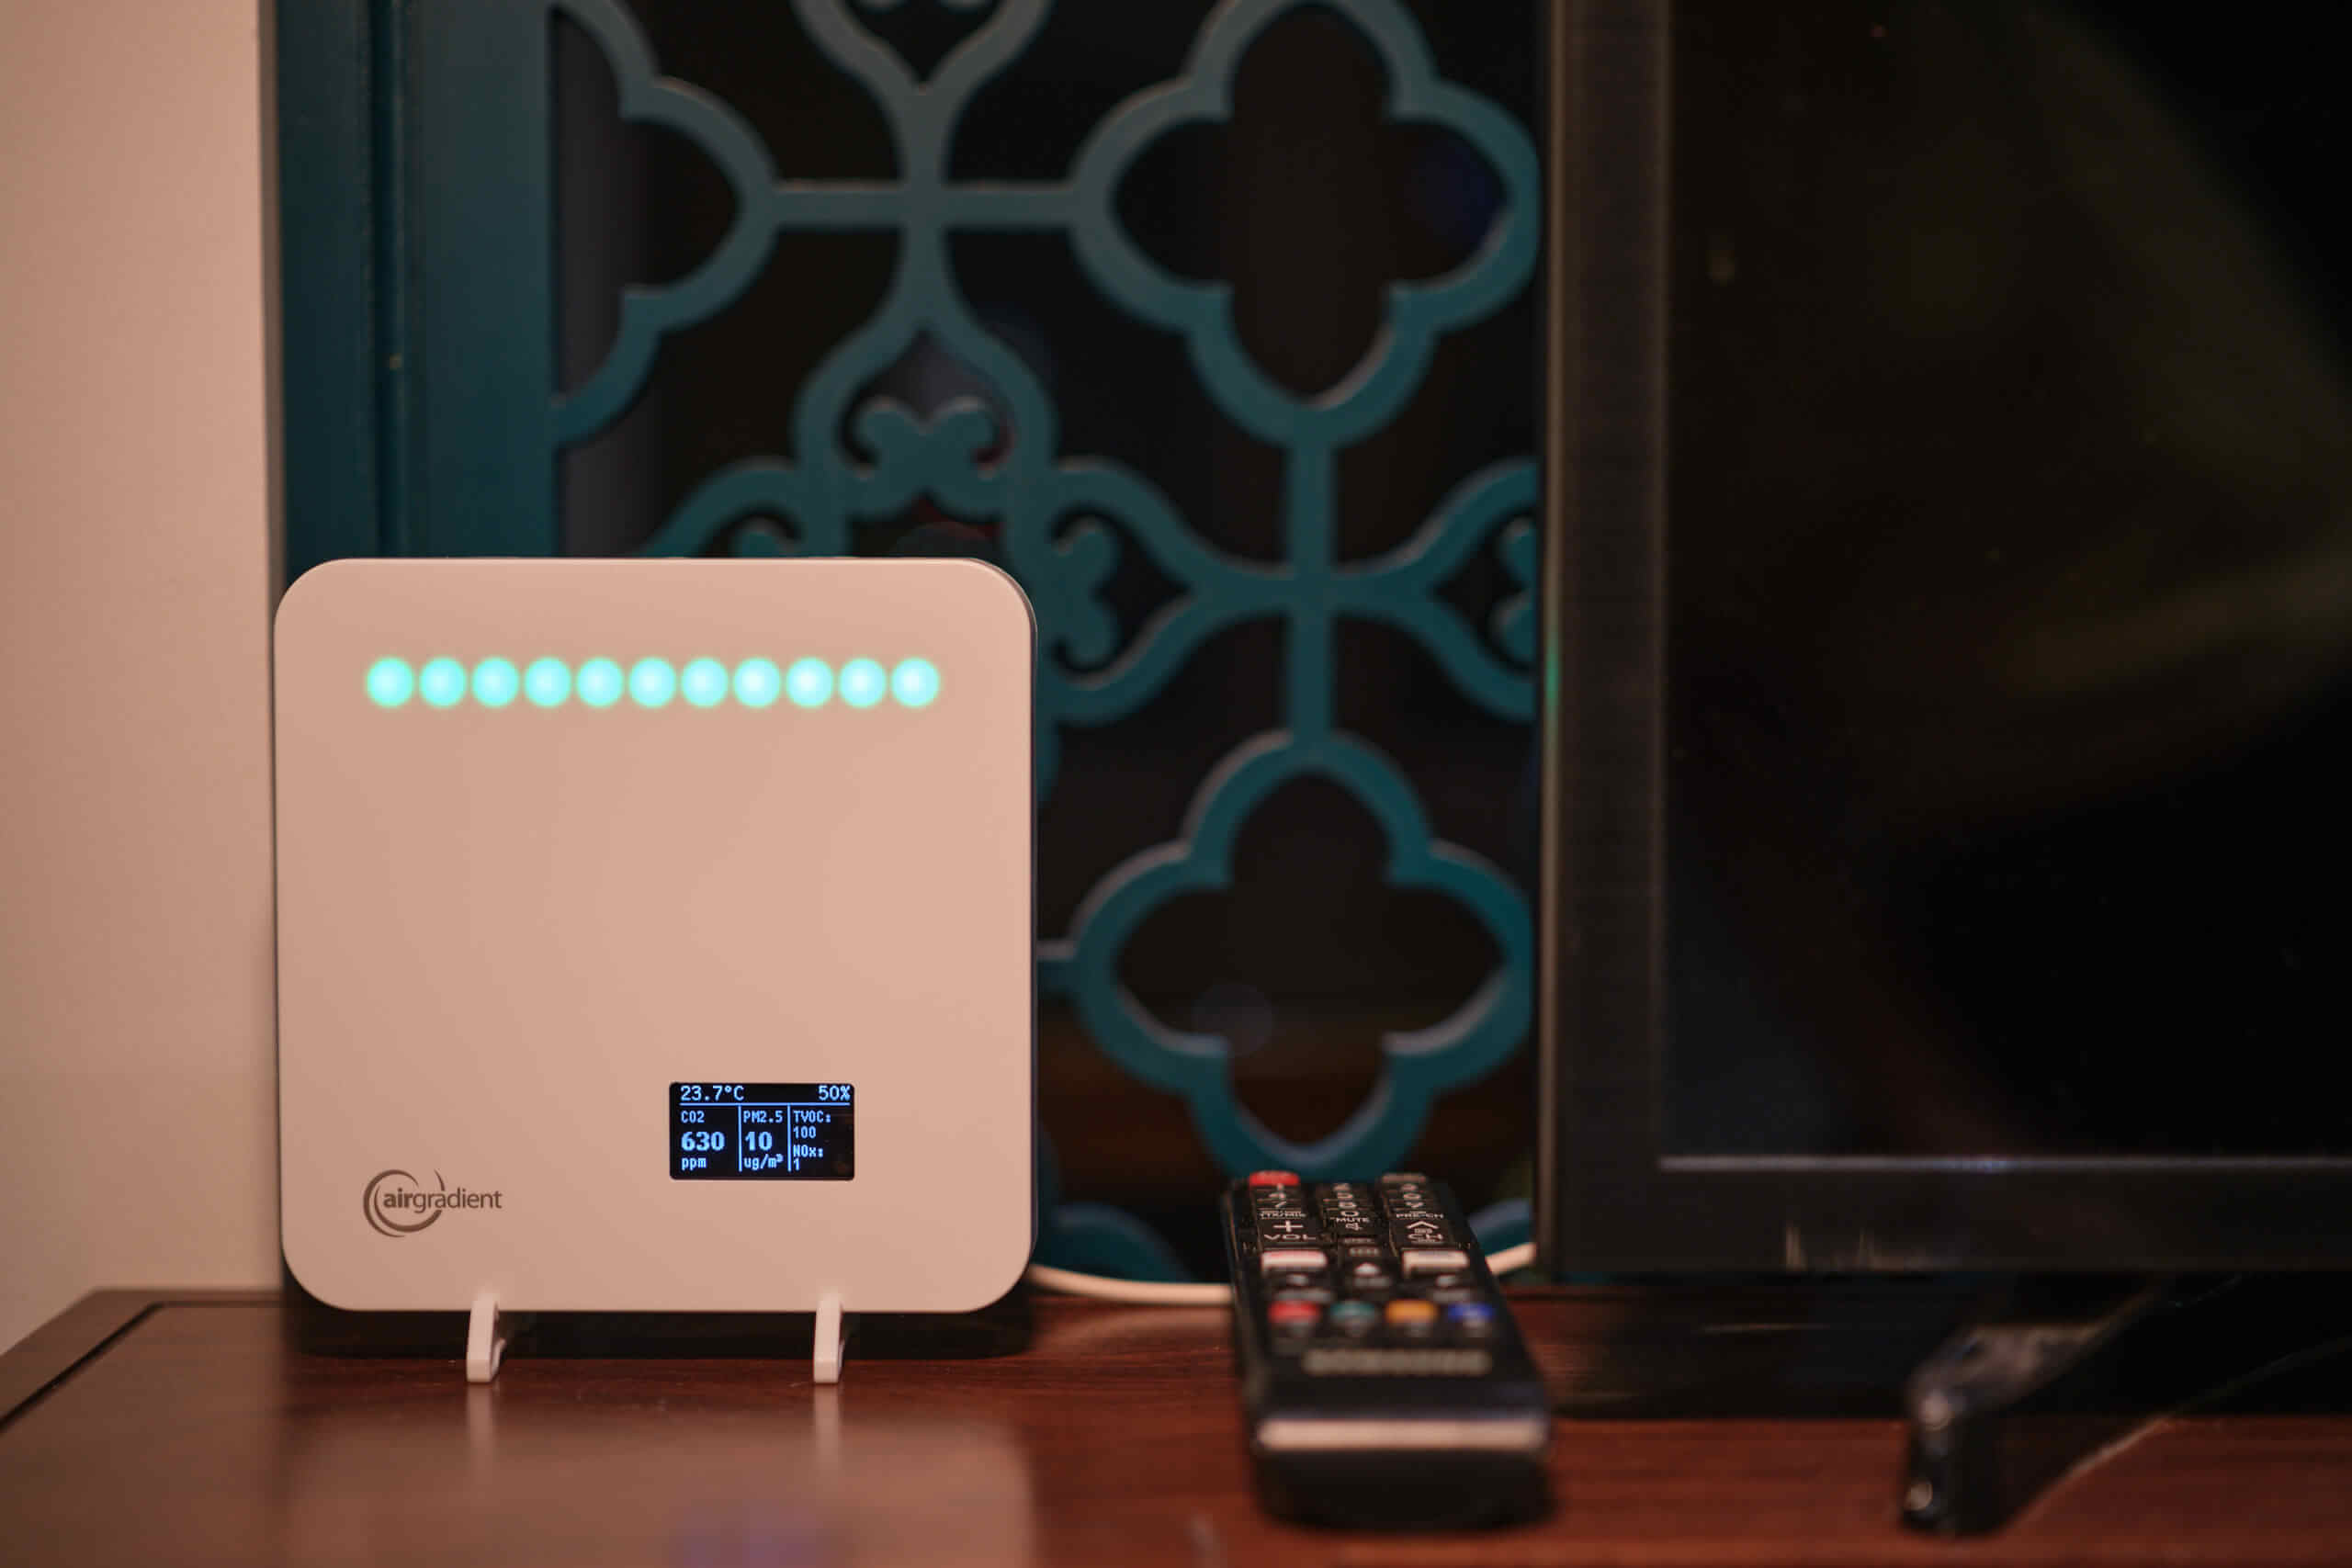
That brings us to the end of the longest single-product review on this blog so far. As may already be clear, I’ve really enjoyed using the AirGradient ONE enough that, once I settle down, I would love to purchase a few more to have in different rooms around the house.
While other air quality monitors do better in certain areas – for example, the uHoo air quality monitor has more sensors, and the Qingping Air Monitor has a nicer display and interface, the AirGradient ONE is a complete package at an affordable price. You’re getting best-in-class sensors with leading accuracy, a cloud dashboard that can be accessed anywhere, and open-source software and user-replaceable hardware, letting you tinker with this device to your heart’s content.
If you’re worried about getting the DIY kit due to it seeming complicated, don’t worry. The kit is exceptionally easy to assemble, and since no soldering is required, this is one of the simplest electronics projects I’ve ever completed. Since you only need ten or so minutes to assemble the device, the DIY option is a great way to save money.
Suppose you want to set up both indoor and outdoor air quality monitors. In that case, the AirGradient ONE is the perfect companion to the AirGradient Open Air (the company’s outdoor air quality monitor), as both of these monitors use the same platform and therefore, your data from both monitors (or multiple of each) can be accessed in the same place.
If you still have questions regarding the AirGradient ONE or have purchased one and want to share your thoughts, I would love to hear from you in the comments below. Would you recommend the device to other users?
AirGradient ONE FAQ
Should I Purchase the DIY Kit or Buy the Monitor Fully Assembled?
The DIY kit is $60 cheaper and easy to assemble, so I recommend this for most users. However, if you want a certified device with a 12-month warranty, you must purchase the fully assembled kit.
Does the AirGradient ONE Have Connectivity?
Yes. The AirGradient ONE uses WiFi to connect to the AirGradient dashboard or your smart home network of choice.
What Alternatives Are There to the AirGradient ONE?
For the price of the DIY AirGradient ONE, there aren’t many. However, for around $200, there are some alternatives from brands like AWAIR.
Can I Replace the Components in the AirGradient ONE?
Yes! Everything can be replaced individually.
Is the AirGradient ONE Accurate?
Yes. The PM and CO2 sensors have been proven accurate by third-party testing, and the other two sensors (VOC and NOx and temperature and relative humidity) are accurate as per their spec sheets.
What Does the AirGradient ONE Monitor?
The AirGradient ONE monitors PM1.0, PM2.5, PM10, tVOCs, NOx, CO2, temperature and relative humidity.
Have Questions or Comments?
Join the discussion on the BreatheSafeAir Community Forum. Ask any questions you have about air quality or adjacent topics and get quick answers!
AirGradient ONE
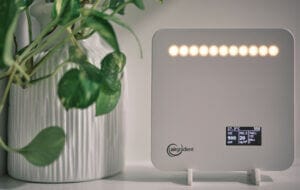
The AirGradient ONE is an open-source, DIY air quality monitor that has user-replaceable parts - all at a very affordable price.
Product Brand: AirGradient
5
Pros
- DIY or fully assembled kits
- Affordable
- Accurate and high-quality sensors
- Minimalist design
- WiFi connectivity
- User-replaceable components
- Open source
Cons
- Requires programming knowledge to unlock the full potential of the device
- Shipping and important taxes can be expensive